4 Essentials for Starting a Food Photography Business
Launch a thriving food photography business with these 4 essentials: skills, portfolio, business setup, and marketing strategies.
The food photography industry is booming, driven by the rise of social media, e-commerce, and the growing demand for visually appealing content in restaurants, food brands, and publications. Turning your passion for capturing mouthwatering dishes into a profitable business requires more than just a camera and a love for food. It demands a blend of creative expertise, strategic business planning, effective marketing, and a commitment to continuous improvement. This comprehensive guide outlines the four essential pillars to launching and sustaining a successful food photography business: building a strong foundation, establishing business essentials, mastering marketing and client acquisition, and committing to ongoing growth. With practical steps, actionable insights, and industry-specific advice, this article will help you navigate the exciting yet challenging world of food photography entrepreneurship.
1. Build a Strong Foundation
The cornerstone of a successful food photography business lies in your ability to create stunning images that tell a story. This requires honing your photography skills, crafting a professional portfolio, and identifying your niche to stand out in a competitive market.
Develop Exceptional Photography Skills
Food photography is a specialized craft that blends technical proficiency with artistic vision. Mastering the following elements is critical:
- Lighting: Lighting is the backbone of food photography. Experiment with natural light for soft, organic looks and artificial light for controlled, dramatic effects. Learn to use diffusers, reflectors, and bounce cards to manipulate light and enhance texture. For example, soft light works well for fresh salads, while dramatic side lighting can highlight the texture of a sizzling steak.
- Composition: Strong composition guides the viewer’s eye and makes dishes pop. Study the rule of thirds, leading lines, and negative space to create balanced, visually appealing images. Experiment with angles—overhead shots for flatlays or 45-degree angles for plated dishes—to find what suits your style.
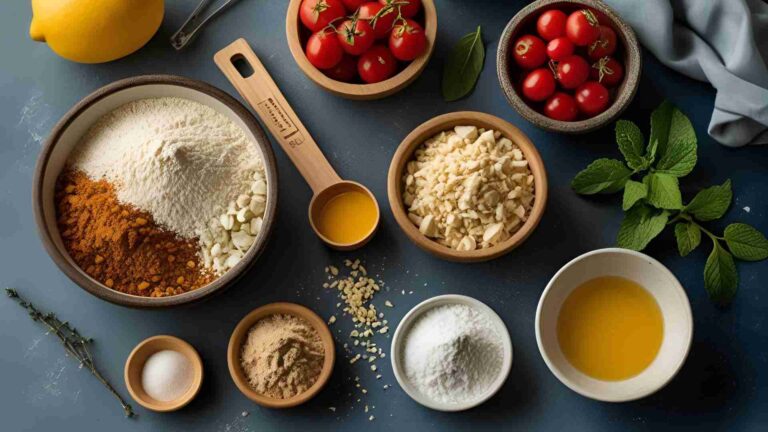
- Food Styling: The art of food styling transforms a dish into a visual masterpiece. Learn to arrange ingredients, use garnishes, and select props that complement the food without overwhelming it. For instance, a rustic wooden table can enhance a homemade pie, while sleek, modern plates suit high-end cuisine.
To build these skills, practice consistently. Set up mock shoots with everyday ingredients, experiment with different setups, and analyze your results. Online courses, workshops, and YouTube tutorials from experts like Joanie Simon of The Bite Shot can accelerate your learning.
Create a Professional Portfolio
Your portfolio is your visual resume, showcasing your skills and style to potential clients. A well-curated portfolio should:
- Highlight your best work (10-15 high-quality images).
- Reflect your unique style, whether it’s moody, vibrant, or minimalist.
- Include a variety of subjects, such as plated dishes, beverages, or product packaging, to demonstrate versatility.
- Be accessible online via a website or platforms like Instagram and Behance.
Start by shooting personal projects to build your portfolio. Collaborate with local chefs or food bloggers to create content in exchange for portfolio pieces. Ensure your images are high-resolution and professionally edited using tools like Adobe Lightroom or Capture One.
Identify Your Niche
The food photography market is diverse, with opportunities in restaurant photography, editorial shoots, product packaging, and recipe development. Identifying your niche helps you focus your skills and marketing efforts. Consider:
- Restaurant Photography: Capturing menus or ambiance for local eateries.
- Product Photography: Shooting for food brands, such as sauces or snacks.
- Editorial Photography: Creating images for magazines or cookbooks.
- Recipe Photography: Partnering with bloggers or brands for step-by-step visuals.
Your niche should align with your strengths and interests. For example, if you excel at vibrant, colorful compositions, target brands with bold aesthetics. Research competitors in your niche to understand market demands and carve out your unique value proposition.
Table 1: Common Food Photography Niches
| Niche | Target Clients | Key Skills Needed |
|---|---|---|
| Restaurant | Restaurants, cafes | Ambiance, plated dishes, fast-paced |
| Product | Food brands, packaging companies | Studio lighting, precision styling |
| Editorial | Magazines, cookbooks | Storytelling, creative composition |
| Recipe | Bloggers, recipe websites | Step-by-step visuals, food styling |
2. Establish Business Essentials
A food photography business is as much about entrepreneurship as it is about creativity. Setting up a solid business foundation ensures legal compliance, financial stability, and professional credibility.
Choose a Business Structure
Selecting the right business structure impacts your taxes, liability, and operations. Common options include:
- Sole Proprietorship: Simple to set up, but offers no personal liability protection.
- Limited Liability Company (LLC): Protects personal assets and provides tax flexibility.
- Corporation: Suitable for larger businesses with employees, but more complex to manage.
Consult a legal professional to choose the structure that suits your goals. For most food photographers starting out, an LLC offers a balance of simplicity and protection.
Register Your Business
Registering your business makes it a recognized legal entity. In the U.S., this involves obtaining an Employer Identification Number (EIN) from the IRS, which is essential for tax purposes and opening a business bank account. An EIN also protects your privacy by allowing you to use it instead of your Social Security Number on client forms like the W-9.
Registration requirements vary by location:
- United States: Register with your state and obtain an EIN via the IRS website.
- Canada: Register with the Canada Revenue Agency for a business number.
- Australia: Apply for an Australian Business Number (ABN) through the Australian Business Register.
- United Kingdom: Register as self-employed with HM Revenue & Customs or set up a limited company.
Your bank can guide you through the process, as they often require an EIN or equivalent to open a business account.
Set Up a Business Bank Account
A dedicated business bank account separates personal and business finances, simplifying bookkeeping and tax reporting. Benefits include:
- Professionalism: Signals to clients that you take your business seriously.
- Financial Clarity: Tracks income and expenses, helping you monitor profitability.
- Tax Preparedness: Allows you to set aside funds for taxes, avoiding penalties.
Research banks for low-fee accounts or those offering small business perks. Automatically transfer a percentage (e.g., 20-30%) of each client payment to a savings account for taxes, as recommended by tax professionals.
Secure Business Insurance
Insurance protects your business from unexpected setbacks, such as equipment theft or client lawsuits. Key policies include:
- Equipment Insurance: Covers cameras, lenses, and lighting gear. For example, replacing a $2,000 camera and $1,500 lens can be costly without coverage.
- General Liability Insurance: Protects against claims of property damage or injury during shoots.
- Professional Liability Insurance: Covers errors or omissions in your work.
Professional organizations like the Professional Photographers of America (PPA) offer tailored insurance plans. Regularly update your policy to reflect new equipment or business changes.
Develop a Pricing Strategy
Pricing your services correctly ensures profitability while remaining competitive. Consider:
- Costs: Calculate expenses like equipment, props, software, insurance, and travel.
- Market Rates: Research local and industry standards. For example, restaurant shoots may range from $500-$2,000, while product photography can command $100-$500 per image.
- Value-Based Pricing: Charge based on the value you deliver, such as increased sales for a client’s brand.
Table 2: Sample Pricing Structure
| Service | Price Range (USD) | Notes |
|---|---|---|
| Restaurant Shoot | $500-$2,000 | Includes 10-20 images |
| Product Photography | $100-$500 per image | Varies by complexity |
| Editorial Shoot | $1,000-$5,000 | Includes styling and retouching |
| Recipe Photography | $50-$200 per image | Often bundled for bloggers |
Create Contracts
Legally sound contracts protect you and your clients by outlining expectations, deliverables, and payment terms. Include:
- Scope of work (e.g., number of images, usage rights).
- Payment terms (e.g., 50% deposit, balance upon delivery).
- Cancellation and reshoot policies.
- Copyright and licensing agreements.
Use templates from legal resources like TheLawTog or consult an attorney to customize contracts.
Build a Website
A professional website showcases your portfolio, services, and contact information. Use platforms like Squarespace or Wix for user-friendly design. Include:
- A gallery of your best work.
- Client testimonials.
- A clear “Contact” page.
- SEO-optimized content with keywords like “food photography” and “food stylist.”
Chart: Food Photography Business Setup Process

3. Master Marketing and Client Acquisition
Marketing is the engine that drives client acquisition. By targeting the right audience, networking strategically, and leveraging digital platforms, you can build a steady stream of clients.
Target Your Ideal Clients
Identify clients whose needs align with your niche. For example:
- Restaurants: Local eateries needing menu or social media content.
- Food Brands: Companies launching new products or rebranding.
- Publications: Food magazines or blogs seeking editorial images.
Research their brand values, target audience, and visual style to tailor your pitches.
Network Effectively
Networking builds relationships and opens doors. Strategies include:
- Events: Attend food festivals, trade shows, or industry meetups to connect with chefs, marketers, and editors.
- Online Communities: Join groups on platforms like LinkedIn or Facebook for food industry professionals.
- Collaborations: Partner with local businesses for portfolio-building shoots in exchange for exposure.
Craft Compelling Pitches
A strong pitch communicates your value and expertise. Develop:
- Elevator Pitch: A 30-second summary of your services, e.g., “I’m a food photographer specializing in vibrant restaurant imagery that drives customer engagement.”
- Cold Email Templates: Personalize emails with client-specific details, showcasing how your work aligns with their brand.
Utilize Social Media
Platforms like Instagram and Pinterest are visual goldmines for food photographers. Tips for success:
- Post consistently (e.g., 3-5 times per week).
- Use hashtags like #foodphotography, #foodstyling, and #foodie.
- Engage with followers and potential clients through comments and stories.
- Share behind-the-scenes content to humanize your brand.
Deliver Exceptional Value
Exceed client expectations to build loyalty and referrals. Offer:
- Mood boards to align creative visions.
- Shot lists to ensure all required images are captured.
- High-quality deliverables via platforms like Pixieset for a professional experience.
4. Commit to Continuous Improvement
The food photography industry evolves rapidly, with trends like minimalist plating or bold, colorful aesthetics shaping client demands. Staying competitive requires ongoing learning and investment.
Stay Updated on Trends
Follow industry leaders on social media, read food photography blogs, and subscribe to magazines like Saveur or Bon Appétit. Experiment with trending styles, such as:
- Dark, moody photography for premium brands.
- Bright, airy images for health-focused products.
- Storytelling through environmental portraits of food.
Seek Constructive Feedback
Feedback sharpens your skills. Share your work with mentors, peers, or clients and ask for specific critiques. Join photography communities like Photo Critique on Reddit or local camera clubs for insights.
Invest in Your Business
Upgrade your equipment as your budget allows. Essential gear includes:
- Camera: A DSLR or mirrorless camera (e.g., Canon EOS R5, $3,000-$3,500).
- Lenses: A 50mm or 100mm macro lens for sharp details ($500-$1,500).
- Lighting: Softboxes or LED panels for studio work ($200-$1,000).
- Props: Plates, linens, and backgrounds ($50-$500).
Table 3: Essential Food Photography Equipment
| Item | Price Range (USD) | Purpose |
|---|---|---|
| DSLR/Mirrorless | $1,500-$3,500 | High-resolution images |
| Macro Lens | $500-$1,500 | Close-up food details |
| Lighting Kit | $200-$1,000 | Controlled lighting for studio shoots |
| Props | $50-$500 | Styling and scene creation |
Also, invest in software like Adobe Lightroom ($10/month) for editing and Pixieset ($8-$40/month) for client delivery. Attend workshops or online courses to refine your skills.
Embrace Your Unique Style
Your individuality sets you apart. Experiment with unconventional angles, bold color palettes, or quirky props to develop a signature style. Clients value photographers who bring a fresh perspective, so don’t shy away from your “weirdness.” For example, using unexpected props like vintage cutlery or textured fabrics can make your work stand out.
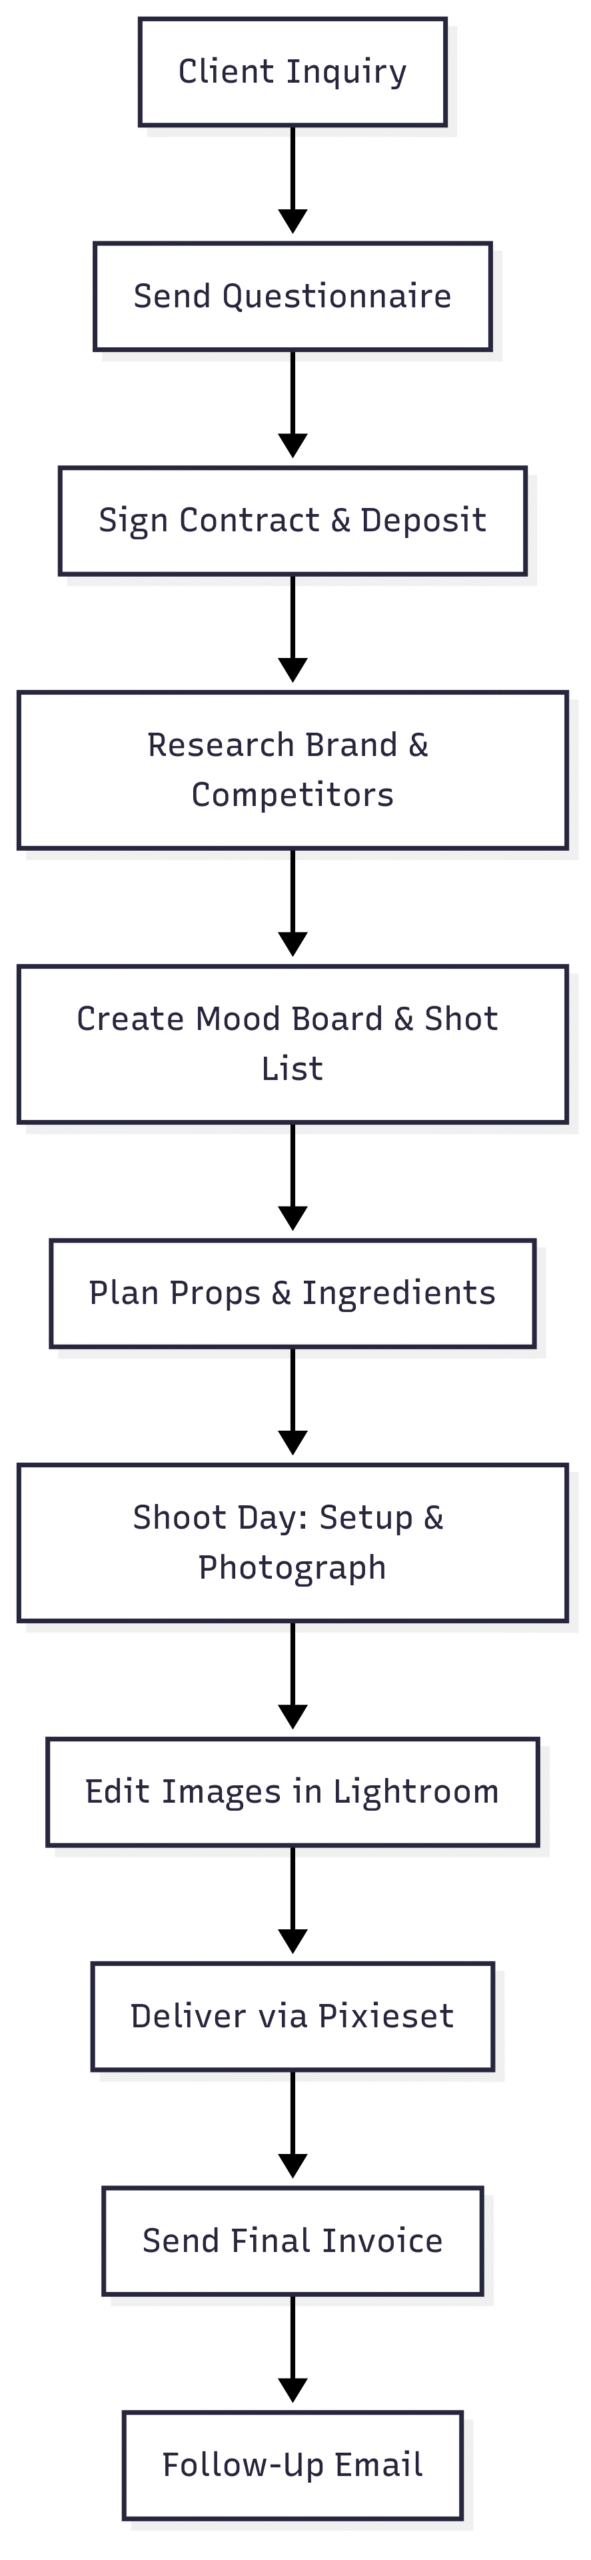
A Step-by-Step Workflow for Success
To tie these essentials together, here’s a streamlined workflow for managing food photography projects:
- Client Onboarding: Send a questionnaire to understand client needs, discuss brand values, and set expectations. Secure a 50% deposit and send a welcome guide.
- Research and Planning: Study the client’s brand and competitors. Create a mood board and shot list to align creative visions.
- Pre-Shoot Prep: Plan props, backgrounds, and ingredients. Sketch shots to visualize compositions.
- Shoot Day: Set up the scene, lighting, and camera. Use tethered shooting for real-time feedback. Style and photograph the food.
- Post-Processing: Cull and edit images in Lightroom, applying presets for efficiency. Export to Pixieset for client review.
- Delivery: Share a gallery link for client selections. Send final images and invoice upon payment.
Chart: Food Photography Workflow
Conclusion
Starting a food photography business is an exciting journey that blends creativity with entrepreneurship. By building a strong foundation in photography skills and portfolio development, establishing robust business essentials, mastering marketing and client acquisition, and committing to continuous improvement, you can create a thriving business. Embrace your unique style, stay adaptable, and deliver exceptional value to clients. With dedication and strategic planning, your food photography business can capture not just stunning images but also a loyal client
Please share these 4 Essentials for Starting a Food Photography Business with your friends and do a comment below about your feedback.
We will meet you on next article.
Until you can read, How do you guys come up with your own recipes constantly?
![30 Best Food Bio for Your Instagram [For Foodies]](https://yumtonight.com/wp-content/uploads/2025/08/Storing-Books-1080-x-1920-px-3-768x432.jpg)