5 Steps to Discover Your Unique Food Photography Style
Food photography is an art form that blends creativity, technical skill, and personal vision. In a crowded field where countless images flood social media and blogs, developing a unique style sets you apart.
Your style acts as a personal fingerprint, reflecting preferences in lighting, composition, color, and mood. This guide outlines five practical steps to uncover and refine that style, helping you create images that feel authentically yours. Whether you’re a beginner or seasoned shooter, these steps emphasize experimentation, analysis, and iteration to build consistency.
Step 1: Master Photography Fundamentals
Before diving into stylistic elements, solidify your technical foundation. Food photography demands juggling multiple roles—photographer, stylist, chef, and more—which can overwhelm if basics aren’t instinctive. Shooting in manual mode allows control over exposure, depth of field, and shutter speed, essential for capturing food’s textures, colors, and details.
Start by understanding key camera settings. Aperture (f-stop) controls depth of field: use f/2.8-f/5.6 for shallow focus on a dish’s hero element, or f/8-f/11 for sharper overall scenes. Shutter speed freezes motion, like steam rising from hot food (1/125s or faster), while ISO manages light sensitivity—keep it low (100-400) to minimize noise in controlled environments.
Natural light is a staple, but learn to modify it with diffusers or reflectors. For artificial setups, LED panels or softboxes provide consistency. Practice tethering your camera to software like Capture One for real-time adjustments.
Common pitfalls include over-relying on auto mode, which limits creative control, or ignoring white balance, leading to unnatural colors. To build proficiency, shoot daily exercises: photograph the same subject under varying lights to see how settings alter mood.
Once techniques become second nature, energy shifts to experimentation. Resources like free online tutorials or structured series can accelerate this—focus on those covering food-specific challenges, such as styling perishable items or capturing gloss on sauces.
| Camera Setting | Purpose in Food Photography | Recommended Range |
|---|---|---|
| Aperture | Controls focus depth | f/2.8 – f/11 |
| Shutter Speed | Freezes motion or allows blur | 1/60s – 1/250s |
| ISO | Manages low-light noise | 100 – 800 |
| White Balance | Ensures accurate colors | 4500K – 6500K |
This table summarizes core settings; adjust based on your gear. For instance, entry-level DSLRs like the Canon EOS Rebel T8i ($749) or mirrorless options like the Sony A6400 ($898) offer solid starting points with food-friendly features like articulating screens.
Step 2: Build an Inspiration Board
Inspiration fuels style discovery. Collect images that resonate to identify patterns in what draws you. Use digital tools like Pinterest, Instagram collections, or apps such as Bublup for organizing visuals from the web or your device. Physical boards with printed photos work too, fostering tactile analysis.
Aim for 50-100 images initially, sourcing from food blogs, magazines, or photographers like Matt Armendariz or Bea Lubas. Include diverse elements: vibrant salads, moody desserts, minimalist plating. As you curate, note recurring themes—do you gravitate toward rustic wooden backgrounds or sleek marble surfaces?
Analyze for specifics: lighting direction (side, back, or top), color saturation (high-contrast vs. muted), and prop density (cluttered vs. sparse). This board becomes a visual manifesto, guiding shoots and revealing subconscious preferences.
To enhance, categorize sub-boards: one for lighting, another for compositions. Regularly update to reflect evolving tastes. This step prevents aimless shooting, channeling inspiration into actionable insights.
For example, if dark, chiaroscuro styles appeal, gather images with deep shadows and highlights. Tools like Adobe Lightroom’s collections ($9.99/month) can integrate mood boards with editing workflows.
Here’s a simple flowchart illustrating the process of building and using your inspiration board:
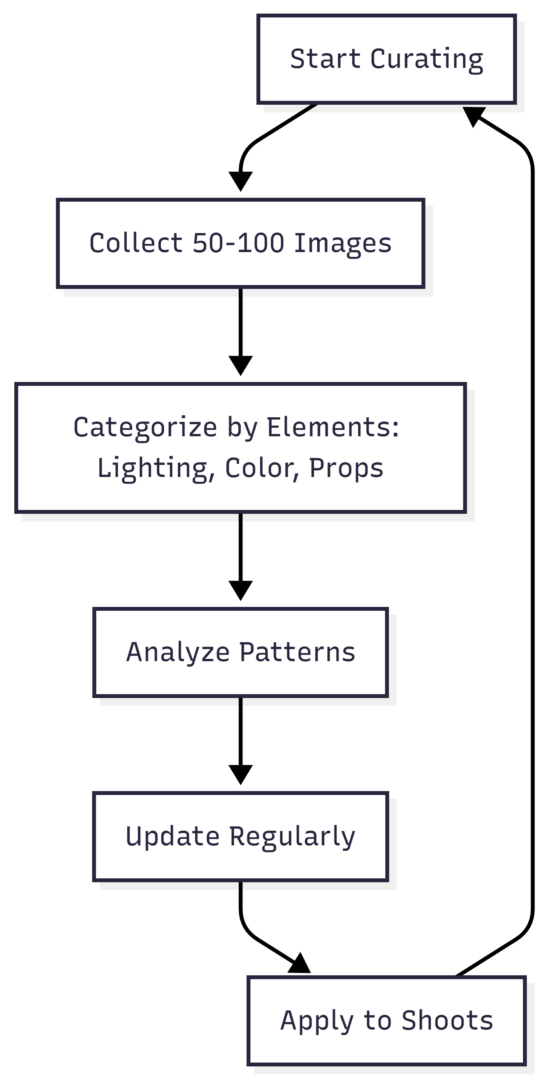
This cyclical flow ensures ongoing refinement.
Step 3: Analyze and Deconstruct Inspiring Images
With your board assembled, dissect images to pinpoint appealing elements. This “reading” process transforms passive admiration into active learning. For each photo, ask targeted questions:
- Angle: Overhead (90°) for graphic symmetry, 45° for depth and intimacy, or straight-on for storytelling.
- Depth of field: Shallow to isolate subjects or deep for contextual scenes.
- Lighting: Diffused natural for soft glows, harsh side-lighting for drama.
- Shadows: Harsh for contrast or soft for subtlety.
- Brightness: High-key (bright, airy) vs. low-key (dark, moody).
- Props: Minimalist (few items) or elaborate (layered textures).
- Food details: Focus on textures like crumbly crusts or glossy glazes.
- Overall style: Rustic, modern, vintage.
Document findings in a journal or spreadsheet. Spot trends: if 70% of images feature warm tones and overhead angles, that’s a clue to your affinity.
For instance, in Matt Armendariz’s work, elements like contrasty lighting and minimalism stand out. Emulate these without copying—use them as springboards. Bea Lubas’s color palettes (e.g., pink-yellow-blue) can inspire original compositions.
Avoid plagiarism: treat deconstructions as educational. If replicating for practice, keep it private. This analysis bridges inspiration and creation, honing your eye for what makes an image compelling.
| Element | Common Variations | Style Impact |
|---|---|---|
| Angle | Overhead, 45°, Straight-on | Graphic vs. Intimate |
| Lighting | Natural Diffused, Artificial Harsh | Soft Ethereal vs. Dramatic |
| Color Palette | Warm, Cool, Desaturated | Inviting vs. Calm vs. Subdued |
| Props | Minimal, Textured, Vintage | Clean vs. Rich Narrative |
This table aids quick reference during analysis. Software like Photoshop ($20.99/month) helps simulate elements digitally before shooting.
Step 4: Experiment and Iterate
Apply insights through hands-on trials. Select 3-5 elements from your analysis—say, moody lighting, warm palettes, and 45° angles—and incorporate them into shoots. Start simple: photograph everyday items like fruits or baked goods to focus on style over complexity.
Experiment with lighting: Use window light diffused by sheer curtains for softness, or direct sun for shadows. Test compositions: Mix angles in one session to compare results. For colors, decide on a palette—warm earth tones for rustic feels—and edit consistently in Lightroom presets.
Iterate based on reviews: After each shoot, critique your portfolio. What feels natural? Adjust props to align—linen for organic vibes, ceramic for modern. Over time, patterns emerge, solidifying your style.
Trust the process; it may take months of weekly shoots. Challenge yourself: Recreate inspiring elements “better” by infusing personal twists, like adding unique textures.
Common experiments include:
- Lighting setups: Natural vs. artificial (e.g., Godox SL-60W LED light, $129).
- Angles: Vary to discover preferences.
- Editing: Consistent curves and hues in post-production.
Document progress with before-after comparisons to track evolution.
A diagram for experimentation flow:
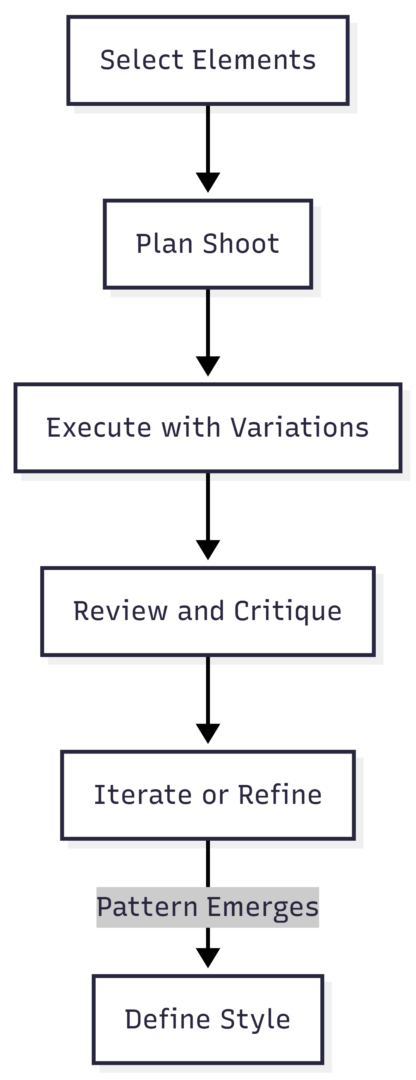
This visualizes the iterative nature.
Step 5: Practice Consistently and Create Projects
Consistency cements style. Shoot frequently—aim for 3-5 sessions weekly—to build muscle memory. Review portfolios quarterly to identify recurring themes, ensuring alignment with your keywords (e.g., “rustic, moody, vibrant”).
Projects accelerate growth: Undertake a 30-day challenge shooting one theme daily, or an A-Z series (apple to zucchini). These force creativity within constraints, revealing preferences.
For example, a black-and-white project highlights textures, or abstract explorations with brittle candies emphasize shapes. Use simple subjects like cupcakes or poached pears to experiment freely.
Enjoy the journey: Frustration signals growth. Balance with fun—shoot what excites, like seasonal ingredients.
Additional actions to support practice:
- Read food photography books: “Plate to Pixel” by Helene Dujardin ($24.95), “How to Photograph Food” by Bea Lubas ($29.99), “Picture Perfect Food” by Joanie Simon ($22.50). These provide techniques and inspiration.
- Maintain your mood board: Add aspirational images weekly.
- List elements by interest/difficulty: Prioritize practice.
- Schedule sessions: Focus on baked goods for ease.
- Launch projects: Daily Instagram posts or weekly blogs build portfolios.
Tools like tripods (Manfrotto MK055XPRO3-3W, $299) stabilize shots, while editing software ensures palette consistency.
| Recommended Book | Author | Key Focus | Price |
|---|---|---|---|
| Plate to Pixel | Helene Dujardin | Basics to Advanced Styling | $24.95 |
| How to Photograph Food | Bea Lubas | Creative Techniques | $29.99 |
| Picture Perfect Food | Joanie Simon | Practical Tips | $22.50 |
This table includes current approximate prices for guidance.
Refining Your Style Over Time
Style isn’t static; it evolves with experience. Revisit steps periodically—update mood boards, experiment with new elements. Keywords like “minimalist” or “vibrant” guide consistency, creating a cohesive portfolio that attracts clients or followers.
Avoid common traps: Over-copying stifles originality; inconsistency dilutes impact. Focus on authenticity—your unique blend of elements distinguishes you.
In summary, these five steps—mastering technique, building inspiration boards, analyzing images, experimenting, and practicing via projects—form a roadmap to your unique food photography style. With dedication, your images will not only look professional but feel profoundly personal, standing out in a visual world.
Please share this 5 Steps to Discover Your Unique Food Photography Style with your friends and do a comment below about your feedback.
We will meet you on next article.
Until you can read, Food Photography Portfolio Website Essentials