Choosing The Best Focal Point In Food Photography
In food photography, selecting the right focal point is essential for creating images that captivate viewers and highlight the dish as the hero. This technique directs the eye to the most appealing elements, such as textured surfaces, glistening ingredients, or layered components, while using depth of field to isolate the subject from distractions.
Whether shooting straight on, overhead, or at a 45-degree angle, the focal point determines the image’s sharpness and storytelling power. By mastering this, photographers can transform ordinary food shots into professional, mouthwatering visuals that emphasize the food’s allure and context.
Understanding the Focal Point in Food Photography
A focal point is the sharpest area in an image that naturally draws the viewer’s attention. In food photography, it serves as the anchor, ensuring the hero element—the main dish or key ingredient—stands out amid composition, lighting, and props. Unlike landscapes or portraits where focal points can vary widely to enhance narrative, food photography prioritizes the food itself, especially in editorial or advertising contexts. Here, the focal point reinforces the story, evoking desires like savoring a recipe with family or purchasing an ingredient.
The focal point coincides with the image’s sharpest point, often aligned with compositional rules to maximize impact. For instance, placing it on a melting butter pat or a juicy steak slice creates an immediate connection. This isolation technique uses focus to guide the eye, preventing distractions from blurred or secondary elements. Without a well-chosen focal point, images can feel off-balance, with viewers’ eyes wandering to unintended areas, diluting the food’s prominence.
To achieve this, photographers must consider the interplay of camera settings, subject placement, and environmental factors. The goal is tack-sharp focus on the hero while controlling blur to enhance depth and realism. This approach not only elevates aesthetic appeal but also aligns with practical outcomes, such as selling products or inspiring culinary actions.
Key Strategies for Choosing Focal Points
Effective focal point selection relies on proven strategies that emphasize the food’s most engaging aspects. First, identify the hero item—the most visually striking part of the dish. This could be a textured crust, a dripping sauce, or a vibrant garnish. Place the sharpest focus directly on it to make it pop against softer surroundings.
Next, prioritize the foreground in compositions, especially at angled shots. This creates a sense of depth and realism, making the image feel inviting rather than abstract. For example, in a setup with multiple elements, focusing on the front-middle ground draws viewers in, simulating a real-life dining perspective.
Incorporate composition rules like the rule of thirds, where the focal point sits at intersecting lines for balanced interest, or centering for bold impact. These placements ensure the hero dominates without overwhelming the frame.
Utilize camera tools for precision: switch to live view mode to zoom in and verify sharpness on the desired spot. This is particularly useful for intricate details like sugar crystals or herb flecks.
Control depth of field with aperture settings. A wide aperture (low f-stop, such as f/2.8) creates a shallow depth of field, blurring backgrounds and foregrounds to isolate the focal point. Conversely, narrower apertures (higher f-stops like f/8) keep more in focus for comprehensive scenes.
Finally, account for subject height. In elevated shots, focus midway between high and low points to maintain even sharpness across varying elevations. These strategies, when combined, produce images where the food commands attention seamlessly.
Factors Influencing Focal Point Selection
Several elements shape where to place the focal point, ensuring it aligns with the image’s intent. Height is a primary factor: tall subjects or props demand focus adjustments to avoid uneven blur. For instance, layered cakes require focusing lower to capture details across heights, influenced by aperture choice—wider apertures exaggerate height differences, necessitating precise placement.
Bokeh and blur quality also play roles. Bokeh refers to how lenses render out-of-focus light points, affecting aesthetic appeal. Desired blur levels dictate focal point position; aggressive bokeh from wide apertures suits isolated heroes, while subtler blur from narrower ones supports contextual storytelling.
Angle significantly impacts options. Different perspectives alter subject presentation: straight-on emphasizes layers, overhead flattens for overview, and 45-degree balances both. Each requires tailored focus to highlight textures and forms effectively.
Additionally, lighting and props influence decisions. Shadows from lighting can define edges, guiding focus to textured areas. Props should complement, not compete, with the focal point, ensuring they remain secondary through strategic blur.
Composition elements like size and color further refine choices. The hero should be the largest, most saturated element, drawing eyes naturally. If other items dominate, reposition or refocus to restore balance.
These factors aren’t rigid; they guide experimentation while maintaining the food’s heroism. Balancing them ensures focal points enhance rather than hinder the narrative.
Best Focal Points by Shooting Angle
Focal point choices vary by angle, optimizing for the dish’s characteristics. Let’s break it down.
Straight-On Angle
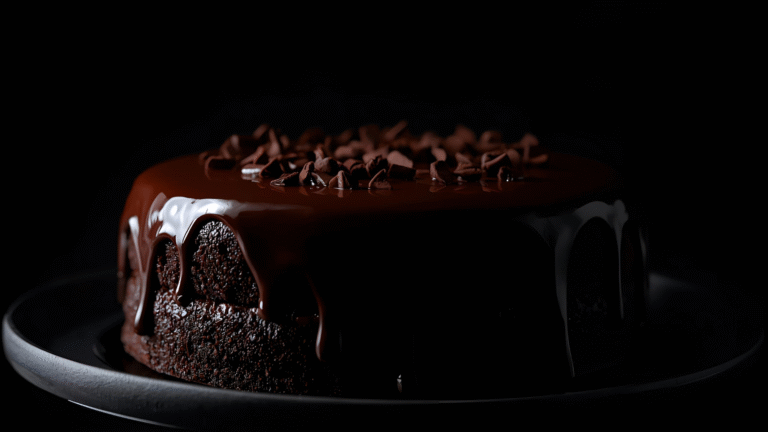
Straight-on shots, where the camera is parallel to the subject, excel for foods with height or layers, like burgers or stacked desserts. Focus primarily on the foreground to middle ground to create depth, keeping the hero sharp while blurring backgrounds for separation.
With wide apertures, this yields creamy bokeh, emphasizing front details. If backgrounds blur excessively, adjust by moving elements closer, selecting a narrower aperture, or shifting focus slightly rearward. This maintains clarity on key layers without losing isolation.
For example, in a pancake stack, focus on the front edge of the top layer to capture syrup drips and textures, allowing rear pancakes to soften gradually.
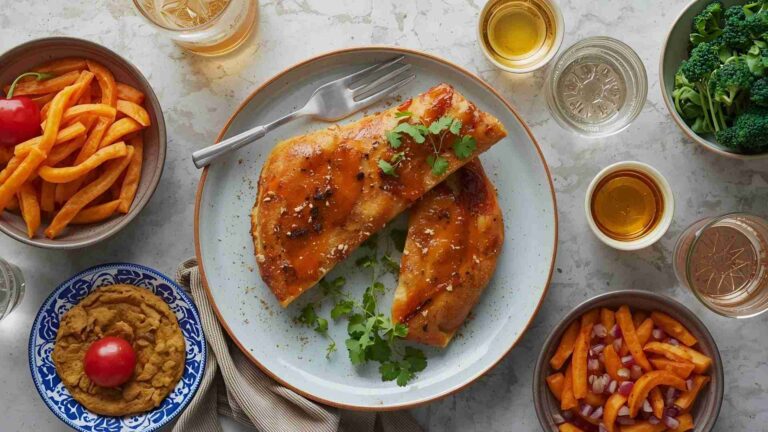
Overhead or Flat Lay Angle
Overhead shots, at 90 degrees, suit flat subjects like pizzas or salads, providing a top-down view. Focus on the hero’s center to ensure even sharpness, especially if elements share similar heights.
For full-scene focus, use apertures like f/4.5 or f/5.6, minimizing blur from height variations. If props vary in elevation, position them to align with the focal plane or increase the f-stop for deeper field.
In a pasta flat lay, centering focus on the main plate keeps surrounding garnishes sharp if heights match, creating a cohesive, appetizing overview.
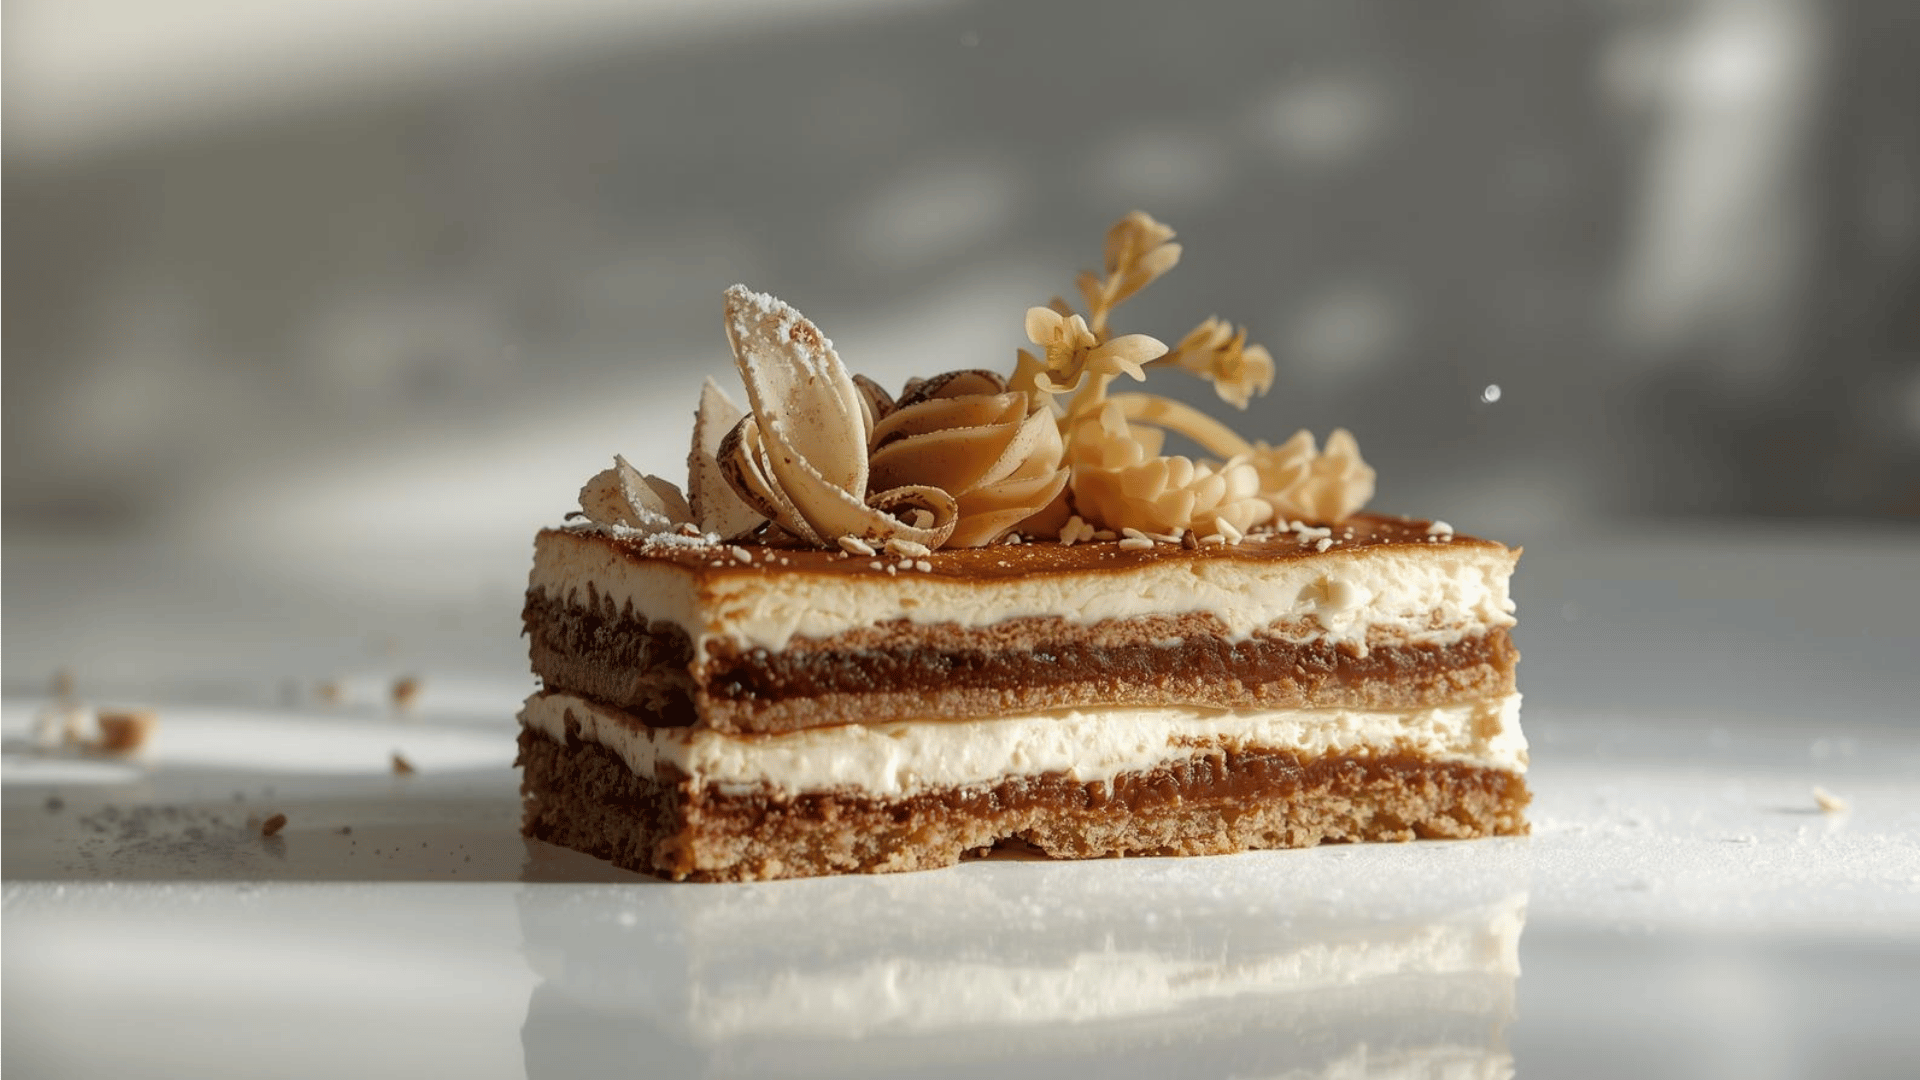
45-Degree Angle
45-degree angles capture top details and layers, ideal for cakes or bowls. Focus on the foreground to middle ground, similar to straight-on, but adjust for the tilted plane to include upper surfaces.
Wide apertures blur backgrounds effectively, highlighting the hero. If top details on multiple items need sharpness, reposition, narrow the aperture, or center focus midway.
For donuts, focusing on the top nuts of the front one allows gradual blur rearward, emphasizing texture and form.
To visualize decision-making, here’s a flowchart for selecting focal points based on angle:
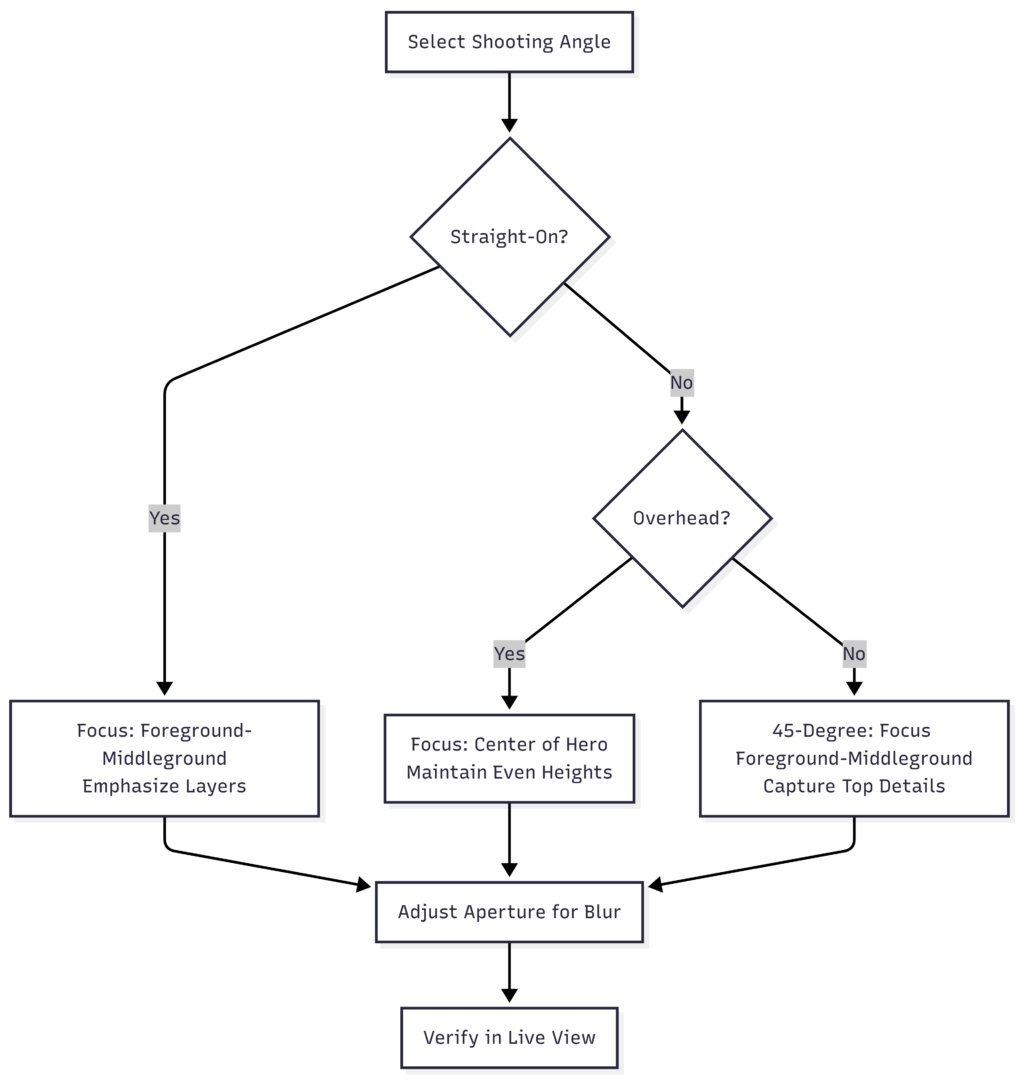
This chart outlines a step-by-step process, helping photographers quickly determine optimal placement.
Depth of Field and Background Blur Considerations
Depth of field (DoF) is crucial for focal point effectiveness, controlling what’s sharp versus blurred. Shallow DoF from low f-stops isolates the hero, making it pop against soft backgrounds—ideal for dramatic effects.
However, not all shots benefit from extreme blur. Consider the angle: overhead shots often require moderate DoF (f/4.5-f/5.6) to keep flat lays cohesive, focusing midway for balanced foreground-background sharpness.
In 45-degree shots, shallow DoF excels, with focus on the foreground creating realistic depth. Blurring foregrounds is less common, as it abstracts the scene; instead, prioritize front elements for immersive storytelling.
Straight-on angles tolerate more blur, but monitor to avoid over-softening key layers.
A table comparing aperture effects by angle:
| Angle | Recommended Aperture | Focal Point Placement | Blur Effect | Best For |
|---|---|---|---|---|
| Straight-On | f/2.8 – f/5.6 | Foreground-Middleground | Strong background bokeh | Layered foods like stacks |
| Overhead | f/4.5 – f/8 | Center of hero | Moderate, even across plane | Flat subjects like pizzas |
| 45-Degree | f/2.8 – f/4.5 | Foreground-Middleground | Blurred background/foreground | Foods with top details |
This table summarizes how to pair apertures with placements for desired outcomes, ensuring sharp heroes without unnecessary distractions.
Techniques for Achieving Sharp Focus
Sharp focus is non-negotiable in food photography; misalignment can mislead viewers and undermine the hero. Modern cameras offer multiple focus modes, but single-point focus is preferred for static subjects.
Select a single point covering the hero entirely—avoid edges where it might split between planes, causing misses. For precision, use live view: zoom in on the screen, manually adjust focus by rocking the ring to the sweet spot.
Manual focus shines on tripods, bypassing autofocus limitations. Some lenses allow fine-tuning in autofocus mode, but switch to manual if resistance occurs.
For handheld shots, continuous (servo) focus tracks minor movements, locking on the hero via back-button focusing.
Avoid auto-multi-point modes, as they may misinterpret scenes; manual control ensures intent matches outcome.
Troubleshooting tips: If images lack sharpness, check shutter speed (avoid below 1/125s handheld), stabilize with tripods, or use timers to minimize shake. Clean lenses and sensors prevent haze.
Integrating Composition, Color, and Size for Focal Point Enhancement
Beyond focus mechanics, integrate broader elements to amplify the focal point. Composition positions the hero prominently—center for symmetry or rule of thirds for dynamism.
Size matters: the hero should dominate, avoiding larger distracting props. Place tall items rearward, short ones forward to guide eyes naturally.
Color draws attention; ensure the hero’s hues are the most vibrant, using complementary backgrounds to heighten saturation.
These integrations create holistic images where the focal point isn’t just sharp but contextually compelling.
Advanced Tips: Props, Lighting, and Lifestyle Elements
- Elevate focal points with supporting techniques. Props add context but stay secondary—focus on the hero, blurring props for emphasis.
- Lighting defines shadows, highlighting textures; side lighting accentuates focal areas like crumbly edges.
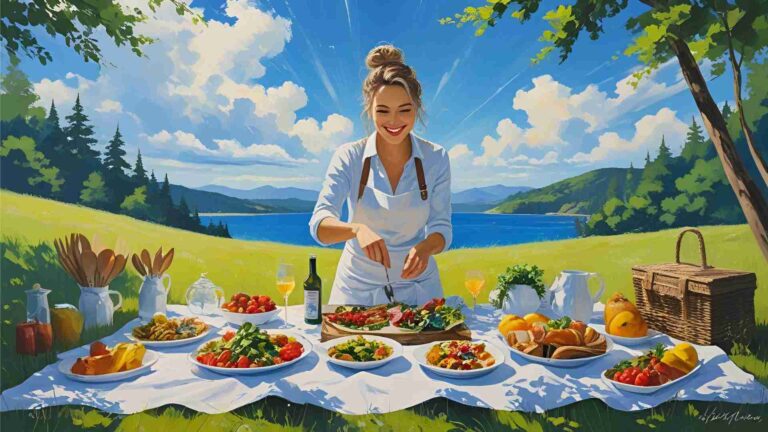
- Incorporate hands or actions for lifestyle feels, focusing on interaction points like a fork piercing food.
- Experiment beyond guidelines: capture variations, as unexpected focal shifts can yield unique results.
Common Pitfalls and Troubleshooting
- Avoid common errors like misplaced focus drawing eyes to blurred areas. Always verify in live view or post-shoot magnification.
- If blur is unintended, increase f-stop or realign elements. For missed focus, ensure single points fully cover targets.
- Related considerations: autofocus isn’t inherently bad for still life but demands oversight; manual often trumps for control.
- For tack-sharp results, download checklists covering 14 troubleshooting tips, including ISO minimization and vibration reduction.
Conclusion: Mastering Focal Points for Impactful Food Photography
Choosing the best focal point transforms food photography from mundane to mesmerizing, ensuring the hero dish captivates while telling a vivid story. By angle-specific strategies, DoF control, and precise techniques, photographers achieve professional sharpness and depth. Remember, guidelines foster creativity—experiment to discover signature styles. With practice, your images will not only look delicious but also engage viewers on a sensory level, fulfilling the essence of food photography.
Please share this Choosing The Best Focal Point In Food Photography with your friends and do a comment below about your feedback.
We will meet you on next article.
Until you can read, Spaghetti Bolognese with a Twist