Creative food photography composition techniques
Master creative food photography with composition techniques like diagonals, negative space, and layering to capture stunning, storytelling images.
Food photography is more than just capturing a dish—it’s about telling a story, evoking emotions, and enticing viewers with visuals that make them hungry for more. Whether you’re a food blogger, a restaurant owner, or an enthusiast looking to level up your Instagram game, mastering creative composition techniques can transform your images from ordinary to extraordinary. This comprehensive guide explores advanced composition strategies, lighting tricks, and styling tips to help you create visually stunning food photography that stands out. From diagonals and negative space to thoughtful props and color theory, we’ll dive into actionable techniques to bring your dishes to life.
Why Composition Matters in Food Photography
Composition is the backbone of any great photograph. In food photography, it’s the art of arranging elements within the frame to create balance, draw attention to the dish, and convey a narrative. A well-composed image guides the viewer’s eye, highlights the textures and colors of the food, and creates a mood—whether it’s cozy, vibrant, or sophisticated. By moving beyond basic rules like the rule of thirds, you can experiment with dynamic techniques that add depth, movement, and personality to your photos.
In this article, we’ll explore a range of composition techniques, including diagonals, negative space, off-center placement, leading lines, layering, and more. We’ll also cover camera angles, lighting, color theory, and storytelling to help you craft images that resonate with your audience. Whether you’re shooting with a smartphone or a professional DSLR, these strategies will elevate your food photography game.
Core Composition Techniques
Diagonals and Movement
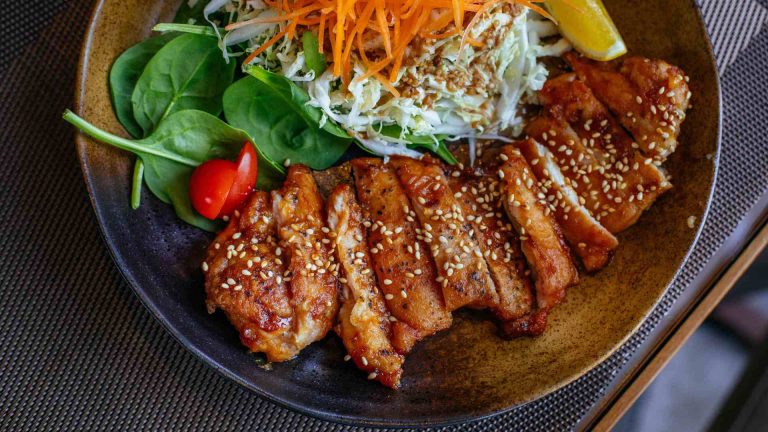
One of the most effective ways to add energy to your food photos is by incorporating diagonals. Unlike straight, parallel lines that can feel static and predictable, diagonal lines create a sense of movement and dynamic tension. They guide the viewer’s eye across the frame, making the image feel alive and engaging.
For example, imagine a dessert scene where a napkin is placed at a diagonal angle, and a dusting of powdered sugar follows a different diagonal path. These lines work together to draw attention to the main subject—say, a slice of cake—while adding visual interest. Diagonals can be created with props like utensils, the edge of a plate, or even the food itself, such as a drizzle of sauce or a row of sliced fruit.
Pro Tip: Avoid aligning all elements in the frame diagonally, as this can feel forced. Instead, use one or two diagonal lines to subtly guide the viewer’s eye toward the focal point.
Negative Space
Negative space—the empty or minimally decorated areas around your subject—is a powerful tool for creating clean, sophisticated images. By leaving space uncluttered, you emphasize the dish itself, making it the undeniable star of the photo. Negative space also adds a sense of harmony and simplicity, which is especially effective for minimalist or modern aesthetics.
For instance, a single bowl of vibrant soup on a plain, neutral background can pop dramatically, with the empty space drawing attention to the dish’s colors and textures. Negative space is also practical for food bloggers or cookbook creators, as it provides room for text overlays or recipe details without overwhelming the image.
Pro Tip: Use neutral or monochromatic props in the negative space to maintain focus on the food. A plain wooden table or a soft linen napkin can enhance the composition without stealing the spotlight.
Off-Center Placement
Centering your subject is a natural instinct, but it often results in static, uninspiring images. Placing your dish off-center creates a more dynamic composition, encouraging the viewer’s eye to explore the entire frame. This technique aligns loosely with the rule of thirds, where the frame is divided into nine equal parts, and key elements are placed along the lines or at their intersections. However, off-center placement doesn’t strictly adhere to this grid—it’s about breaking free from symmetry to create visual intrigue.
For example, positioning a plate of pasta slightly to the left, with a fork and a sprig of basil on the right, can lead the viewer’s eye across the image, creating a sense of balance and movement.
Pro Tip: Experiment with different off-center placements to find what feels natural for your dish. Use props to fill the remaining space thoughtfully, ensuring they complement rather than compete with the food.
Leading Lines
Leading lines are a classic composition technique that directs the viewer’s attention to the main subject. In food photography, lines can be formed by utensils, napkins, or even the food itself. For instance, a pair of chopsticks pointing toward a bowl of ramen or a trail of scattered herbs can guide the eye to the dish.
The key is subtlety—overloading the frame with too many lines can make the image feel contrived. Instead, use one or two lines to create a natural flow. For example, a napkin folded in a way that points toward a plate of sushi can subtly emphasize the dish without overwhelming the composition.
Pro Tip: Combine leading lines with other techniques, like diagonals or negative space, to create a cohesive and engaging image.
Layering for Depth
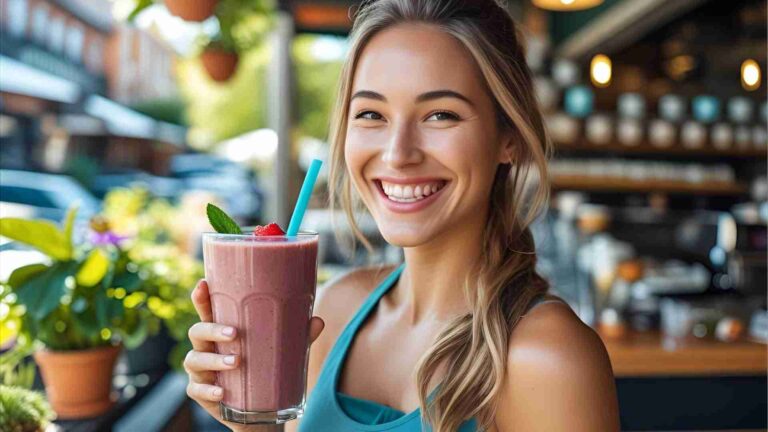
Layering adds texture and dimension to food photography, making flat dishes appear more dynamic. By incorporating multiple elements at different depths—such as a textured backdrop, a fabric napkin, a cooling rack, and the food itself—you create a rich, tactile composition. Layers are especially effective for dishes that lack inherent texture, like soups or smoothies.
For example, a pie photographed on a wooden board, with a gauze napkin and a scattering of sugar on top, gains depth from the interplay of textures. Each layer contributes to the story without overshadowing the main subject.
Pro Tip: Choose neutral or complementary layers to avoid distracting from the food. Ensure each element adds to the narrative, whether it’s a rustic vibe or a modern aesthetic.
Framing the Subject
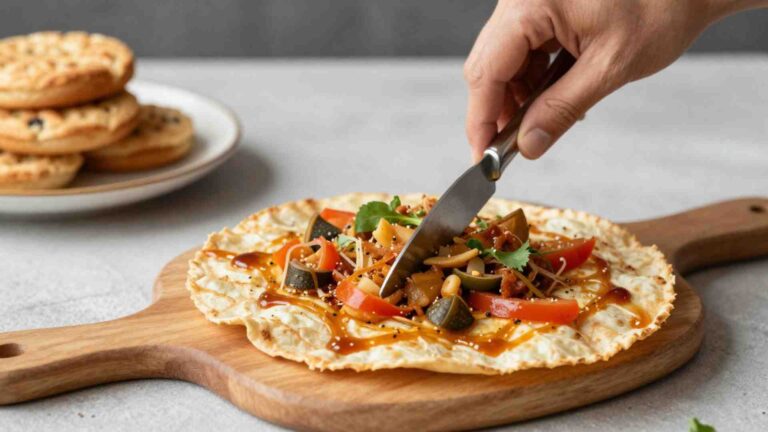
Framing involves using props or ingredients to create a visual border around your dish, drawing attention to it. This technique is particularly useful for dishes that need context, such as a casserole where the ingredients aren’t immediately obvious. By surrounding the dish with fresh herbs, spices, or utensils, you clarify what’s in the dish while emphasizing its importance.
For instance, a bowl of salad framed by scattered lettuce leaves, cherry tomatoes, and a fork creates a clear focal point while telling the story of the dish’s ingredients.
Pro Tip: Use framing to enhance storytelling. For example, a rustic wooden spoon and a linen napkin can evoke a cozy, homemade feel for a comfort food dish.
Repeating Patterns
Patterns are a bold, graphical way to create visually striking food photos. Arranging food items in a repeating shape—like a grid of cookies or a spiral of sliced vegetables—creates a sense of rhythm and harmony. To add intrigue, consider breaking the pattern with an unexpected element, such as a missing cookie or a single berry out of place. This disruption draws the viewer’s eye and adds a storytelling element.
Pro Tip: Patterns work best with simple, uniform items like pastries or fruits. Use a contrasting background to make the pattern pop.
Foreground Elements
Incorporating foreground elements—objects closer to the camera than the main subject—adds depth and a sense of space to your photos. For example, placing a glass or a sprig of herbs in the foreground can create a layered effect, making the image feel more immersive. This technique is particularly effective for storytelling, as it can suggest a lived-in, dynamic scene.
Pro Tip: Keep foreground elements subtle and out of focus to avoid distracting from the main dish.
Mixing Shapes
Mixing shapes adds visual contrast and interest to your compositions. While repeating patterns rely on uniformity, mixing shapes involves combining different forms—like a square plate, round fruits, and a triangular napkin—to create a dynamic frame. This technique is especially effective in top-down shots, where shapes are more pronounced.
For example, a square tray of round cookies next to a triangular napkin creates a visually engaging contrast that guides the eye to the main subject.
Pro Tip: Use shape contrast sparingly to avoid overwhelming the viewer. Ensure the shapes complement the dish’s aesthetic.
Camera Angles and Orientation
The angle of your shot can dramatically affect how your dish is perceived. Here are some key angles to experiment with:
- Overhead (90-degree): Ideal for flat dishes like pizzas or charcuterie boards, this angle showcases the arrangement of ingredients and creates a clean, graphic look.
- 45-degree: A versatile angle that adds depth and perspective, perfect for most dishes, from burgers to salads.
- Straight-on: This angle creates intimacy and is great for tall dishes like layered cakes or stacked sandwiches.
- Close-up: Use a macro lens to highlight textures, such as the crunch of a crust or the sheen of a sauce.
- Over-the-shoulder: This angle adds a storytelling element, making the viewer feel like they’re about to dig into the dish.
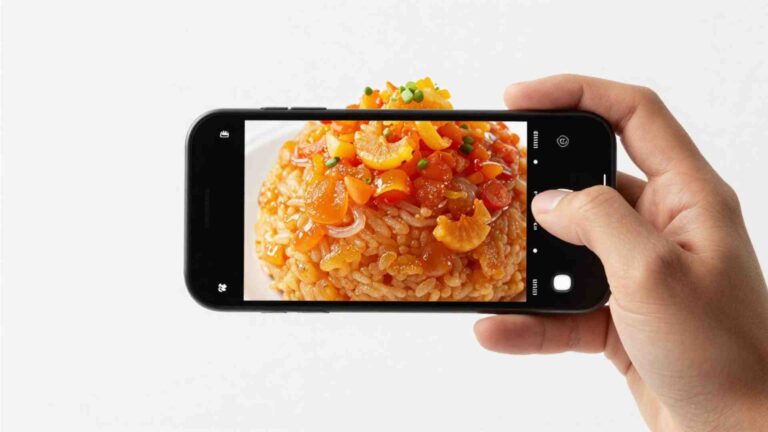
Orientation also matters. Portrait shots are ideal for social media platforms like Instagram, while landscape shots work well for website headers or print menus. Experiment with both to find what suits your platform and aesthetic.
Pro Tip: Use a tripod to stabilize your camera and experiment with angles without disrupting the scene. This allows you to fine-tune your composition with precision.
Lighting Techniques
Lighting is a critical component of food photography, as it enhances textures, colors, and mood. Here are some advanced lighting techniques to consider:
Natural Light
Natural light is a favorite among food photographers for its soft, even illumination. Position your setup near a window to capture diffused daylight, which highlights the natural colors and textures of your dish. Experiment with different times of day—early morning light is soft and warm, while midday light is brighter and more neutral.
Light Modifiers
Use reflectors, diffusers, or softboxes to control the quality and direction of light. A reflector can bounce light onto shadowy areas, while a diffuser softens harsh sunlight. These tools help create a polished, professional look.
Dark Food Photography
For a moody, atmospheric vibe, use a dark background with controlled lighting to create deep shadows. This technique works well for rich dishes like chocolate desserts or red wine reductions.
Reflective Surfaces
Incorporate mirrors, metal trays, or glass to create unique reflections that add visual interest. For example, a glass tabletop can reflect the dish, adding depth and elegance.
Splash Photography
Capture the motion of liquids—like a splash of cream or a drizzle of syrup—to add energy and excitement. Use a fast shutter speed and continuous lighting to freeze the action.
Multi-Light Setup
For advanced control, use a multi-light setup with key, fill, and accent lights. The key light provides the main illumination, the fill light softens shadows, and the accent light highlights specific details, like the sparkle on a garnish.
Pro Tip: Tethered shooting—connecting your camera to a computer for real-time feedback—can help you adjust lighting and styling on the fly, ensuring perfect results.
Color Theory in Food Photography
Color plays a crucial role in making your food photos pop. Understanding color theory can help you create visually appealing images that evoke the right emotions.
- Complementary Colors: Pair colors opposite each other on the color wheel, like red tomatoes against a green background, for high contrast and visual impact.
- Analogous Colors: Use colors next to each other on the color wheel, like yellow and orange, for a harmonious, cohesive look.
- Split-Complementary Colors: Combine one main color with two colors adjacent to its complement for a balanced yet vibrant palette.
- Emotional Impact: Reds and oranges evoke warmth and comfort, greens suggest freshness, and blues create a cool, refreshing vibe.
Pro Tip: If a dish lacks vibrant colors, use colorful props or backgrounds to add contrast. For example, a beige dish like mashed potatoes can pop against a deep blue napkin.
Styling, Backdrops, and Props
Styling is where your creativity can truly shine. The right backdrops and props enhance the dish and set the mood without stealing focus.
- Backdrops: Move beyond plain surfaces by using textured materials like wood, linen, or metal. A weathered wooden board can evoke rustic charm, while a sleek metal tray adds a modern edge.
- Props: Incorporate artisanal or vintage items, like ceramic plates or antique silverware, to add authenticity. Fresh herbs, edible flowers, or a wisp of steam can introduce dynamic elements.
- Scale and Texture: Play with oversized or miniature props for drama, and mix textures (like smooth glass and rough linen) to create visual interest.
Pro Tip: Every prop should serve the story. For example, a scattering of flour next to a freshly baked loaf suggests a hands-on baking process.
Storytelling Through Food Photography
Great food photography tells a story that goes beyond the dish itself. Here are some ways to weave narrative into your images:
- Motion and Action: A dripping sauce or a hand reaching for a fork suggests a meal in progress, making the scene feel alive.
- Seasonal Elements: Incorporate autumn leaves or summer herbs to ground the photo in a specific time of year.
- Cultural Signifiers: Use props like chopsticks or a tajine to add authenticity to ethnic dishes.
- Reflections and Shadows: Use mirrors or soft lighting to create depth and mood, making the image more immersive.
Pro Tip: Sketch your composition before shooting to plan the story. A quick sketch can help you visualize prop placement and ensure every element contributes to the narrative.
Integrating WP Recipe Maker for Food Bloggers
For food bloggers, pairing stunning photos with a professional recipe presentation is key. WP Recipe Maker is a powerful tool that allows you to create customizable recipe cards that complement your photography. These cards can include ingredients, instructions, nutritional information, and even interactive features like serving size calculators. By integrating your beautifully composed photos with clear, engaging recipe details, you create a seamless experience for your audience, encouraging them to try your dishes.
Example Recipe Card Layout:
| Section | Content Example |
|---|---|
| Title | Creamy Tomato Basil Soup |
| Image | [Your stunning photo here] |
| Ingredients | – 2 tbsp olive oil – 1 onion, chopped – 2 cups canned tomatoes |
| Instructions | 1. Heat olive oil in a pot. 2. Sauté onion until soft. 3. Add tomatoes and simmer. |
| Notes | Garnish with fresh basil for extra flavor. |
Pro Tip: Use negative space in your photos to leave room for recipe card text overlays, creating a cohesive blog post design.
Chart: Composition Workflow
To visualize the process of creating a compelling food photography composition, here’s a flowchart:

This workflow ensures you consider all aspects of composition, from planning to final edits, for a polished result.
Equipment Recommendations and Pricing
To execute these techniques effectively, here’s a list of recommended equipment with approximate pricing (USD, based on general market trends):
| Equipment | Description | Approx. Price |
|---|---|---|
| DSLR/Mirrorless Camera | Canon EOS R6 or Sony A7 III for high-quality images | $1,500–$2,500 |
| Macro Lens | 50mm or 100mm for close-up texture shots | $300–$1,000 |
| Tripod | Manfrotto Befree for stability | $100–$200 |
| Softbox | Neewer 24×24-inch for diffused lighting | $50–$100 |
| Reflector | 5-in-1 collapsible reflector for light control | $20–$50 |
| Diffuser | Scrim or translucent fabric for softening light | $10–$30 |
Pro Tip: If you’re on a budget, a smartphone with a good camera and affordable clip-on lenses can produce excellent results for beginners.
Final Thoughts
Creative food photography is about more than just capturing a dish—it’s about crafting a visual story that engages and inspires. By mastering composition techniques like diagonals, negative space, leading lines, and layering, you can create images that are both beautiful and meaningful. Experiment with angles, lighting, and props to develop a unique style that reflects your vision. Whether you’re sharing your photos on social media or building a food blog with tools like WP Recipe Maker, these techniques will help you create stunning visuals that leave a lasting impression.
Try these ideas in your next shoot, and don’t be afraid to break the rules to find what works for you. With practice and creativity, your food photography will not only look delicious but also tell a story that resonates with your audience.
Please share these Creative food photography composition techniques with your friends and do a comment below about your feedback.
We will meet you on next article.
Until you can read, How content marketing can succeed in the food industry