Professional Food Photography Portfolio Must-Haves
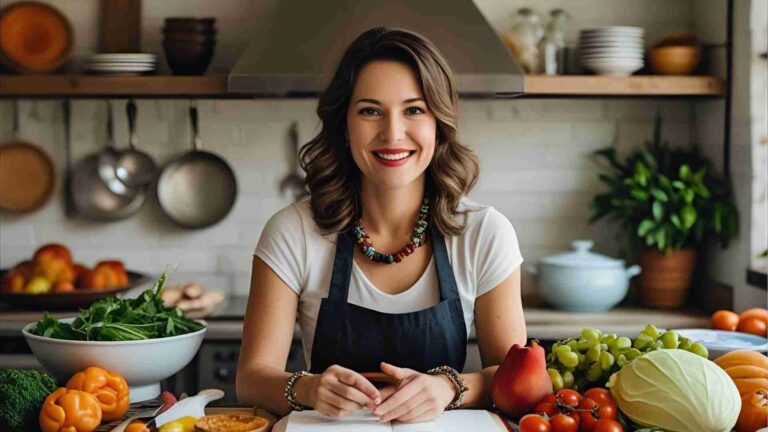
As a freelance food photographer with experience serving small clients, you’re ready to pursue editorial and commercial work with larger budgets and teams. Targeting top magazines, agencies, and creative directors requires a portfolio that demonstrates not just technical skill but also your ability to solve problems, collaborate, and tell compelling stories through imagery. Based on insights from portfolio reviews at industry events, this guide outlines the must-haves for your food photography portfolio. We’ll cover key elements clients seek, composition techniques, styling strategies, equipment recommendations, and specialized tips for restaurant and product shoots. By incorporating these, you’ll create a portfolio that stands out in a crowded market.
What Clients Look for in a Food Photographer
Clients evaluate portfolios beyond aesthetics; they assess if you can deliver under real-world constraints. At the core, they want a problem solver. Photography involves overcoming challenges like lighting inconsistencies, depth of field (DoF) limitations, or the inverse square law affecting light falloff. Your portfolio should showcase images where you’ve navigated these issues to execute a vision. For instance, include shots with varied lighting setups—natural vs. artificial, soft vs. hard—to prove adaptability.
Variety in lighting is crucial. Photography is about shaping light to match a concept. Clients expect to see moody, bright, diffused, and directional lighting across your work. As a food photographer, focus on creating beautiful light rather than perfect food styling, which often falls to specialists on larger sets. Include examples of natural window light softened with diffusers and artificial setups mimicking daylight.
Teamwork is another key indicator. Larger projects involve creative directors, stylists, and assistants. Demonstrate this through diverse images suggesting collaboration, such as those with varied prop and food styling that imply input from multiple experts. Discuss team experiences in portfolio reviews, but visually, show breadth in styling to signal you’re team-oriented and confident leading on set.
To be memorable, something must stand out. In a sea of similar Instagram-style white feeds, push boundaries. Include experimental shots that explore unique moods or subjects, even if they didn’t perform well on social media. Trust your instincts—clients hire innovators, not followers.
Storytelling elevates your portfolio. Images should narrate, like a farm-to-table sequence or a restaurant interior with food details. Include series that build a story, such as a winter clementine set showing preparation, plating, and consumption. This shows discernment: capturing a narrative in three strong images beats 200 mediocre ones.
Variety in shot types is essential. Mix wide food scenes, atmospheric environments, portraits (e.g., chef with dish), and macro details. Think wide, tight, and tighter to break visual monotony and demonstrate problem-solving across scales.
Pagination and layout matter. Arrange images to flow logically, perhaps by color, mood, or subject. Online, use clean navigation; in print, ensure sequencing tells your story as a photographer.
Building a Strong Portfolio: Image Requirements and Structure
Start with 30-50 images for your online portfolio, expanding to categories like beverages, desserts, entrees, and ingredients as you grow. Aim for diversity: burgers, sandwiches, salads, breakfasts, pastas, meats, seafoods, vegetables, breads, soups, pizzas, and action/process shots. If specializing (e.g., vegan), adapt accordingly but show prepared foods to build client confidence.
For printed portfolios, 30 images suffice, as viewers linger longer. Include tear sheets from jobs to prove real-world application.
Structure your website simply:
- Food gallery (or sub-galleries for 10+ images per category).
- Contact page with phone and email.
- About page (250 words) with your photo.
- Tear sheets section (start with 5+).
- Social links.
Avoid mixing unrelated genres like portraits; maintain a consistent style to avoid confusion.
If food styling isn’t your strength, collaborate with chefs or stylists for mutual portfolio building.
Essential Equipment for Professional Food Shots
Quality gear supports your portfolio’s technical excellence. Here’s a table of recommended items, with specifications and approximate prices (based on current market averages in USD):
| Item | Specifications | Price Range | Why It’s Essential |
|---|---|---|---|
| Camera Body (e.g., Canon EOS R5 or Sony A7R IV) | Mirrorless, 45MP sensor, ISO 100-51200, 8K video | $3,000-$4,000 | High resolution for detailed food textures; excellent low-light performance for restaurant shoots. |
| Tripod (e.g., Manfrotto 055 Aluminum with XPRO Ball Head) | Load capacity 9kg, height 9-188cm, magnesium ball head | $200-$300 | Enables hands-free styling to camera; crucial for overhead setups. |
| Overhead Arm Setup | 2x C-stands (Manfrotto), 40in extension arm (Impact), grip heads, spigot | $300-$500 total | For stable 90° angles without camera shake. |
| Diffuser (e.g., 60in scrim) | Translucent fabric, collapsible | $50-$100 | Softens natural/artificial light for even illumination. |
| Reflectors (e.g., 5-in-1 kit) | 42in diameter, includes white, black, silver, gold | $20-$50 | Controls shadows and highlights; black for deepening contrast. |
| Artificial Light (e.g., Godox SL-60W LED) | 5600K color temp, 60W output, softbox compatible | $100-$150 | Mimics natural light for controlled environments. |
| Fake Ice Cubes (acrylic) | Set of 20, reusable | $10-$20 | Props up food or fills bowls without melting. |
| Makeup Sponges (wedge-shaped) | Pack of 100, washable | $5-$10 | Levels props or supports sagging elements like burgers. |
| Spray Bottle (for glycerin mix) | 8oz, fine mist | $5 | Creates fresh droplets on produce or glasses. |
| Long-Handled Tweezers | Stainless steel, pointed tip, 6-8in | $10-$15 | Precise placement of garnishes without disturbing the scene. |
Invest in these for versatility. For lenses, see the composition section below.
Mastering Food Photography Composition
Composition is the backbone of captivating images. Your portfolio must showcase strong compositions to draw viewers in.
Setting Up the Camera
Use a tripod for stability, allowing hands-free styling. For overhead shots, build a setup with C-stands, extension arm, grip heads, spigot, and ball head (total ~$300-$500). This is portable for on-location work.
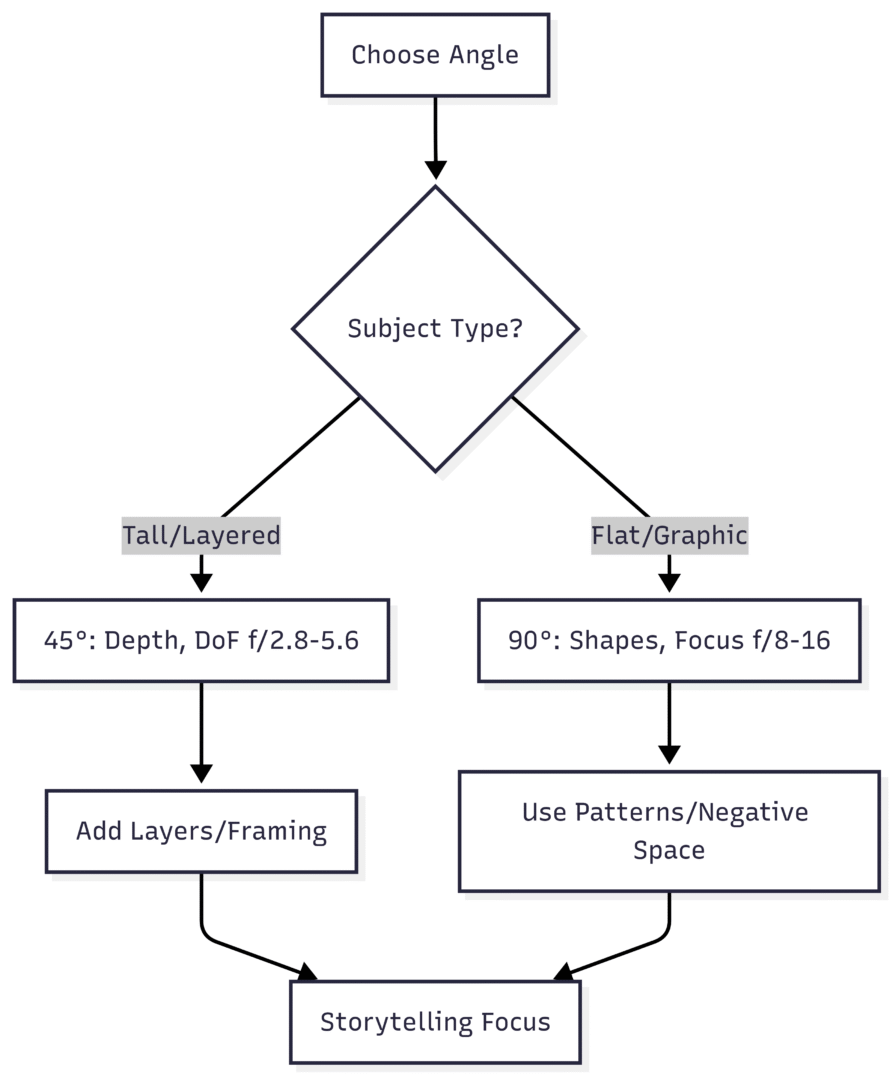
Best Camera Angles
Stick to two primary angles: 0-45° and 90°. Avoid 45-90° to prevent distortion like food “sliding” off the table.
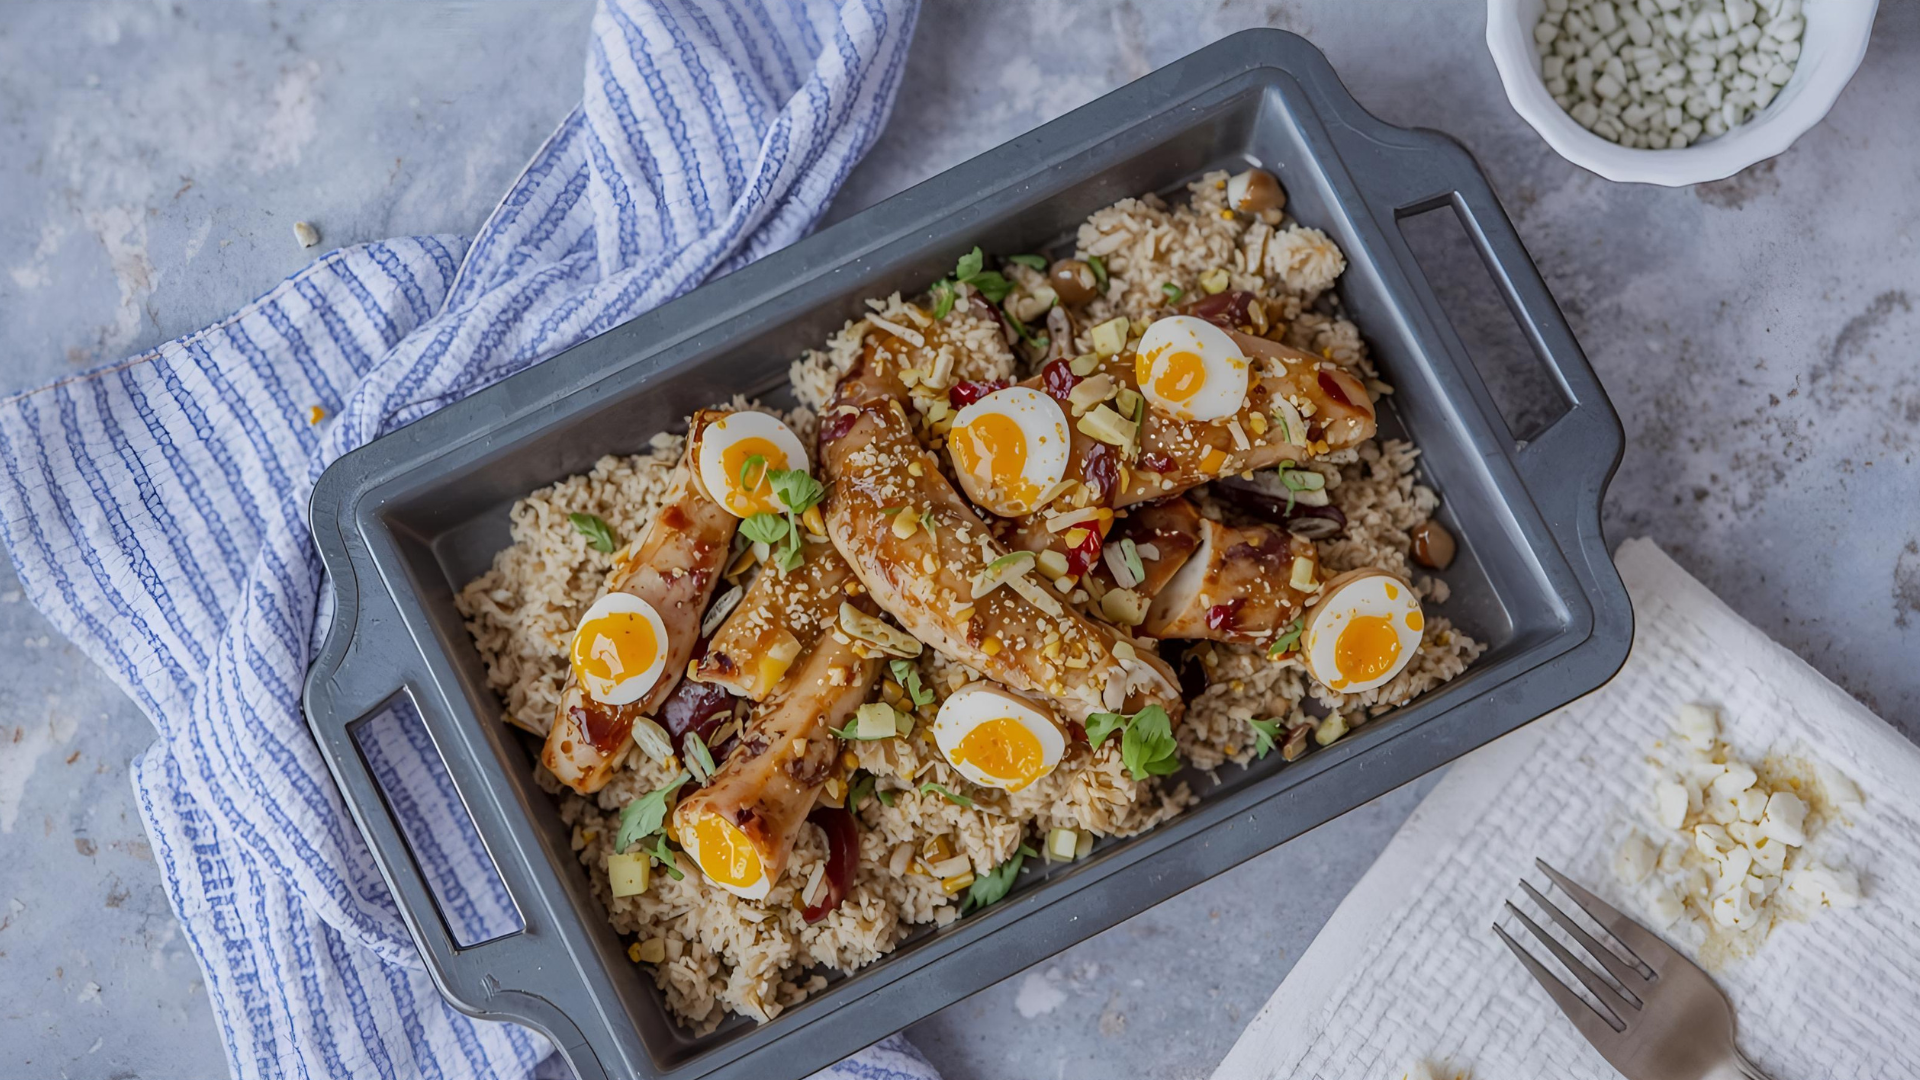
- 45° Angle: Versatile for depth and storytelling. Use f/2.8-f/5.6 for shallow DoF, separating food from background. Ideal for tall foods like cakes or layered dishes. Benefits: Descriptive view, layers/framing with props, bokeh for focus.
- 90° Angle: Graphic and eye-catching. Use f/8-f/16 for full focus. Benefits: Emphasizes shapes (e.g., circular foods on square plates), traps eyes in patterns (circular, triangular compositions), allows negative space for text.
Here’s a chart illustrating composition flow for angles:
Trusted Composition Techniques
- Lines: Use props/food for diagonals/parallels to guide eyes and add action.
- Layers: Foreground, middle, background for depth (45° angle).
- Framing: Surround subject with props/ingredients.
- Repeating Patterns/Shapes: For harmony, e.g., multiple crostatas or patterned fruits.
- Leading Lines: Point elements toward the hero (e.g., forks toward product).
- Visual Balance: Equalize weight across frame.
- Negative Space: Around main subject for emphasis; useful for text overlays.
- Composing for Light: Angle food to capture reflections (angle of incidence = reflection).
- Styling to Camera: Build scene layer by layer while tethered.
For product photography, position at rule-of-thirds intersections, ensure label visibility, use composites for open/closed views, and straighten lines.
Food Styling Strategies
Styling transforms ordinary shots into stunning ones. Portfolio images should reflect professional techniques.
- Use small plates/bowls for focused portions.
- Incorporate fresh ingredients as props for freshness.
- Layer elements (napkins, plates, garnishes) for depth.
- Garnish liberally: herbs, seeds, flakes for texture/color.
- Add crumbs/spills for a “lived-in” feel.
- Humanize with bites, hands, or interactions.
- Undercook dishes/under-ripe produce for moisture/retention.
- Create droplets with 50/50 water-glycerin spray.
- Avoid busy patterns; use neutral palettes.
- Cut produce variably (slices, wedges) for interest.
- Group in odd numbers for dynamics.
- Buy extras for replacements.
- Less is more: Remove before adding.
For hot food, glaze with oil. Simulate heat with tools like eyeliner for grill marks.
Specialized Tips: Restaurant and Product Photography
Restaurant Photography
Approach restaurants with a free one-hour shoot (one food, one drink), then license images. Shift to project fees covering prep, shoot, and editing (include team/expenses).
Tips:
- Create pre-pro with shot list, mood boards.
- Plan lighting: Natural near windows (use tripod for low light); artificial with softbox.
- Lenses: Macro (105mm/80mm), zoom (24-70mm/18-55mm), wide (14-24mm/16mm).
- Use messenger for kitchen pacing.
- Shoot variations (overhead, straight-on, 3/4).
- Add surfaces/backdrops for mood.
- Unique dishes/glassware.
- Human elements (hands).
- Macro details.
- Interiors first.
Product Photography
Focus on the product as hero.
- Center at intersections.
- Add negative space for text.
- Balance visual weight.
- Less is more; relevant supports only.
- Leading lines to product.
- Readable labels/logos.
- Higher DoF (f/13) for focus.
- Composites for open/closed views.
- Straight lines.
Lighting Mastery
Light defines mood. Use natural diffused (via scrim) or artificial mimicking it. Avoid direct; bounce with white cards, deepen shadows with black. Directional light adds realism.
Editing and Final Touches
Edit in Lightroom: Adjust exposure, contrast, highlights/shadows. Shoot raw for flexibility. Ensure consistency across portfolio.
Curating and Reviewing Your Portfolio
Aim for 30-50 images initially. Get feedback: Submit for reviews focusing on flow, client appeal, and market fit (video/written summaries available via services).
By integrating these must-haves—problem-solving evidence, lighting variety, storytelling, composition mastery, styling precision, and specialized techniques—your portfolio will attract premium clients. Focus on diversity, quality, and narrative to level up your career.
Please share this Professional Food Photography Portfolio Must-Haves with your friends and do a comment below about your feedback.
We will meet you on next article.
Until you can read, How To Choose The Best Food Photography Angles