Cocktail Photography Tips for Food Photographers
Cocktail photography is a captivating and specialized branch of food photography, where vibrant colors, translucent liquids, and delicate garnishes come together to create images that evoke refreshment, elegance, and celebration. Unlike solid foods, cocktails are dynamic—shifting with melting ice, fading bubbles, or settling layers—demanding both technical precision and creative flair to capture their fleeting beauty. For food photographers looking to expand their skills or create standout beverage images for portfolios, social media, or commercial clients, this guide offers techniques tailored to cocktails. From essential equipment to advanced lighting, composition, styling, and post-production, we’ll provide actionable strategies to produce professional-grade images that make viewers crave a sip. This article builds on core principles, offering detailed insights, practical workflows, and fresh perspectives, avoiding repetitive lists for a streamlined, engaging read. Prices, and diagrams clarify key processes. Let’s craft cocktail photos that dazzle and inspire.
The Art and Science of Cocktail Photography
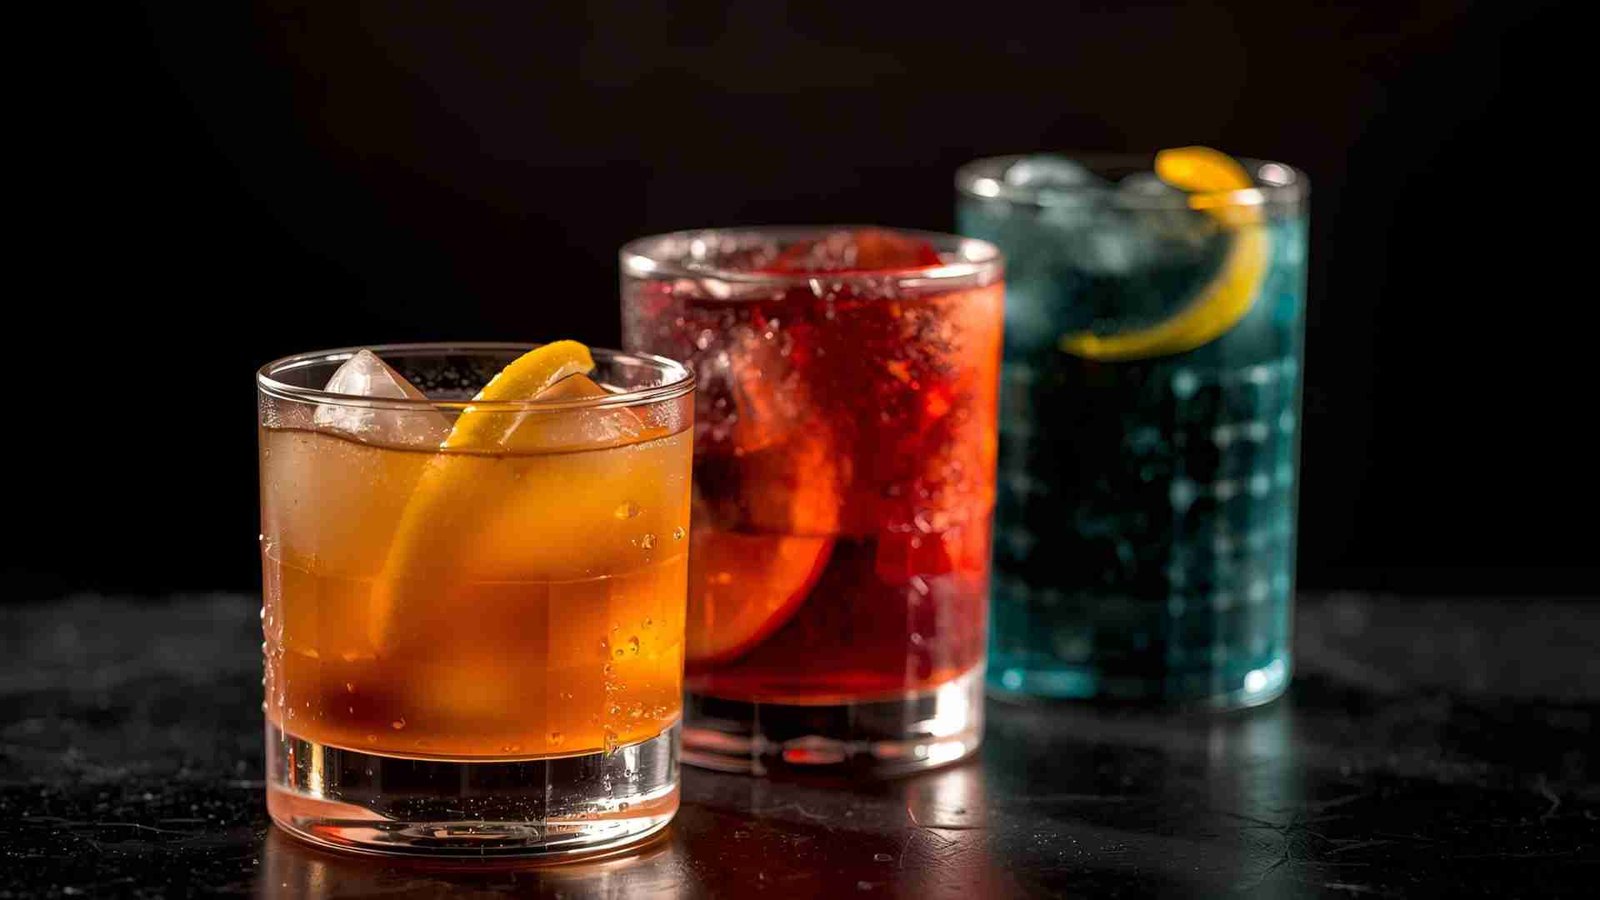
Cocktail photography stands apart from traditional food photography due to its fluid, transient nature. Drinks interact uniquely with light, creating glowing refractions or challenging reflections in glassware. The goal is to convey sensory experiences—cool refreshment, bold flavors, or cozy warmth—through visual storytelling. Whether it’s the crisp clarity of a gin and tonic or the layered richness of a negroni, each shot should feel alive and inviting.
Unique Challenges and Opportunities
- Reflections and Glare: Glassware reflects light, requiring careful control to avoid hotspots.
- Time-Sensitive Elements: Ice melts and condensation fades within minutes.
- Color Vibrancy: Drinks must pop without looking artificial.
- Narrative Power: Props and garnishes set the scene, from tropical escapes to moody bars.
Approach cocktails as dynamic subjects, embodying moments of joy or sophistication. Plan meticulously—sketch compositions, prep ingredients, and test setups—to maximize efficiency during the shoot.
Pre-Shoot Planning
Create a shot plan: Define the mood (e.g., bright spritz for summer or dark old fashioned for winter), select glassware, and list garnishes. Prepare a mise en place with all elements ready before pouring to capture peak freshness. Use a notebook or digital app like Notion (~$10/month) for organization.
Essential Equipment for Cocktail Photography
High-quality gear lays the foundation for professional results, but beginners can start affordably. Here’s a detailed breakdown tailored for food photographers transitioning to drinks.
Cameras and Lenses
A camera with manual controls is essential for adjusting aperture, shutter speed, and ISO. Full-frame models excel in low light, while crop-sensor options suit budget-conscious shooters.
| Camera | Specifications | Price (USD) | Best For |
|---|---|---|---|
| Canon EOS R6 Mark II | 24.2MP full-frame, 40fps, 4K 60p, IBIS | ~$2,500 | Action shots like pours, low-light bars |
| Nikon Z6 II | 24.5MP full-frame, 14fps, 4K UHD, dual processors | ~$2,000 | Vibrant colors, dynamic range |
| Sony A7 IV | 33MP full-frame, 10fps, 4K 60p, advanced AF | ~$2,500 | High-resolution details for prints |
| Fujifilm X-S20 | 26.1MP APS-C, 8fps, 6K video, compact | ~$1,300 | Portable, budget-friendly quality |
Lenses should offer sharpness and versatility for close-ups or bokeh-heavy portraits.
| Lens | Specifications | Price (USD) | Best For |
|---|---|---|---|
| Canon RF 50mm f/1.8 STM | f/1.8 aperture, 50mm, compact, STM autofocus | ~$200 | Affordable bokeh for intimate shots |
| Nikon Z MC 105mm f/2.8 VR S | f/2.8 aperture, 105mm, 1:1 macro, stabilization | ~$1,000 | Close-ups of bubbles, garnishes |
| Sony FE 85mm f/1.8 | f/1.8 aperture, 85mm, fast AF, lightweight | ~$600 | Portrait-style cocktail shots |
| Sigma 70mm f/2.8 DG Macro Art | f/2.8 aperture, 70mm, 1:1 macro, HSM focus | ~$570 | Budget macro for intricate details |
Lighting and Modifiers
Lighting control is critical for cocktails. Natural light works for soft effects, but artificial setups ensure consistency.
- LED Panel: Godox SL-60W with softbox (~$150) for even, adjustable light.
- Strobe: Profoto B10 (~$1,600) for freezing motion in splashes.
- Reflectors/Flags: Neewer 5-in-1 (~$25) for bouncing light; black foam boards (~$10) to shape shadows.
- Polarizing Filter: B+W 67mm CPL (~$80) to reduce glass glare.
Accessories and Props
- Tripod: Manfrotto 055 Aluminum with Ball Head (~$300) for stable overheads or long exposures.
- Glassware: Highballs (~$25/6-pack), coupes (~$30/4-pack), rocks glasses (~$20/set).
- Styling Tools: Acrylic ice (~$15/bag), glycerin spray bottle (~$10), museum putty (~$5) for securing props.
- Backdrops: Vinyl marble (~$20/sheet) or rustic wood (~$15/plank).
Total starter kit cost: ~$1,200-$2,000.
Lighting Techniques for Stunning Cocktail Photos
Lighting is the heart of cocktail photography, defining texture, color, and mood. Master setups to highlight a drink’s clarity or create dramatic effects.
Natural vs. Artificial Light
Natural light from a north-facing window provides soft, diffused illumination—ideal for beginners. Use sheer curtains (~$15) as diffusers during golden hour for warm tones. Artificial light offers control, perfect for studio or restaurant shoots.
| Lighting | Pros | Cons | Best Cocktails |
|---|---|---|---|
| Natural Window | Soft, flattering glow | Time/Weather-dependent | Clear drinks like martinis |
| LED Softbox | Consistent, adjustable power | Requires setup (~10 min) | Layered drinks like pina coladas |
| Strobe with Modifier | Freezes motion, high output | Costly (~$500+) | Splashes, vibrant punches |
| Gels | Adds colored mood | Can distort drink color | Themed cocktails |
Key Lighting Setups
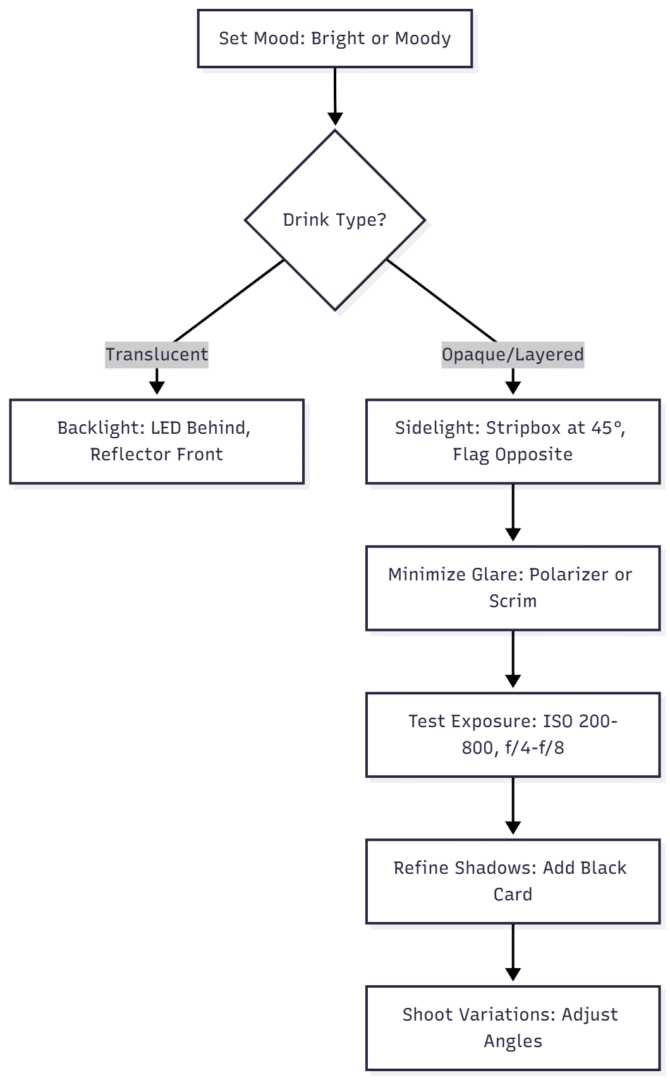
- Backlighting: Position light behind the drink (e.g., Godox softbox at 45°) to create a glowing halo, ideal for translucent cocktails. Reflect light back with a white board (~$10) to fill shadows.
- Sidelighting: Place light to the side (30-60°) for depth, emphasizing textures like condensation or citrus zest. Use a stripbox (~$50) for focused beams.
- Hard Light: Bare bulb for dramatic shadows or light prisms in cut glass. Angle high to avoid direct glare.
- Colored Gels: Apply sparingly (~$20/pack) for mood, e.g., blue gel for a tropical vibe.
Lighting Workflow:
Managing Reflections
Glassware reflects everything—lights, cameras, even you. Counter with:
- Polarizing Filters: Rotate to reduce glare (~$50-$100 based on lens size).
- Double Diffusion: Fire light through two softboxes or a scrim (~$30) for softer spread.
- Fog Window: Shoot during initial condensation (1-2 minutes post-chill) for a matte effect.
- Black Flags: Block stray reflections with foam boards (~$10).
Pro Tip: Use a lens hood (~$20) or trace reflections back to their source with a small mirror (~$5).
Composition Strategies for Engaging Cocktail Images
Composition transforms a drink into a visual narrative, balancing structure with creativity.
Foundational Techniques
- Rule of Thirds: Place the glass or garnish on grid intersections for dynamic balance.
- Negative Space: Use empty areas (e.g., white marble backdrop) to emphasize elegance.
- Leading Lines: Straws, bar spoons, or citrus peels guide the viewer’s eye.
- Layering: Add depth with foreground (e.g., scattered herbs) and background (e.g., shaker) elements.
| Technique | Application | Example | Benefit | Challenge |
|---|---|---|---|---|
| Rule of Thirds | Glass at left third | Martini with olive at intersection | Visual energy | Can feel predictable |
| Negative Space | Minimal props | Single highball on slate | Highlights drink | Risks emptiness |
| Leading Lines | Straw to rim | Mojito with mint sprig | Directs attention | Needs careful placement |
| Layering | Props at varying depths | Lemon peel in front, bar cart behind | Adds dimension | Avoids clutter |
Composition Decision Tree:
Adding Movement
Dynamic shots capture attention:
- Pours: Freeze with 1/500s shutter, ISO 800, and continuous autofocus.
- Splashes: Use high-speed sync strobe (~$400) at 1/2000s for crisp droplets.
- Swirls: Slight blur at 1/125s, ISO 400 for fluid motion.
Pro Tip: Use a dropper (~$5) for controlled splashes, testing on a stand-in glass.
Styling Hacks for Irresistible Cocktail Photos
Styling brings cocktails to life, blending realism with artistry to evoke flavor and mood.
Garnishes and Color Theory
Choose garnishes that complement the drink’s palette and enhance visual pop:
- Citrus: Dehydrated wheels (~$50 dehydrator) for texture in gin tonics.
- Herbs: Fresh mint or rosemary (~$3/bunch), stored in wet napkins for vibrancy.
- Rims: Salt or sugar (~$2/jar) for margaritas, applied with syrup for adhesion.
- Edible Flowers: Add elegance to spritzes (~$10/pack).
Use color theory: Pair orange drinks with blue backdrops or green garnishes with red cocktails for contrast.
| Garnish | Preparation | Best Cocktails | Cost (USD) |
|---|---|---|---|
| Citrus Twists | Zest with microplane, curl | Negronis | ~$5/lb fruit |
| Fresh Mint | Rinse, store in damp cloth | Mojitos | ~$3/bunch |
| Chili Salt Rim | Mix salt with chili powder | Spicy margaritas | ~$3/jar |
| Dried Lavender | Dry at 120°F for 2 hours | Lavender martinis | ~$8/oz |
Condensation and Ice Effects
Simulate dew with a 50/50 water-glycerin spray (~$10/bottle) for lasting condensation. Use acrylic ice (~$15/bag) for lighting tests, swapping for real ice during the final shot to avoid melt.
Styling Workflow:

Props and Backdrops
Select props that enhance the drink’s story without overpowering:
- Glassware: Vary shapes (coupes, highballs) for visual interest (~$20-$30/set).
- Surfaces: Marble (~$20/sheet) for elegance, wood (~$15/plank) for warmth.
- Bar Tools: Include shakers or strainers (~$15) for mixology context.
Pro Tip: Source vintage glassware from thrift stores (~$5/piece) for unique character.
Advanced Techniques: Action and Post-Production
Elevate shots with dynamic action and polished edits.
Capturing Action
- Pours: Use continuous shooting mode, 1/500s shutter, ISO 800, and a tripod (~$150) for stability.
- Splashes: High-speed strobe (~$400) at 1/2000s, ISO 1600 for frozen droplets.
- Composites: Shoot a clean base image, then add action layers (e.g., splash) in Photoshop (~$20/month).
| Action | Shutter Speed | ISO | Equipment | Tips |
|---|---|---|---|---|
| Pour | 1/500s | 800 | Tripod, LED | Focus on stream |
| Splash | 1/2000s | 1600 | Strobe | Use dropper for control |
| Swirl | 1/125s | 400 | Handheld | Slight blur for motion |
Post-Production Workflow
Edit for vibrancy and clarity:
- Import RAW files to Lightroom (~$10/month).
- Adjust white balance for accurate drink colors.
- Retouch glare or dust in Photoshop.
- Composite action shots (e.g., splash over base).
- Enhance contrast, vibrance, and sharpness.
- Export for web (sRGB, 72dpi) or print (CMYK, 300dpi).

Commercial and Restaurant Cocktail Photography
For professional shoots:
- Pre-Production: Create a shot list, mood board, and timeline (~1-2 hours prep). Share via email or apps like Slack (~$7/month).
- Pricing: Creative fee ($1,000-$3,000), plus licensing ($300-$800/image based on usage).
- Workflow: Coordinate with bartenders for fresh pours; shoot interiors first for context.
- Tips: Bring backup batteries (~$50) and memory cards (~$30) for long sessions.
Core Food Photography Principles Adapted for Cocktails
Rather than an exhaustive list, here are seven key principles reimagined for drinks:
- Texture Focus: Highlight bubbles, frost, or layered liquids with sidelighting, not just food surfaces.
- Storytelling: Use props like cocktail shakers or citrus peels to suggest a mixology narrative.
- Depth of Field Control: Shoot at f/2.8 for dreamy bokeh or f/11 for sharp details in layered drinks.
- Authentic Imperfections: Allow slight drips or scattered garnishes for realism.
- Color Contrast: Pair drink hues with complementary backdrops (e.g., blue for orange cocktails).
- Consistent Practice: Weekly shoots to develop a signature style, like moody backlit martinis.
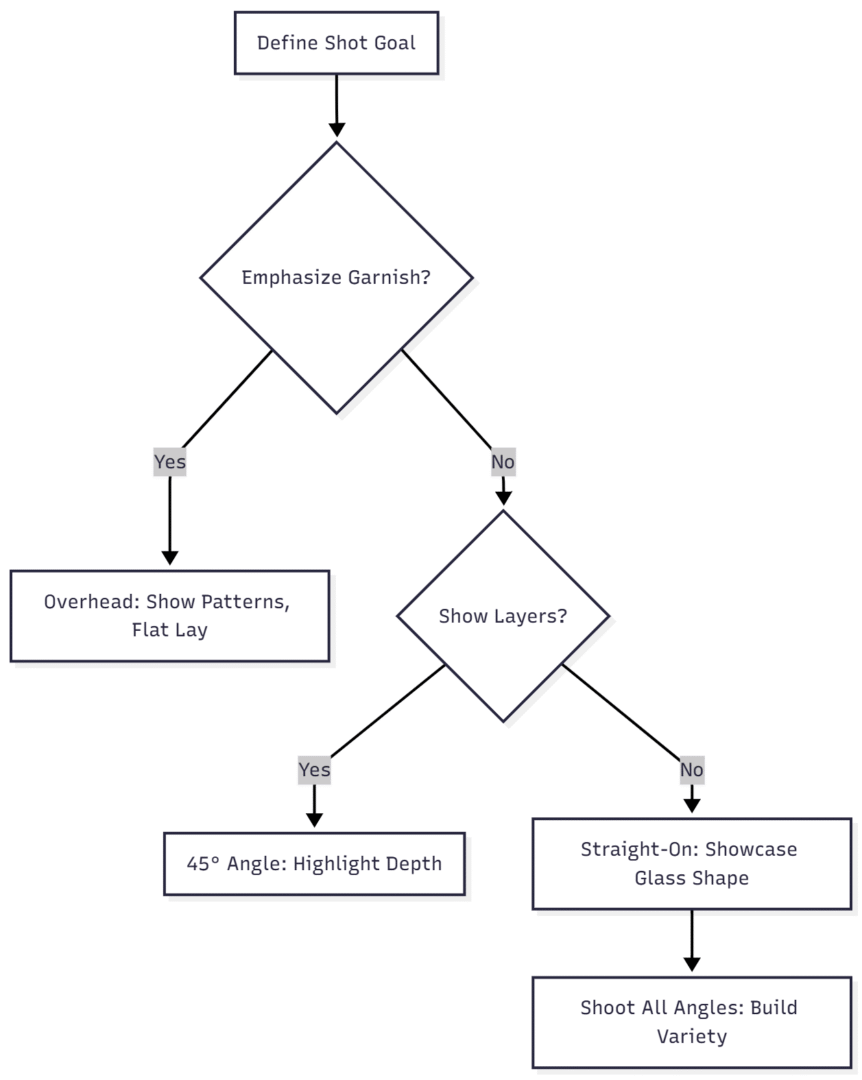
- Angle Exploration: Test overhead, 45°, and straight-on angles to find the drink’s best perspective.
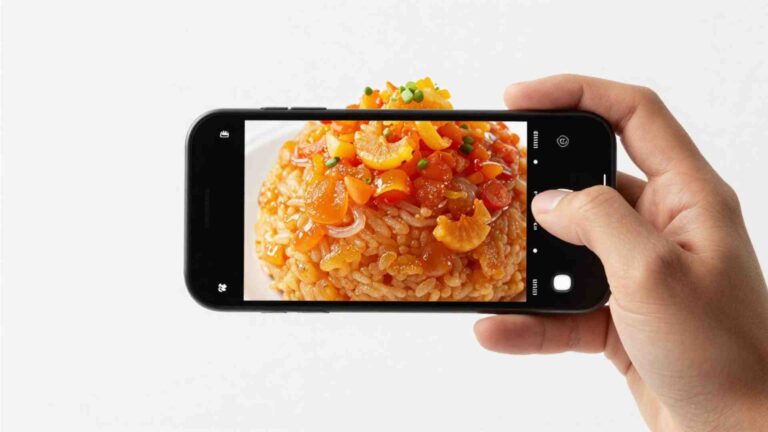
Mobile Cocktail Photography
For smartphone users:
- Lenses: Moment Macro (~$120) for close-ups, Wide (~$100) for context.
- Apps: Lightroom Mobile (free basic) or Snapseed (free) for editing.
- Stabilization: Joby GorillaPod (~$40) for steady shots.
- Lighting: Clip-on LED ring light (~$20) for small setups.
Cultivating a Creative Mindset
Embrace experimentation—try unconventional garnishes, bold lighting, or unique angles. Study professionals on platforms like X or Instagram for inspiration, analyzing their use of light and props. Dedicate time weekly to practice, treating mistakes as stepping stones. Keep a journal (~$10) to sketch ideas and track progress.
Frequently Asked Questions
A mirrorless camera like the Canon EOS R8 (~$1,500) or Nikon Z5 (~$1,300) with a 50mm f/1.8 lens (~$200) is ideal for sharp, vibrant shots with good low-light performance.
Use a polarizing filter (~$50), double diffusion (softbox + scrim, ~$30), or shoot during the glass’s “fog window” (1-2 minutes after chilling) to minimize reflections.
Backlighting with a softbox (~$150) creates a glowing effect for clear drinks, while sidelighting with a stripbox (~$50) highlights textures in layered cocktails.
Spray a 50/50 water-glycerin mix (~$10) on chilled glassware for lasting dew-like effects without melting ice.
Use a 45° angle for layered drinks, overhead for garnishes, or straight-on for elegant glass shapes, depending on the drink’s features.
Conclusion
Cocktail photography is a blend of technical mastery and creative storytelling. By honing lighting, composition, styling, and post-production, you’ll craft images that capture the spirit of each drink. Start with the basics, experiment relentlessly, and let your unique style shine—your next cocktail shot could be a masterpiece.
Please share this Cocktail Photography Tips for Food Photographers with your friends and do a comment below about your feedback.
We will meet you on next article.
Until you can read, Food Photography Composition Techniques