How to Create a Food Photography Set up in 6 Steps
Food photography doesn’t require a professional studio or thousands of dollars in gear. With the right setup process and a few key tools, you can create images that look polished, intentional, and magazine-worthy — right from your home.
The goal of a solid food photography setup isn’t complexity. It’s consistency. A reliable workflow frees your brain to focus on what matters: creative composition, thoughtful styling, and capturing food at its best.
Here’s a step-by-step breakdown of how to build your food photography setup from scratch.
Basic Gear You Need Before You Start
Before diving into the steps, make sure you have the essential equipment on hand. You don’t need everything at once, but this is the full working list:
| Gear Item | Purpose |
|---|---|
| Table, apple boxes, or crates | Stable base for your scene |
| Camera + lens | Capturing the image |
| Tripod | Consistent framing, hands-free styling |
| Backdrops (base + vertical board) | Background and surface texture |
| Props and test food | Scene styling and composition testing |
| Foam boards (white + black) | Light control and shadow management |
| Diffuser or sheer curtain | Softening harsh window light |
| Computer + tether cable (optional) | Real-time image review |
Step 1: Use a Table to Create Your Photography Scene
The foundation of any food photography setup is a stable, elevated surface. A dining table, work desk, or kitchen table all work well. If you don’t have a table, apple boxes or wooden crates are solid alternatives — as long as they’re sturdy.
Working on an elevated surface matters for several reasons. It puts your food at a height where natural light reaches it effectively. It allows you to shoot from multiple angles — overhead, 45 degrees, or straight on — without awkward positioning. And it protects your back from the strain of shooting off the floor for extended periods.
Avoid the floor where possible. It limits your angle options, strains your body, and typically puts you too far from your window light source.
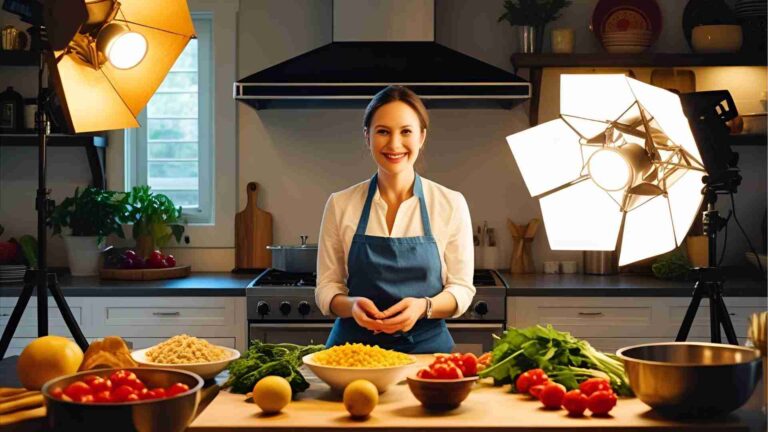
Step 2: Position Your Table Near a Light Source
Light is the single most important element in food photography. Natural window light is the most accessible and flattering source available, and knowing how to position yourself relative to it makes a dramatic difference.
The key principle here is the Inverse Square Law — the closer you are to your light source, the more powerful and directional it becomes. The ideal range for your table is anywhere from right at the window edge to roughly 1–2 meters (3–6 feet) away.
What to look for in a window light source:
- Side-lighting is best. Light coming in from the left or right of your subject creates dimension and highlights texture.
- Avoid overhead light coming from basement or skylight windows, as it flattens food and removes shadow depth.
- Diffused light on overcast days is ideal for soft, even coverage.
- Direct sunlight creates harsh contrast and moves quickly — use a sheer curtain or white foam board diffuser to manage it.
The window should be to the side of your table, not directly behind or in front of your camera. This setup creates depth, dimension, and texture that front-lit or flat-lit setups simply can’t achieve.
Step 3: Set Up a Tripod and Camera at Your Desired Angle
Food is a still-life subject. Unlike portrait or event photography, nothing is moving — which means you have every reason to use a tripod, and very few reasons not to.
A tripod gives you:
- Consistent framing across multiple shots and style adjustments
- Slower shutter speeds without motion blur, especially useful in lower light
- Hands-free shooting so you can reach into the frame and adjust props or garnishes without resetting the camera
Common shooting angles for food photography:
| Angle | Best Used For |
|---|---|
| 90° Overhead (flat lay) | Bowls, spreads, table scenes, pizza, charcuterie |
| 45° (eye level to dish) | Burgers, cakes, layered food, drinks |
| 25–35° (low angle) | Tall subjects, stacked food, dramatic perspective |
| Straight on | Beverages, product shots, glassware |
For flat lay overhead shots, you’ll need a tripod with a lateral arm extension that allows the camera to point straight down without the tripod legs appearing in frame. Not all tripods include this — check before you buy.
Step 4: Position Food Photography Backdrops to Make an ‘L’ Frame
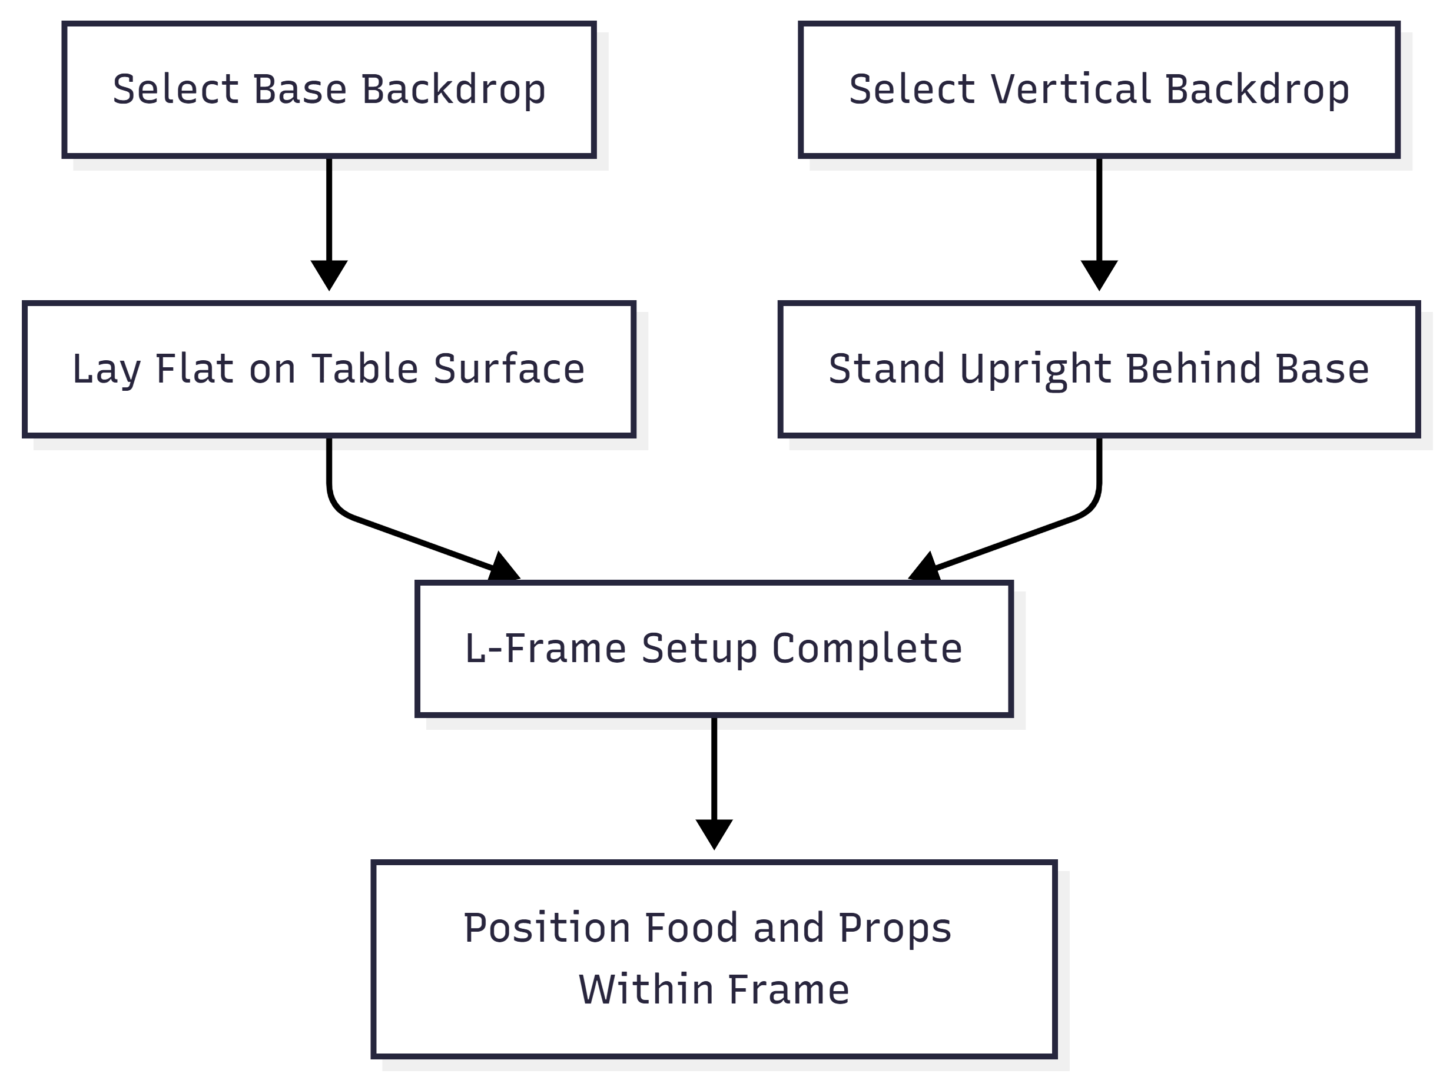
Backdrops are what give your food photography its visual context and mood. For most setups, you’ll need two surfaces: a base that sits flat on your table, and a vertical backdrop that stands behind your food to act as a wall.
Together, these two surfaces create what’s known as an ‘L’ frame — the same visual cue used in interior photography and film sets to simulate a corner of a room.
Backdrop material options and their characteristics:
| Material | Look | Best For |
|---|---|---|
| Vinyl | Consistent, easy to clean | Commercial, product work |
| Wood (real or faux) | Warm, rustic, textured | Casual, lifestyle food |
| Concrete/stone | Cool, modern, dramatic | Dark moody photography |
| Fabric/linen | Soft, light, layered | Minimal, airy aesthetic |
| Painted MDF boards | Customizable, matte | Versatile studio work |
When starting out, look for backdrop systems that include built-in legs or stands so the vertical board stays upright on the table without falling. Duo Boards from V-Flat World are a popular option among food photographers for their double-sided vinyl surfaces and easy-fit stands.
For overhead flat lay shots, you only need the base backdrop — no vertical board required.
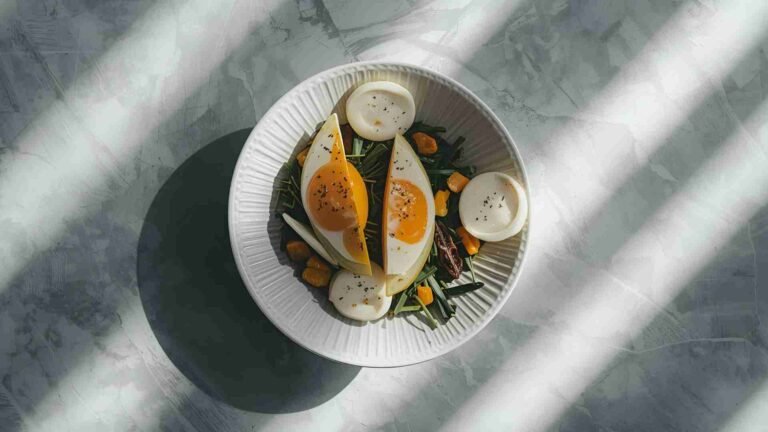
Step 5: Style Your Scene with Props and Test Food
With your backdrops in place, you can start building the composition. This is where food photography becomes as much about art direction as technical skill.
Start with test food, not your hero dish. Your hero food — the real, freshly prepared dish — should be saved for the final shots. Use a stand-in plate or prepared test version while you’re moving things around, adjusting props, and making composition decisions. This protects the real dish from wilting, melting, or losing its visual freshness while you work through the setup.
Prop selection principles:
- Choose props that match the mood or story of the dish, not just anything nearby
- Use cutlery, linens, and small ingredients (herbs, spices, raw components) to create context
- Avoid props that compete with the food — they should support it
- Create leading lines using cloth folds, scattered crumbs, or placed utensils that direct the viewer’s eye toward the main subject
Composition building is iterative. Take test shots throughout. Look at what’s working and what isn’t. Adjust scale, placement, and layering until the scene feels balanced and natural.
Step 6: Use Lighting Modifiers to Shape the Light
Once your composition is close to where you want it, the final step before adding the hero food is to refine your lighting. Modifiers are simple, inexpensive tools that give you significant control over how light behaves in your scene.
Core lighting modifiers and their functions:
| Tool | Function | Effect |
|---|---|---|
| White foam board | Reflects light back onto subject | Fills in shadows, brightens the dark side |
| Black foam board | Absorbs light | Deepens shadows, adds drama and contrast |
| Sheer curtain / diffusion panel | Softens direct light | Reduces harsh highlights and hard shadows |
| Reflector (silver/gold) | Bounces and intensifies light | Adds warmth or brightness to specific areas |
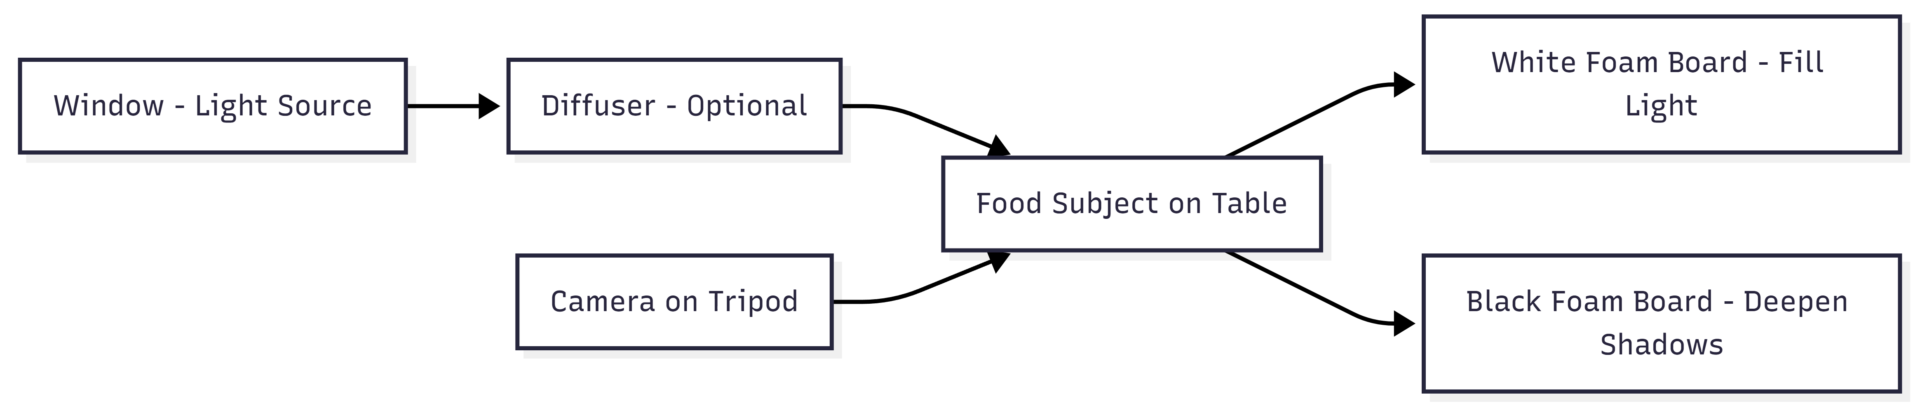
Position your white foam board on the opposite side of your subject from the window. This reflects light back into the shadow side, preventing it from going too dark. The closer you move the board to the subject, the stronger the fill effect.
If your window light is too harsh or producing strong shadows, hang a sheer curtain or clip a white diffusion panel to soften it before it hits your scene.
For artificial light setups, use continuous LED panels or speedlights with softboxes. Position your key light to mimic the same side-lighting angle you’d achieve with a window, and apply the same foam board principles on the opposite side.
Natural light changes throughout the day, so check your settings regularly and adjust your modifiers as needed if shooting over an extended session.
Bonus Step: Tether Your Camera to a Computer
Tethering means connecting your camera directly to a laptop or desktop so every photo you take appears immediately on your screen. Software like Capture One or Lightroom Classic supports tethered shooting with most DSLRs and mirrorless cameras.
Why tethering improves your photography:
- You can evaluate sharpness, composition, and exposure on a large screen in real time
- Catch mistakes (out-of-focus shots, crooked framing, missed details) immediately rather than after the shoot
- Useful for client work, allowing immediate review without guessing
- Reduces wasted shooting time and missed opportunities with fresh food
Tethering is not essential for beginners, but it becomes increasingly valuable as your work becomes more precise and professional.
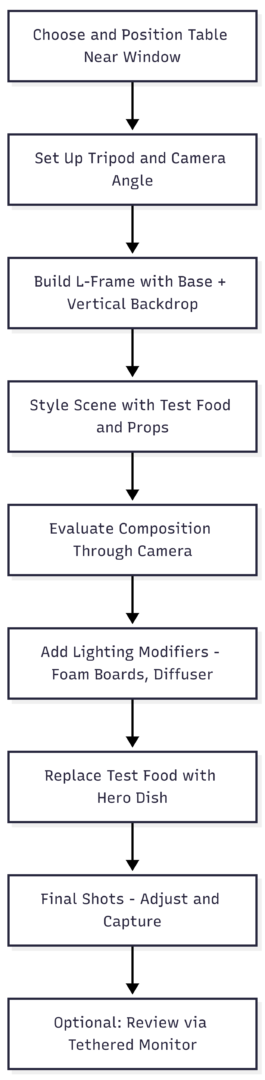
Putting It All Together: The Complete Setup Flow
Quick Reference: Food Photography Setup Checklist
| Step | Action | Priority |
|---|---|---|
| 1 | Set up stable table near window | Essential |
| 2 | Position table for side-lighting | Essential |
| 3 | Mount camera on tripod at chosen angle | Essential |
| 4 | Build L-frame with backdrops | Essential |
| 5 | Style scene with test food and props | Essential |
| 6 | Add foam boards and diffusers | Recommended |
| Bonus | Tether camera to computer | Optional |
Final Thoughts
A great food photography setup isn’t built in one day, and it doesn’t require a dedicated studio space. What it requires is a clear, repeatable process — one that gives you control over light, composition, and consistency so you can focus on the creative work.
Start with what you have. A table, a window, a camera, and a white foam board will get you further than you think. As you develop your eye and your workflow, you can invest in better backdrops, more sophisticated lighting modifiers, and tethering solutions.
The setup is the foundation. The creativity you bring to it is what makes the photograph.
Please share this How to Create a Food Photography Set up in 6 Steps with your friends and do a comment below about your feedback.
We will meet you on next article.
Until you can read, Why Screen Calibration Matters