How to Create Engaging Flat Lay Food Photos
Flat lay food photography involves arranging food and props on a flat surface and capturing the scene from directly overhead. This technique provides a clean, organized view that highlights the dish’s elements, making it ideal for social media, blogs, and restaurant marketing. It allows creators to tell a story through composition, drawing viewers in with vibrant details and emotional connections. Whether you’re a food blogger, restaurant owner, or social media enthusiast, mastering flat lays can elevate your content and boost engagement.
Essential Equipment for Overhead Shots
The foundation of successful flat lay photography lies in stable, high-quality gear. Without the right setup, achieving sharp, distortion-free images becomes challenging.
Tripod and Rig Options
A sturdy tripod is crucial for maintaining a 90-degree overhead angle without camera shake. Opt for models with a horizontal arm or boom extension to position the camera directly above the scene while keeping legs out of the frame.
Recommended tripods include the Manfrotto 055 carbon fiber 4-section model, praised for its rigidity, lightweight design (around 4.6 lbs), and Quick Power Lock levers for fast setup. It extends up to 66.9 inches and supports up to 19.8 lbs of load. Approximate price: $350-$400.
For more flexibility, consider a boom arm or overhead rig like those from Glide Gear or Proaim. These allow precise positioning over larger setups. Budget alternatives involve shooting on the floor, but for professional results, invest in a C-stand, such as the Manfrotto Combi-Boom Stand 420B, which doubles as a light stand. It features a boom arm extending up to 75 inches and supports counterweights for stability. Approximate price: $200-$250.
If you already own a standard tripod, add a horizontal arm accessory like the Manfrotto 131D, which clamps onto existing legs and extends the camera outward. Approximate price: $100.
For heavy-duty needs, the Manfrotto Heavy Duty Stand 126BSU offers robust support with a maximum height of 131 inches and load capacity of 44 lbs. Use it with super clamps and extension arms to create a custom overhead frame. Approximate price: $150.
To avoid tipping, always add counterweights (sandbags or similar) when extending arms horizontally.
Camera and Lens Recommendations
Use a DSLR or mirrorless camera for manual control and superior image quality. The Nikon D850 stands out with its 45.7MP full-frame sensor, 153-point autofocus, and 4K video capability, ensuring sharp details in food textures. Approximate price: $2,500 (body only).
For a more affordable option, the Nikon D750 offers a 24.3MP sensor, tilting LCD screen, and excellent low-light performance. Approximate price: $1,200 (body only).
Canon users might prefer the EOS 5D Mark III, with a 22.3MP sensor and durable build, or the EOS 6D Mark II for its 26.2MP sensor and vari-angle LCD, ideal for overhead previews. Approximate prices: $1,000-$1,500.
Lenses play a key role in capturing undistorted views:
- Prime Lenses: A 50mm f/1.8 (e.g., Canon EF 50mm f/1.8 STM or Nikon AF-S 50mm f/1.8G) provides sharp images with minimal distortion. It’s versatile for full-frame cameras and creates subtle bokeh. Approximate price: $100-$200.
- Macro Lenses: For detailed textures, a 100mm macro (e.g., Canon EF 100mm f/2.8L Macro IS USM) allows close-ups of ingredients. Approximate price: $900.
- Wide-Angle Lenses: A 24mm or 35mm (e.g., Canon EF 35mm f/1.4L II USM) fits broader scenes without edge distortion. Approximate price: $1,500-$1,800.
For crop-sensor cameras, adjust for the crop factor—a 35mm lens approximates a 50mm on full-frame.
Tethering tools, like a USB cable or app (e.g., Canon EOS Utility), let you control the camera from a laptop, adjusting settings without disturbing the setup.
Camera Settings Guide
Optimal settings ensure clarity and vibrancy:
- Aperture: f/5.6 to f/8 for sufficient depth of field, keeping the entire scene in focus.
- ISO: 100-400 to reduce noise, especially in well-lit setups.
- Shutter Speed: At least 1/125 second to prevent blur; use a tripod for slower speeds if needed.
For deeper depth of field in larger scenes, increase to f/11-f/16, but watch for diffraction.
Here’s a table summarizing recommended gear:
| Gear Type | Model Example | Key Specs | Approximate Price |
|---|---|---|---|
| Tripod | Manfrotto 055 Carbon Fiber | 66.9″ height, 19.8 lbs load | $350-$400 |
| Boom Arm Stand | Manfrotto Combi-Boom 420B | 75″ extension, counterweight support | $200-$250 |
| Camera | Nikon D850 | 45.7MP, 4K video | $2,500 |
| Prime Lens | Nikon AF-S 50mm f/1.8G | f/1.8 aperture, minimal distortion | $200 |
| Macro Lens | Canon EF 100mm f/2.8L | 1:1 magnification, image stabilization | $900 |
Mastering Lighting for Vibrant Flat Lays
Lighting transforms flat lays from dull to appetizing, emphasizing textures and colors.
Natural Lighting Techniques
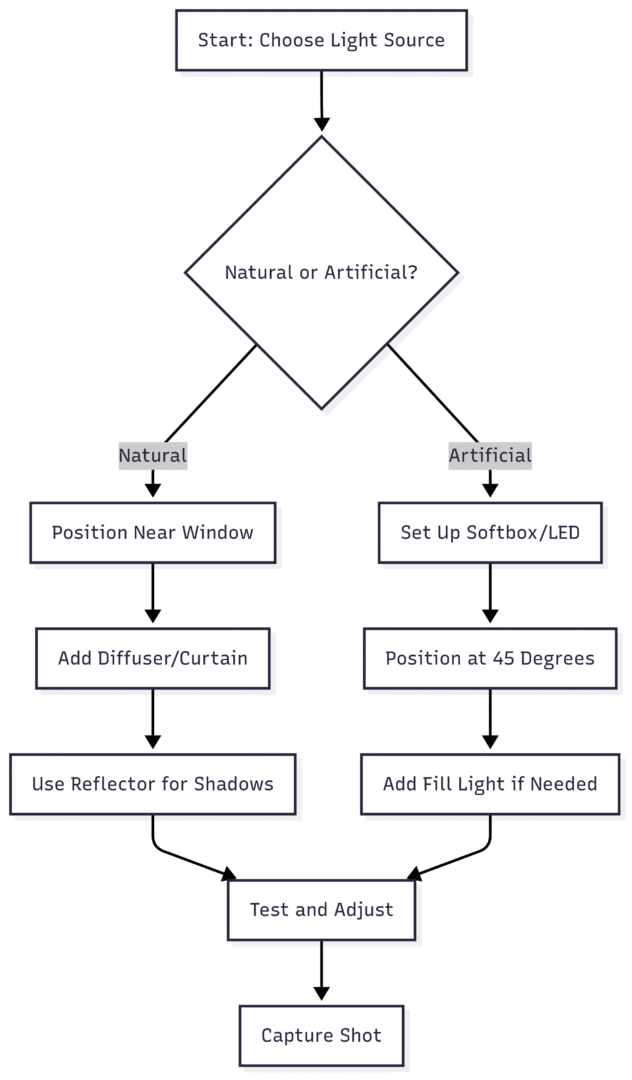
Natural light offers a soft, authentic glow. Shoot during morning or late afternoon for warm, diffused rays; avoid midday harshness.
Position near a large window, using sheer curtains as diffusers to soften shadows. Place the setup so light comes from the side or at a 45-degree angle for depth.
Use reflectors (white foam board or commercial models like a 5-in-1 reflector, approximate price: $20-$50) to bounce light into shadows. For larger scenes, multiple reflectors ensure even coverage.
Challenges like reflections on glass can be mitigated by slight angle adjustments or polarizers. Tall items casting shadows? Rearrange heights or use side lighting to highlight textures.
Artificial Lighting Setup
For consistent control, use artificial sources. Softboxes or LED panels (e.g., Godox FV200 continuous light, 200W output, approximate price: $300) mimic daylight.
Position at 45 degrees for dimension; add a second light as fill. Choose color temperatures: 3000K-4000K for warm, cozy moods; 5000K-6000K for fresh, natural tones.
Diffusers soften harsh light—place them between the source and scene. For even illumination in large setups, combine multiple lights or larger diffusers.
To visualize the lighting process, here’s a chart:
Composition and Styling: Building a Story
Engaging flat lays tell a recipe’s narrative through thoughtful arrangement.
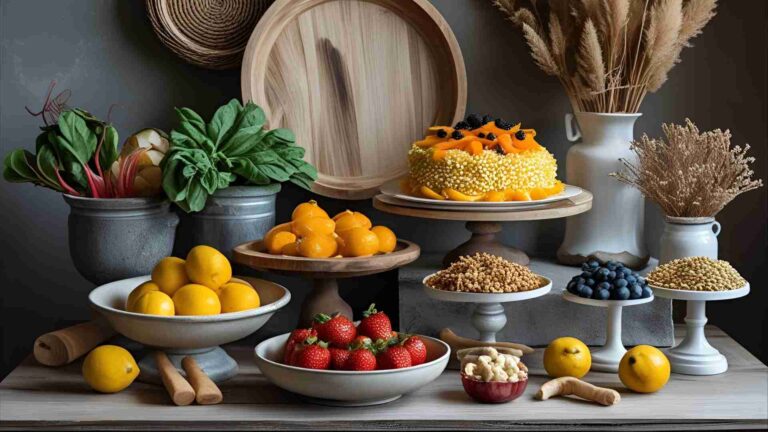
Selecting Backgrounds
Choose backgrounds that complement the food without overpowering it. Options include:
- Marble slabs for polished elegance.
- Wooden boards for rustic warmth.
- Dark slate for dramatic contrast.
- Textured linen or parchment for coziness.
Layer materials for depth, like wood under parchment. Neutral palettes keep focus on the dish; waterproof options prevent stains.
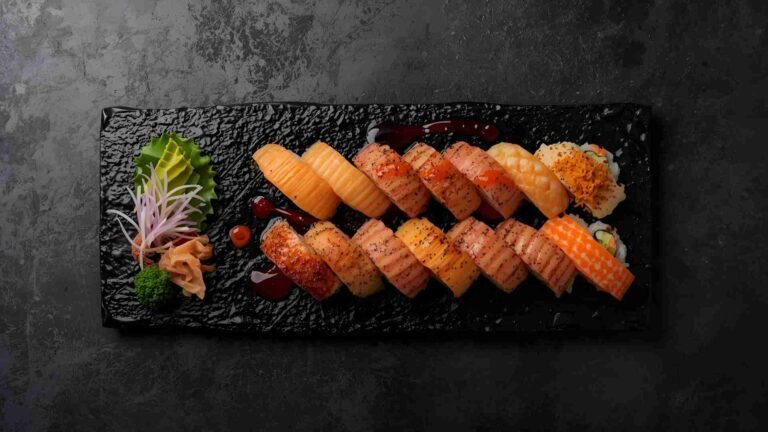
Props and Food Arrangement
Props enhance the theme: vintage utensils for rustic dishes, sleek tools for modern ones. Essentials include cutting boards, bowls, and spoons.
Incorporate raw ingredients—scattered herbs, spice trails, or flour dust—for action and texture. Add human elements like hands stirring for relatability.
Arrange in odd numbers for balance; use shapes like C-curves, S-curves, or triangles to guide the eye. Vary heights with stacks or elevated plates for dimension.
Avoid overcrowding; embrace negative space. For geometry, contrast shapes (circular food on square plates) and colors (analogous schemes for harmony).
Styling hacks: Use fresh ingredients for vibrancy; drizzle oils for shine; add crumbs for realism. Cut tall foods in half for flat lay suitability.
Shooting Techniques and Overcoming Challenges
Position the camera parallel to the scene using a bubble level. Compose with the rule of thirds via grid overlays.
Common challenges:
- Glare on surfaces: Reduce highlights or use polarizers.
- Uneven lighting: Multiple sources or reflectors.
- Flat textures: Side lighting to emphasize details.
Experiment with layers for depth; practice with inspiration from Pinterest or mood boards.
Post-Processing for Professional Polish
Editing refines raw shots. Use software like Adobe Lightroom or Photoshop.
Adjust exposure, contrast, and shadows for dimension. Apply presets: warm for baked goods, cool for desserts.
Crop strategically to highlight subjects; use vignettes for focus. Sharpen garnishes selectively; maintain natural colors.
Address issues like steam effects (enhance for freshness) or reflections (tone down).
Displaying Your Flat Lays
Integrate photos into blogs using tools like WP Recipe Maker for SEO-friendly recipe cards. It optimizes images, ensures responsiveness, and structures content.
For social media, repurpose shots to drive traffic. Platforms like Instagram favor flat lays for their storytelling potential.
By combining these elements, you’ll create flat lays that captivate and engage, turning simple overhead shots into powerful visuals. Practice consistently to refine your style.
Please share this How to Create Engaging Flat Lay Food Photos with your friends and do a comment below about your feedback.
We will meet you on next article.
Until you can read, 6 Best AI Recipe Generators: Our Top Picks