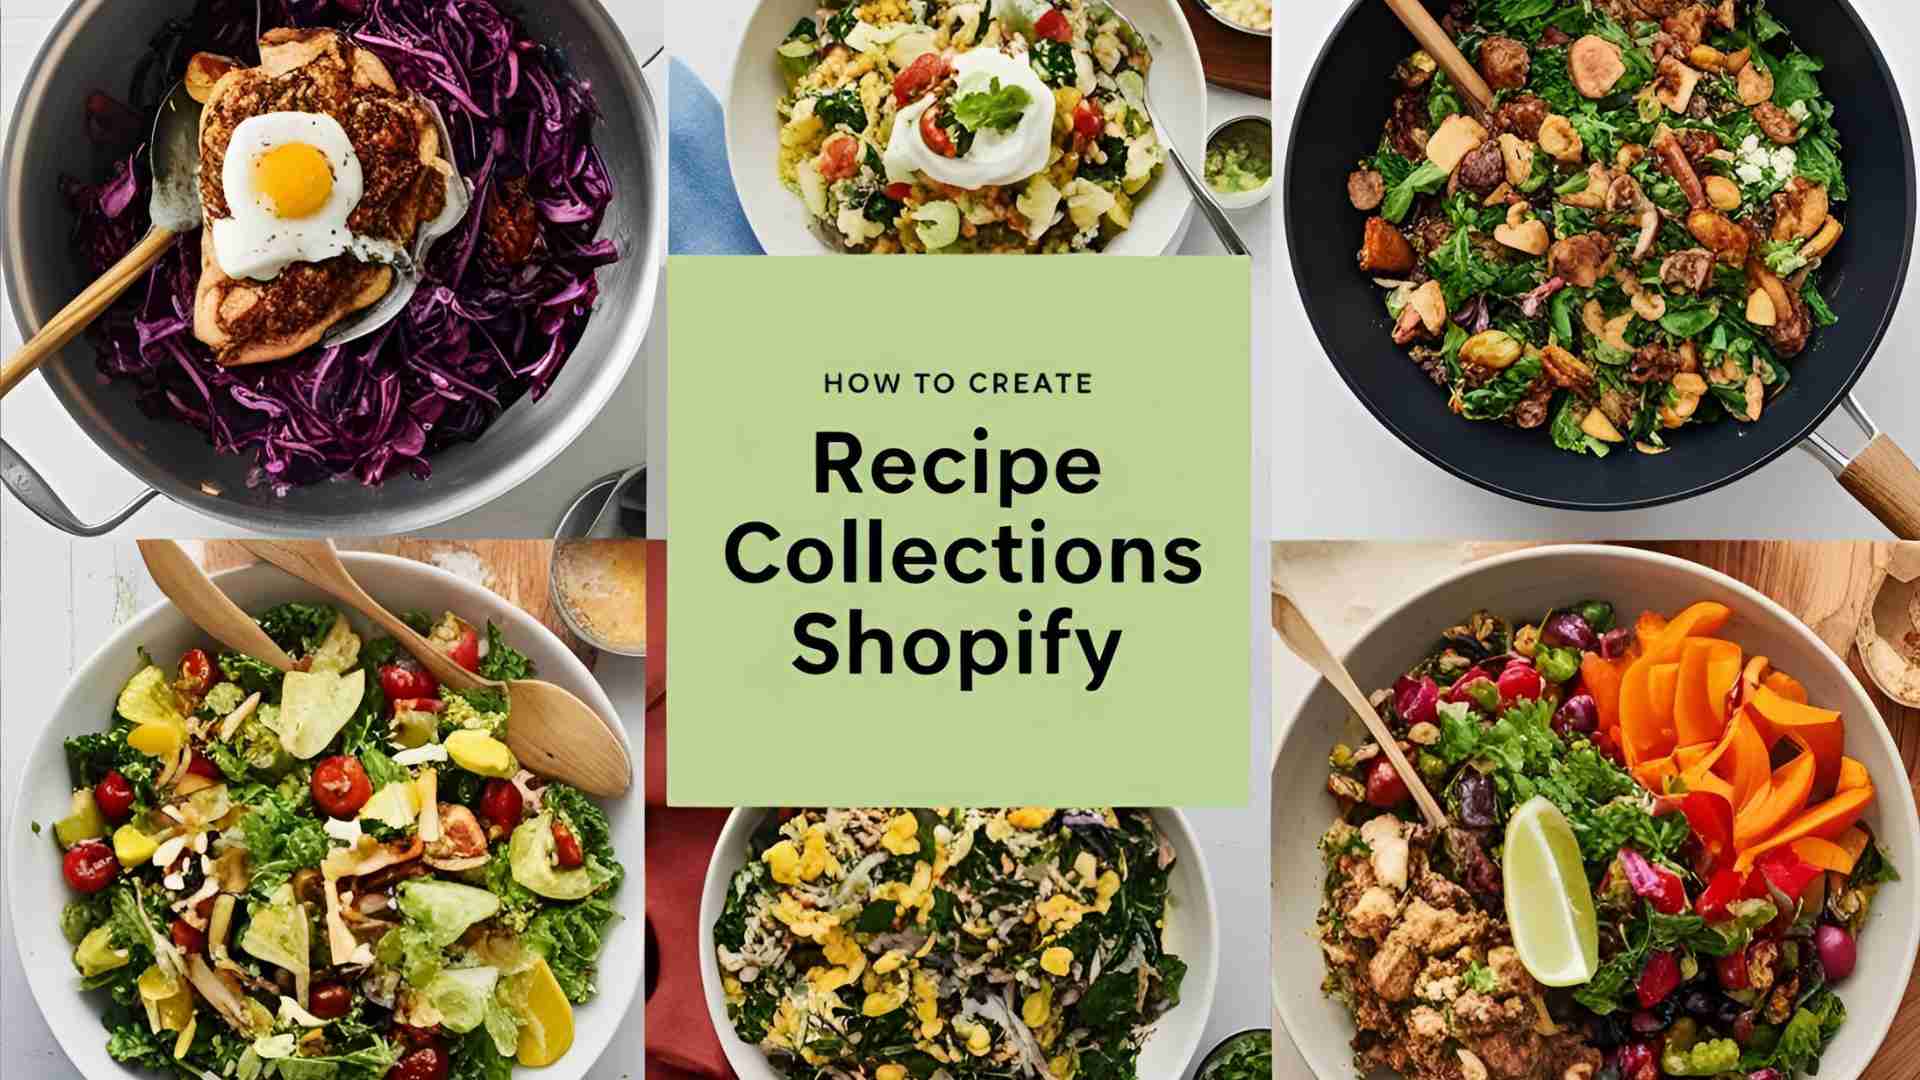
How to Create Recipe Collections in Shopify (Quick Tutorial)
Learn how to create recipe collections in Shopify with this detailed guide. Build a user-friendly recipe system, optimize for SEO, and boost sales effortlessly.
Creating a recipe collection system in Shopify is an excellent way to engage customers, showcase culinary content, and drive product sales. By organizing recipes into a structured, SEO-optimized, and visually appealing system, you can enhance user experience and increase conversions. This guide provides a step-by-step approach to building a recipe collection system in Shopify, addressing common challenges, exploring native solutions, and leveraging apps when necessary. Whether you’re a food blogger, a kitchenware retailer, or a grocery store owner, this tutorial will help you craft a seamless recipe experience on your Shopify store.
Why Recipe Collections Matter for Your Shopify Store
Recipes are powerful content tools for e-commerce businesses. They attract customers by offering valuable, engaging content that builds trust and encourages repeat visits. For stores selling food-related products—such as ingredients, cookware, or meal kits—recipes can directly link to products, driving sales. A well-structured recipe collection system:
- Enhances User Experience: Organizes recipes for easy navigation, helping customers find inspiration quickly.
- Boosts SEO: Leverages recipe schema markup to improve search engine visibility and attract organic traffic.
- Increases Sales: Connects recipes to products, encouraging customers to purchase ingredients or tools.
- Builds Brand Loyalty: Establishes your store as a go-to resource for culinary ideas, fostering customer trust.
This guide explores multiple approaches to creating recipe collections, including using Shopify’s blog system, products as recipes, and third-party apps like Recipe Kit. We’ll also address advanced customization and user-submitted recipe forms.
Approach 1: Using Shopify’s Blog System for Recipes
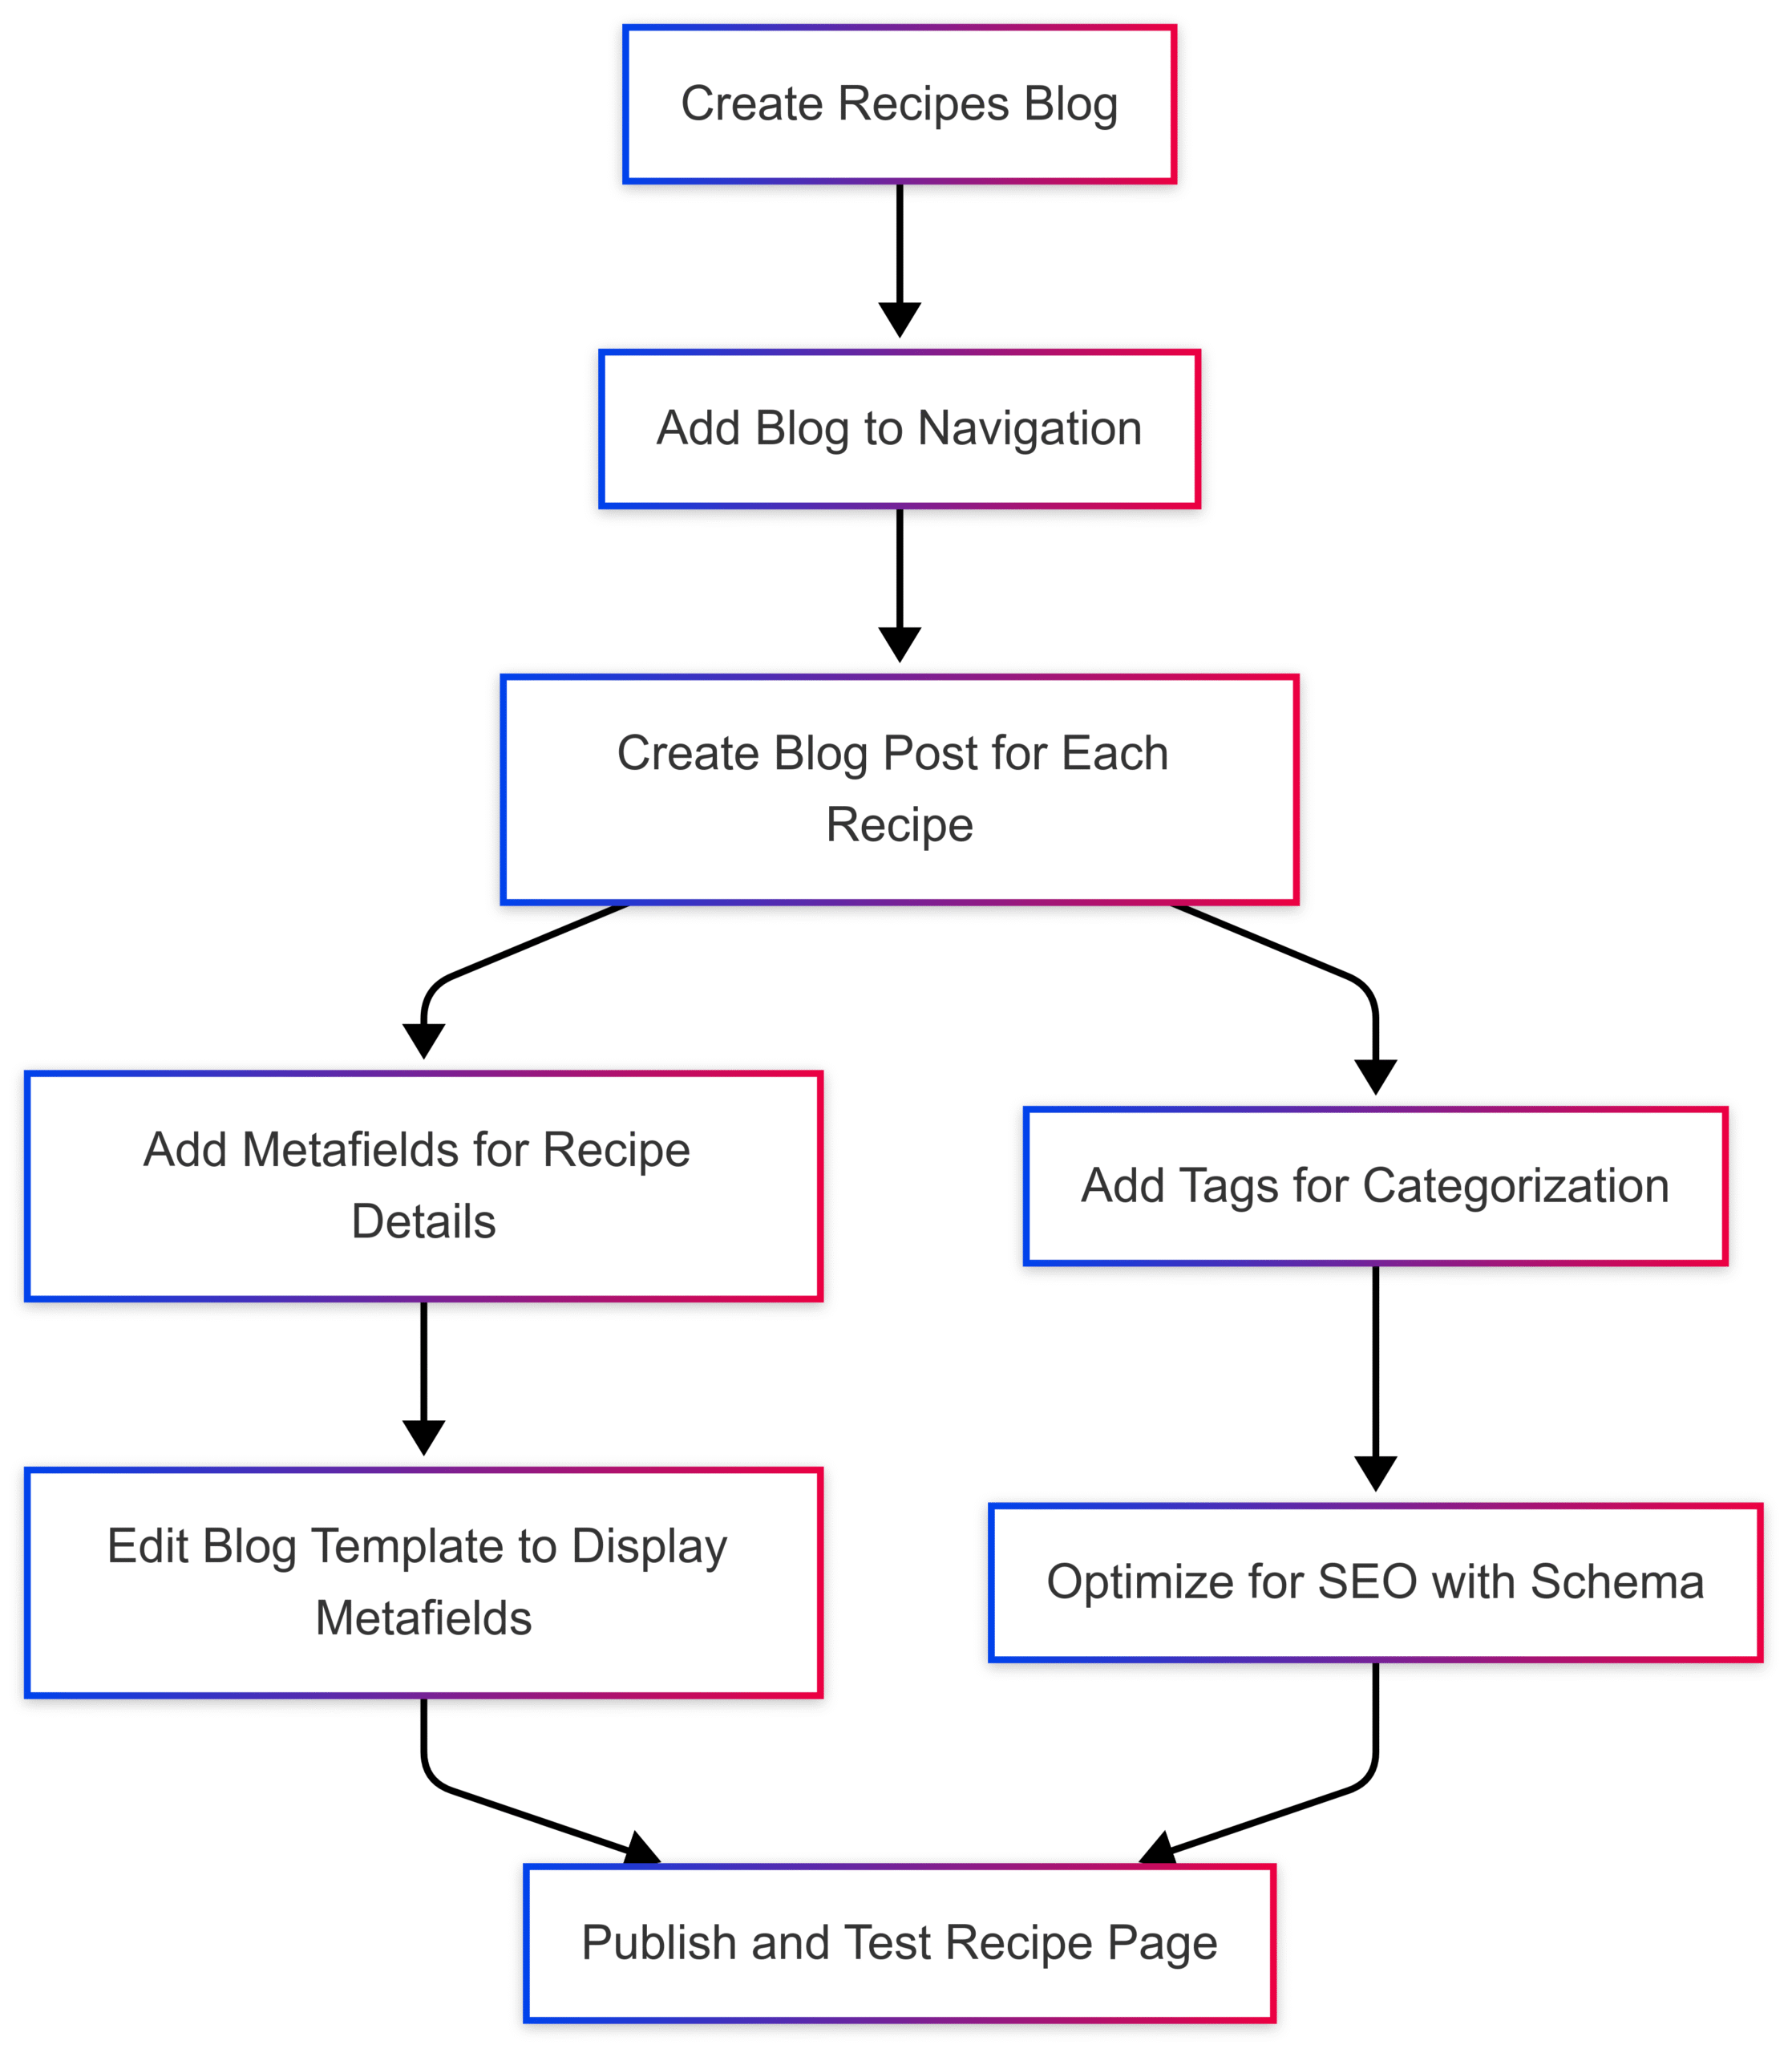
Shopify’s blog system is a flexible and native way to create a recipe collection without requiring extensive coding. By setting up a dedicated “Recipes” blog, you can organize recipes as blog posts, each linking to a detailed recipe page.
Step-by-Step Guide to Setting Up a Recipes Blog
- Create a Recipes Blog
- Navigate to your Shopify admin panel.
- Go to Online Store > Blog Posts > Blogs.
- Click Add Blog, name it “Recipes,” and save.
- This creates a dedicated blog for your recipes, accessible via a URL like
/blogs/recipes.
- Add the Blog to Navigation
- Go to Online Store > Navigation.
- Edit your main menu and add a new item linking to
/blogs/recipes. - This ensures customers can easily find your recipe collection from the homepage.
- Create Recipe Blog Posts
- In the Shopify admin, go to Online Store > Blog Posts.
- Click Add Blog Post and select the “Recipes” blog.
- Add the recipe title, description, and content (e.g., ingredients and instructions).
- Use tags like “Desserts,” “Vegan,” or “Quick Meals” for categorization.
- Upload a high-quality image of the dish to enhance visual appeal.
- Optimize for SEO
- In the blog post editor, click Edit Website SEO.
- Add a meta title (e.g., “Delicious Chocolate Cake Recipe | [Your Store Name]”) and meta description.
- Include keywords like “easy chocolate cake recipe” to improve search rankings.
- Use structured data (recipe schema) by embedding JSON-LD in the blog post’s HTML (requires coding or an app).
- Enhance with Visuals and CTAs
- Add a call-to-action (CTA) in the blog post, like “Shop Ingredients” or “Get the Tools,” linking to relevant products.
- Use high-quality images and consistent formatting for a professional look.
Pros and Cons of Using Blogs
| Pros | Cons |
|---|---|
| Native Shopify feature, no additional cost | Limited custom fields for recipe details (e.g., prep time, servings) |
| Easy to manage and update | No built-in recipe card functionality |
| Supports tags for categorization | Requires manual SEO optimization |
| SEO-friendly with proper setup | Limited interactivity without apps |
Addressing Custom Fields Limitation
Shopify’s blog system doesn’t natively support custom fields for recipe details like prep time, servings, or ingredient lists. To overcome this:
- Use Metafields: Shopify’s metafields allow you to add custom data to blog posts. Install a free app like Metafields Guru or use Shopify’s native metafield editor to create fields for:
- Prep Time
- Cooking Time
- Servings
- Difficulty Level
- Ingredient List
- Nutritional Information
- Display Metafields: Edit your blog post template (
blog.liquid) to display metafield data.
<div class="recipe-details">
  <p><strong>Prep Time:</strong> {{ article.metafields.recipe.prep_time }}</p>
  <p><strong>Servings:</strong> {{ article.metafields.recipe.servings }}</p>
</div>- Manual Formatting: If metafields aren’t an option, format the blog post content with HTML/CSS to create a recipe card-like structure.
Mermaid Chart: Blog-Based Recipe System Workflow
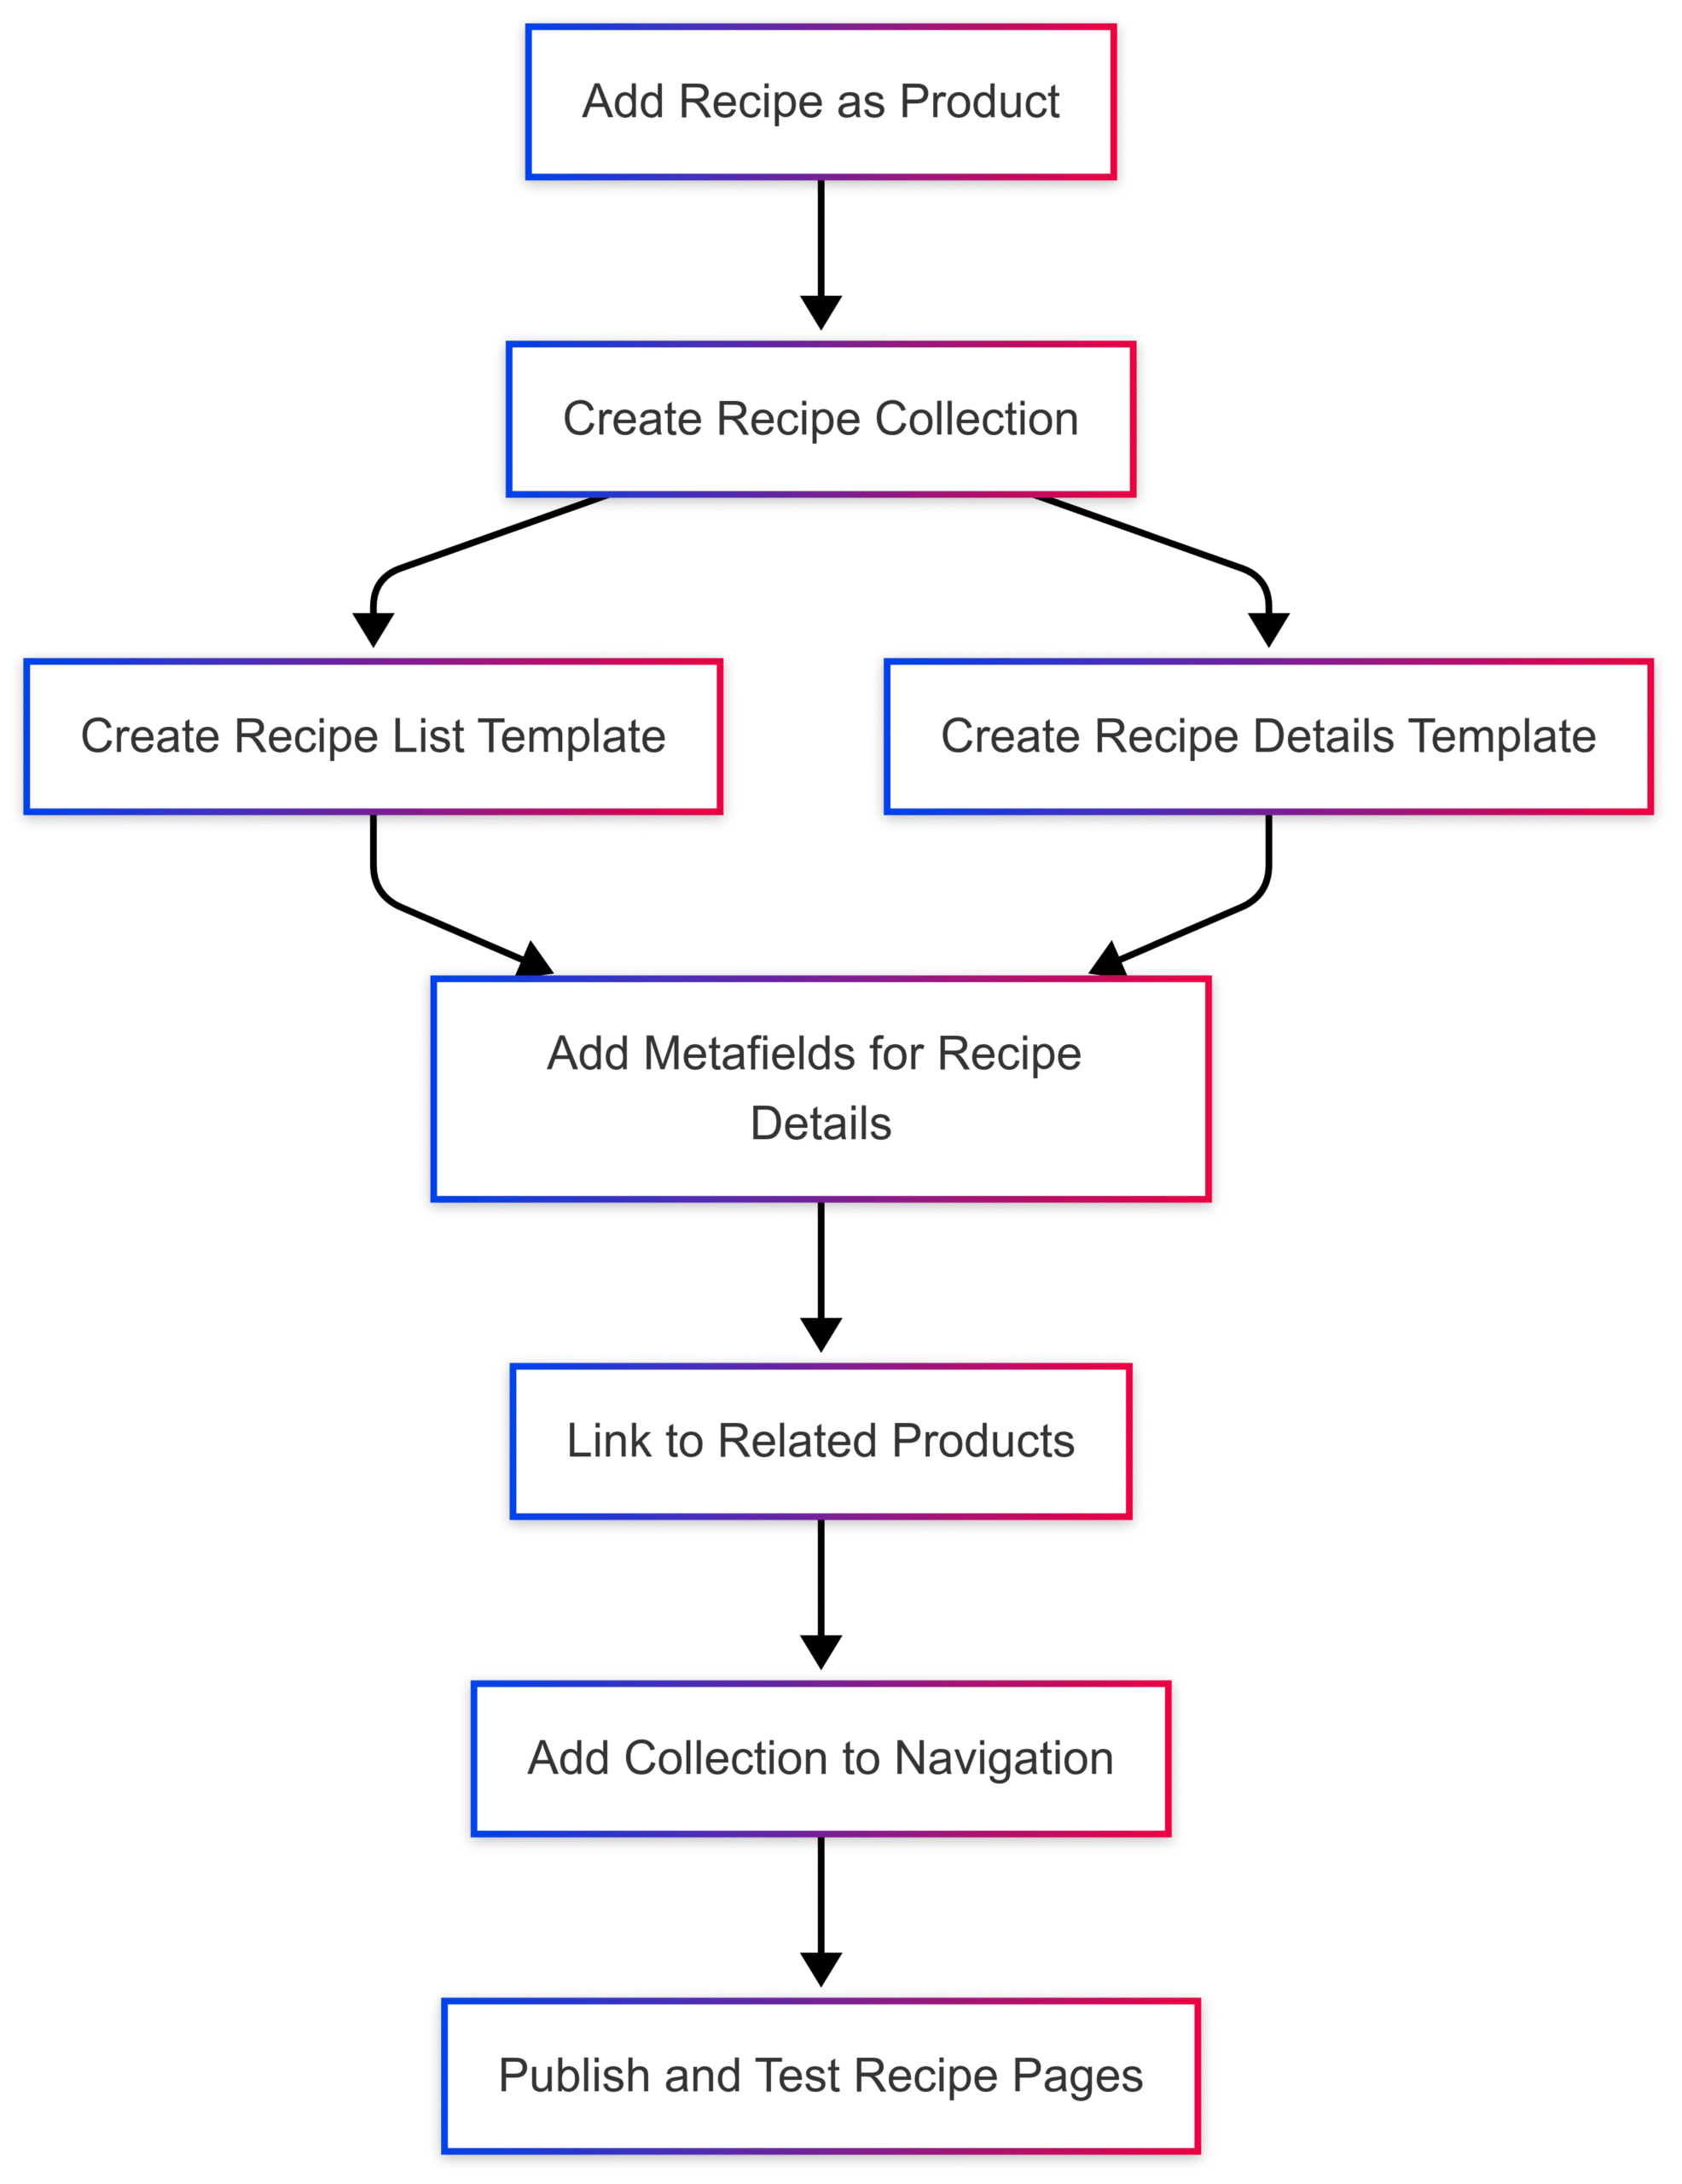
Approach 2: Using Shopify Products for Recipes
An alternative approach is to treat recipes as products in Shopify. This leverages the product object’s robust features, including variants, images, and descriptions, to create detailed recipe pages.
Step-by-Step Guide to Using Products for Recipes
- Create a Recipe as a Product
- Go to Products > Add Product in your Shopify admin.
- Enter the recipe name as the product title (e.g., “Classic Chocolate Chip Cookies”).
- Use the product description for the recipe’s main content (ingredients, instructions).
- Add images of the finished dish and preparation steps.
- Use product variants for options like serving sizes (e.g., “Small Batch,” “Family Size”).
- Set the price to $0 if the recipe is free, or assign a price for premium recipes.
- Organize Recipes into a Collection
- Go to Products > Collections > Create Collection.
- Choose Manual Collection for curated recipes or Automated Collection with conditions like a “Recipe” tag.
- Add all recipe products to the collection.
- Create a Recipe List Template
- Go to Online Store > Themes > Actions > Edit Code.
- Create a new template,
collection.recipe-list.liquid, to display all recipes in a grid. - Example code:
<div class="recipe-list"> {% for product in collection.products %} <div class="recipe-card"> <a href="{{ product.url }}"> <img src="{{ product.featured_image | img_url: 'medium' }}" alt="{{ product.title }}"> <h3>{{ product.title }}</h3> </a> </div> {% endfor %} </div>
- Create a Recipe Details Template
- Create a new template,
product.recipe.liquid, for individual recipe pages. - Use the product description for ingredients and instructions, and metafields for additional details.
- Example code:
<div class="recipe-details"> <h1>{{ product.title }}</h1> <img src="{{ product.featured_image | img_url: 'large' }}" alt="{{ product.title }}"> <div>{{ product.description }}</div> <p><strong>Prep Time:</strong> {{ product.metafields.recipe.prep_time }}</p> <p><strong>Servings:</strong> {{ product.metafields.recipe.servings }}</p> </div>
- Create a new template,
- Link to Products
- In the recipe description, include links to related products (e.g., ingredients or cookware) using HTML anchors.
- Example:
<a href="/products/flour">Buy Flour</a>.
- Add to Navigation
- Add the recipe collection to your main menu for easy access.
Pros and Cons of Using Products
| Pros | Cons |
|---|---|
| Leverages product object features (variants, images) | Recipes aren’t true products, which may confuse inventory management |
| Supports metafields for custom data | Requires custom templates for optimal display |
| Easy to link to related products | More setup effort than blogs |
| SEO-friendly with product schema | May clutter product catalog |
Chart: Product-Based Recipe System Workflow
Approach 3: Using Recipe Kit App
For a streamlined, no-code solution, the Recipe Kit app (available on the Shopify App Store) simplifies the process of creating recipe collections. It integrates with Shopify’s blog system and provides customizable recipe cards with SEO benefits.
Step-by-Step Guide to Using Recipe Kit
- Install Recipe Kit
- Visit the Shopify App Store and search for Recipe Kit.
- Click Install App and follow the setup instructions.
- Set Up the Recipes Blog
- Create a “Recipes” blog as described in Approach 1.
- Add it to your store’s navigation.
- Choose a Recipe Card Design
- During installation, select a recipe card design that matches your brand.
- Customize colors, borders, and fonts in the App Settings.
- New designs are released monthly, offering variety.
- Create a Recipe
- In the Recipe Kit dashboard, choose Create a New Blog Post or Attach to Existing Blog Post.
- Fill in recipe details: title, description, ingredients, instructions, author, category, and keywords.
- Link ingredients to Shopify products by clicking Attach Shopify Product.
- Save and Publish
- Save the recipe and click View Recipe to see it live on your blog post.
- Recipe Kit automatically adds SEO-friendly recipe schema for Google rich snippets.
- Repeat for Additional Recipes
- Create unlimited recipes by repeating the process.
Pros and Cons of Recipe Kit
| Pros | Cons |
|---|---|
| No coding required | Requires app subscription (pricing varies, check Shopify App Store) |
| SEO-optimized recipe cards | Dependency on third-party app |
| Easy product linking | Limited to blog-based structure |
| Print-friendly designs | Customization may require CSS knowledge |
Pricing
- Recipe Kit: Pricing details are available on the Shopify App Store. Typically, apps like Recipe Kit offer plans starting at $9.99/month, with a free trial. Check https://apps.shopify.com/recipe-kit for current pricing.
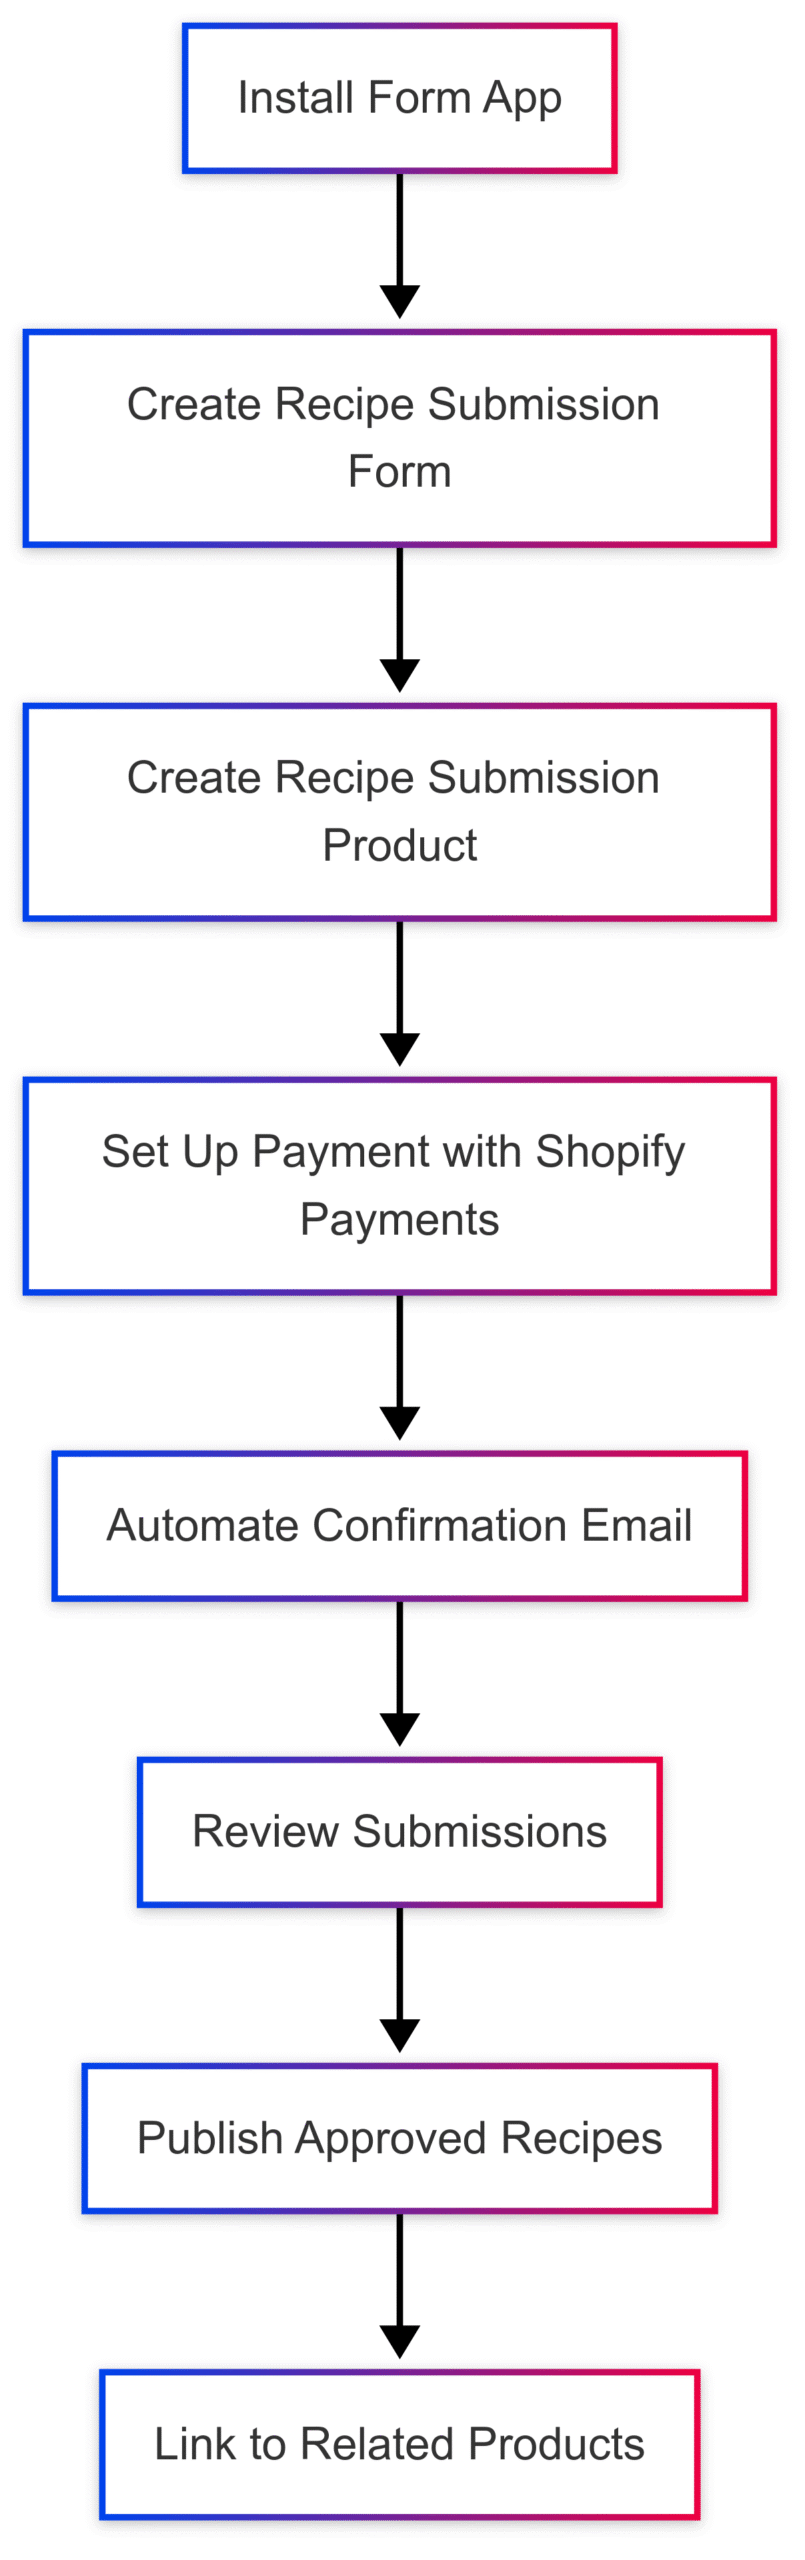
Approach 4: Handling User-Submitted Recipes
If you want customers to submit recipes and pay based on the dish’s appearance or taste, you’ll need a form to collect recipe details and a payment system. This can be achieved with Shopify apps like Helium Customer Fields or Uploadery.
Step-by-Step Guide to User-Submitted Recipes
- Install a Form App
- Use Helium Customer Fields (Shopify App Store) to create a custom form.
- Alternatively, use Form Builder or Uploadery for file uploads.
- Create a Recipe Submission Form
- In the app, create a form with fields:
- Recipe Name: Text input.
- Ingredients: Textarea for a list.
- Instructions: Textarea for step-by-step directions.
- Photo Upload: File upload for a dish image.
- Additional Notes: Optional textarea for comments.
- Customer Name/Email: For contact and confirmation.
- Example form structure:
<form> <label>Recipe Name</label> <input type="text" name="recipe_name" required> <label>Ingredients</label> <textarea name="ingredients" required></textarea> <label>Instructions</label> <textarea name="instructions" required></textarea> <label>Upload Photo</label> <input type="file" name="photo" accept="image/*"> <label>Additional Notes</label> <textarea name="notes"></textarea> <button type="submit">Submit Recipe</button> </form>
- In the app, create a form with fields:
- Set Up Payment
- Create a product called “Recipe Submission” with variants for pricing (e.g., $10 for basic, $20 for premium based on complexity).
- Require customers to purchase this product before accessing the form.
- Use Shopify Payments to handle transactions securely.
- Automate Confirmation
- Use Shopify’s email automation or an app like Klaviyo to send confirmation emails after submission.
- Example email template:
Subject: Thank You for Your Recipe Submission! Dear {{ customer.name }}, Thank you for submitting "{{ recipe.name }}". We’ll review your recipe and contact you soon! Best, [Your Store Name]
- Review and Publish
- Manually review submissions for quality.
- Publish approved recipes as blog posts or products, linking to related products.
Pros and Cons of User-Submitted Recipes
| Pros | Cons |
|---|---|
| Engages customers and builds community | Requires manual review for quality control |
| Monetization potential | App costs for form functionality |
| Unique content for SEO | Risk of low-quality submissions |
| Encourages repeat visits | Additional setup complexity |
Pricing
- Helium Customer Fields: Starts at $9/month (check Shopify App Store).
- Uploadery: Starts at $19.99/month (check Shopify App Store).
- Shopify Payments: Standard transaction fees apply (e.g., 2.9% + $0.30 per transaction for Basic plan).
Chart: User-Submitted Recipe Workflow
Best Practices for Recipe Collections
- Optimize for SEO
- Use keyword-rich titles and descriptions (e.g., “Easy Vegan Dinner Recipes”).
- Implement recipe schema markup for rich snippets (manually or via Recipe Kit).
- Add internal links to related products or blog posts.
- Use High-Quality Imagery
- Include professional photos of dishes to attract clicks.
- Optimize images for fast loading (use formats like WebP).
- Enable Filtering
- Use tags (e.g., “Gluten-Free,” “30 Minutes”) for easy navigation.
- For product-based recipes, add filters like price or category in the collection template.
- Consistent Design
- Maintain a uniform layout for recipe cards (use Recipe Kit or custom CSS).
- Ensure mobile responsiveness for over 50% of Shopify traffic.
- Add Trust Factors
- Include customer reviews or ratings for recipes.
- Display badges like “Best Seller” or “Customer Favorite.”
- Simplify Navigation
- Add recipe collections to the main menu.
- Use breadcrumbs (e.g., Home > Recipes > Desserts) for easy backtracking.
Troubleshooting Common Issues
- Recipes Not Displaying Correctly
- Cause: Incorrect template or metafield setup.
- Solution: Verify
collection.recipe-list.liquidandproduct.recipe.liquidtemplates. Check metafield definitions in Shopify admin.
- SEO Not Effective
- Cause: Missing schema markup or poor keyword strategy.
- Solution: Use Recipe Kit for automatic schema or manually add JSON-LD. Research keywords with tools like Google Keyword Planner.
- Form Submissions Not Working
- Cause: App misconfiguration or theme conflict.
- Solution: Reinstall the app and test with a default Shopify theme. Check form code for errors.
Conclusion
Creating recipe collections in Shopify is a powerful way to engage customers, boost SEO, and drive sales. By using Shopify’s blog system, treating recipes as products, or leveraging apps like Recipe Kit, you can build a user-friendly and visually appealing recipe system. For user-submitted recipes, apps like Helium Customer Fields or Uploadery provide robust form functionality, while Shopify Payments ensures secure transactions. Follow best practices like SEO optimization, high-quality imagery, and intuitive navigation to maximize impact. Experiment with these approaches to find the best fit for your store, and watch your recipe content become a key driver of customer loyalty and revenue.
Please share these How to Create Recipe Collections in Shopify (Quick Tutorial) with your friends and do a comment below about your feedback.
We will meet you on next article.
Until you can read, How To Do Food Blog Keyword Research