How To Share A Recipe Properly – Step By Step Instructions
Learn how to share recipes properly with our step-by-step guide. Respect copyright, credit bloggers, and use tools like WP Recipe Maker to share ethically.
Sharing recipes online is a powerful way to connect with food enthusiasts, preserve cherished family dishes, and build a community around your culinary creations. However, with the ease of copying content online, it’s critical to share recipes ethically and legally to respect the original creators. Improper sharing can lead to copyright violations, strained relationships within the blogging community, and loss of trust among readers. This guide provides detailed, step-by-step instructions on how to share recipes properly, whether you’re a food blogger, a home cook, or a recipe enthusiast. We’ll cover legal considerations, ethical practices, tools like WP Recipe Maker, and collaborative recipe management systems to streamline your sharing process.
Why Sharing Recipes Properly Matters
The internet has made recipe sharing effortless, but it’s also increased the risk of plagiarism and unauthorized use of content. Food bloggers invest significant time and resources into creating original recipes, writing instructions, and capturing high-quality photos. Copying their work without permission or proper credit undermines their efforts and can violate copyright law. By sharing recipes correctly, you:
- Respect Creators: Acknowledge the hard work of bloggers and home cooks.
- Build Trust: Ethical sharing fosters goodwill and strengthens the food blogging community.
- Avoid Legal Issues: Copyright laws protect written instructions, photos, and creative content.
- Enhance Your Reputation: Originality and integrity make your blog or social media presence stand out.
This guide ensures you share recipes in a way that’s both legal and respectful, while also exploring tools to make sharing collaborative and efficient.
Step-by-Step Instructions for Sharing a Recipe Properly
1. Understand Copyright and Ownership
Before sharing a recipe, it’s essential to understand what’s protected under copyright law:
- Ingredients Lists: These are not copyrightable, as they’re considered factual data. You can copy an ingredient list verbatim, but doing so without credit may still upset the original creator. Always use discretion and consider linking back to the source.
- Instructions: Recipe instructions are protected under copyright law, as they reflect the creator’s unique expression. Copying them word-for-word without permission is illegal. Instead, rephrase instructions in your own words or link to the original source.
- Photos: Photos are the intellectual property of the photographer. Using them without permission is a clear violation of copyright law. Always check the blogger’s photo use policy or request permission via email. Never edit or add text to someone else’s photo without explicit consent.
Action Step: Before sharing, visit the blogger’s website and look for a copyright or terms-of-use page. If none exists, email them to ask for permission to use their content or photos.
2. Write an Original Introduction
When sharing a recipe, always write your own introduction in your own words. This sets the tone for your post, provides context, and shows your unique perspective. For example, you might explain why you chose the recipe, how it fits into your cooking style, or a personal anecdote related to the dish. Copying the original blogger’s introduction is not only unethical but also diminishes your authenticity.
Example Introduction:
I recently discovered a fantastic vegan lasagna recipe on [Original Blog Name]. It’s packed with fresh vegetables and a creamy cashew sauce that’s perfect for a cozy family dinner. I adapted it slightly to suit my pantry, and I’m excited to share my version with you, with full credit to the original creator.
Action Step: Craft a 100–150-word introduction that reflects your voice and experience with the recipe. Include a link to the original source for transparency.
3. Share Ingredients Ethically
If you must include the ingredient list, you can legally copy it from the original source. However, to maintain good relationships within the blogging community, consider these best practices:
- Credit the Source: Mention the original blogger and link to their recipe. For example, “This ingredient list is from [Original Blog Name]’s delicious [Recipe Name].”
- Adapt Sparingly: If you make minor changes (e.g., substituting honey for maple syrup), note them but don’t claim the recipe as your own. Acknowledge the original source.
- Use Your Conscience: Even though copying ingredients is legal, doing so excessively without credit can harm your reputation in the tight-knit blogging community.
Action Step: List the ingredients in your post, clearly crediting the original source with a clickable link. If you’ve made changes, note them explicitly.
4. Link to Original Instructions
Never copy and paste a recipe’s instructions. Instead, provide a link to the original source where readers can access the full recipe. Use clear, inviting language like:
- “Get the full instructions for this amazing recipe here: [Link to Original Recipe].”
- “Visit [Original Blog Name] for the step-by-step guide to this delicious dish.”
This approach respects copyright law, drives traffic to the original creator, and keeps your content ethical. If you’ve adapted the recipe significantly, you can write your own instructions, but still credit the original source for inspiration.
Action Step: Include a prominent link to the original recipe’s instructions in your blog post or social media share.
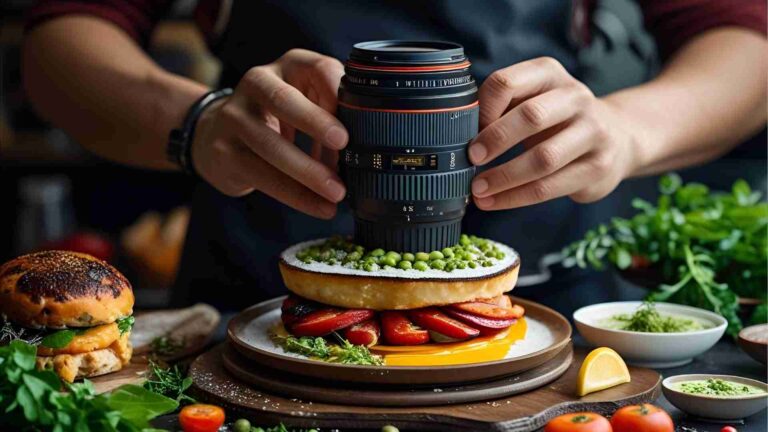
5. Handle Photos with Care
Photos are a critical component of recipe sharing, but they’re also the most legally sensitive. Here’s how to handle them:
- Request Permission: Always ask the original creator for permission to use their photos. Most bloggers are open to sharing if their watermark remains intact and you link back to their site.
- Use Your Own Photos: Ideally, prepare the recipe yourself and take your own photos. This ensures originality and avoids legal complications.
- Avoid Editing: Never alter someone else’s photo (e.g., adding text or filters) unless you have explicit permission. Doing so violates copyright law and can damage your reputation.
Action Step: If using someone else’s photo, email the creator for permission and ensure their watermark is visible. Better yet, create your own high-quality images.
6. Adapt Recipes Thoughtfully
Adapting a recipe is a great way to put your spin on a dish, but it requires care:
- Make Significant Changes: A true adaptation involves more than swapping one ingredient (e.g., honey for maple syrup). Adjust multiple ingredients, techniques, or flavors to create something new.
- Credit the Original: Always mention the original recipe and link to it. For example, “Inspired by [Original Blog Name]’s chocolate chip cookies, I added espresso powder and swapped almonds for walnuts.”
- Write Original Instructions: Even if you adapt the recipe, write the instructions in your own words to avoid copyright issues.
Action Step: Document your changes clearly and provide a link to the original recipe for transparency.
7. Share Responsibly on Social Media
Social media platforms like Instagram, Pinterest, and Facebook are powerful for sharing recipes, but they come with strict rules:
- Don’t Post Full Recipes: Never share a complete recipe (ingredients and instructions) on social media, as this violates copyright law and platform policies. Instead, share a teaser photo and a link to the original recipe.
- Use Links: Always link to the original blog post or website. For example, post a photo with a caption like, “This creamy pasta dish from [Original Blog Name] is a must-try! Find the recipe here: [Link].”
- Avoid Claiming Ownership: Never post someone else’s photo or recipe as your own. This can lead to account suspensions and damage your credibility.
Action Step: Share a link to the original recipe on social media, accompanied by a brief description and a high-quality photo (yours or with permission).
8. Use Tools Like WP Recipe Maker for Professional Sharing
For food bloggers, tools like WP Recipe Maker simplify the process of sharing recipes on a WordPress website. This plugin offers features that enhance user experience and ensure your recipes are shareable and SEO-friendly:
- Customizable Templates: Create visually appealing recipe cards with pre-built or custom templates.
- Adjustable Servings: Allow readers to scale ingredient quantities based on serving size.
- Media Integration: Add photos or videos to each recipe step for clarity.
- SEO Optimization: Automatically generate recipe metadata to improve search engine rankings.
- Share Buttons: Enable readers to share recipes on platforms like Pinterest, Facebook, and Twitter with one click.
- Shoppable Links: Include affiliate links for ingredients or equipment to monetize your content.
Pricing for WP Recipe Maker:
| Plan | Price (One-Time) | Features Included |
|---|---|---|
| Pro Bundle | $49 | Basic recipe templates, SEO metadata, share buttons |
| Premium Bundle | $99 | Advanced templates, recipe collections, adjustable servings |
| Elite Bundle | $149 | All features, plus shoppable links, video integration, and premium support |
Action Step: Install WP Recipe Maker on your WordPress site and follow the setup guide to create professional recipe cards. Compare pricing plans at WP Recipe Maker’s website to choose the best option.
Collaborative Recipe Management Systems
For those looking to share recipes collaboratively with family, friends, or communities, a dedicated recipe management system can streamline the process. Based on user requirements for sharing groups, categorization, media support, and ease of use, here are some recommended platforms:
1. ForYouEats
Overview: ForYouEats is a free recipe management platform designed for collaborative sharing. It supports private and public recipes, making it ideal for family or friend groups.
Features:
- Sharing Groups: Create private “Foodie Friends” groups to share recipes selectively.
- Categories/Tags: Organize recipes with labels like “Christmas” or “Air Fryer.”
- Collaboration: Share shopping lists via “Pantry Pals” and collaborate on potluck planning.
- Recipe Import: Import recipes from websites (limited functionality).
- Media Support: Upload photos; video support is limited.
- Mobile App: Basic mobile interface, no “screen always on” feature yet.
- Price: Free, with potential future ads or premium options to remove them.
Pros: Free, user-friendly, supports private sharing.
Cons: Limited media support, no translation feature.
Action Step: Sign up at ForYouEats.com and create a private group for your family or friends.
2. Paprika
Overview: Paprika is a robust, paid recipe management app with strong collaboration features. It’s ideal for recipe enthusiasts who want advanced functionality.
Features:
- Sharing Groups: Share recipes via email or cloud sync with family and friends.
- Categories/Tags: Organize recipes with custom categories and tags.
- Collaboration: Sync recipes across devices for collaborative editing.
- Recipe Import: Import recipes from websites or scan printed recipes with OCR.
- Media Support: Supports photos and links to videos.
- Mobile App: Intuitive app with a “screen always on” option for cooking.
- Price: $4.99 per device (one-time payment).
Pros: Comprehensive features, reliable OCR scanning, cross-platform support.
Cons: Paid per device, no built-in translation.
Action Step: Download Paprika from PaprikaApp.com and set up a shared recipe folder.
3. Notion
Overview: Notion is a versatile productivity tool that can be adapted for recipe management. It’s free for basic use and supports collaboration.
Features:
- Sharing Groups: Create shared workspaces for family or friends.
- Categories/Tags: Use databases to categorize recipes with tags like “BBQ” or “Vegan.”
- Collaboration: Real-time editing and commenting for group input.
- Recipe Import: Manual import via text or images; no automated scanning.
- Media Support: Upload photos, videos, or links to TikTok/YouTube.
- Mobile App: User-friendly app, but no “screen always on” feature.
- Price: Free for basic use; $10/month for premium features.
Pros: Flexible, free tier, supports multiple media types.
Cons: Not recipe-specific, requires setup for recipe management.
Action Step: Create a Notion workspace at Notion.so and build a recipe database with shared access.
4. Google Drive
Overview: Google Drive is a free, cloud-based solution for collaborative recipe sharing, though it lacks recipe-specific features.
Features:
- Sharing Groups: Share folders with specific people or groups.
- Categories/Tags: Organize recipes in folders with labels.
- Collaboration: Real-time editing in Google Docs or Sheets.
- Recipe Import: Manual import; no automated scanning.
- Media Support: Upload photos, videos, or links.
- Mobile App: Functional but not tailored for recipes.
- Price: Free (up to 15GB storage).
Pros: Free, widely accessible, supports all media types.
Cons: Generic interface, not user-friendly for older users, no recipe-specific tools.
Action Step: Set up a shared Google Drive folder at Drive.Google.com and organize recipes in subfolders.
Comparison Table:
| Platform | Price | Sharing Groups | Recipe Import | Media Support | Mobile App Quality |
|---|---|---|---|---|---|
| ForYouEats | Free | Yes | Basic | Photos | Good |
| Paprika | $4.99/device | Yes | Advanced | Photos, Links | Excellent |
| Notion | Free/$10/month | Yes | Manual | All Types | Good |
| Google Drive | Free (15GB) | Yes | Manual | All Types | Average |
Chart: Recipe Management System Workflow

Best Practices for Collaborative Recipe Sharing
To meet the needs of collaborative recipe sharing, especially across languages and groups, consider these tips:
- Create Clear Categories: Use tags like “Christmas,” “BBQ,” or “Air Fryer” to organize recipes. Most platforms support custom labels.
- Support Multiple Media Types: For old cookbook photos or TikTok videos, choose a platform like Notion or Google Drive that handles diverse media.
- Enable Translation: For multilingual groups, use tools like Google Translate to manually translate recipes before sharing. Paprika and ForYouEats don’t offer built-in translation, so this step is manual.
- Prioritize Ease of Use: For older users, Paprika’s intuitive interface or ForYouEats’ simplicity may be best. Avoid complex setups like Notion for less tech-savvy groups.
- Backup Regularly: To avoid data loss (like with WhatsApp), choose platforms with cloud storage (e.g., Google Drive) or export options (e.g., Paprika, ForYouEats).
Action Step: Select a platform based on your group’s needs (e.g., Paprika for advanced features, Notion for flexibility) and set up a shared recipe collection.
Why You Should Share Recipes Online
Sharing recipes online, whether through a blog or a collaborative platform, offers numerous benefits:
- Preserve Family Recipes: Digitizing recipes ensures they’re not lost over time.
- Build a Community: Sharing recipes attracts food enthusiasts who engage with your content.
- Establish Authority: High-quality, original recipes position you as a trusted source.
- Drive Traffic: SEO-optimized recipes improve your blog’s visibility on search engines.
- Monetize Content: Use affiliate links or ads to generate income.
- Connect with Foodies: Crediting other bloggers fosters networking and collaboration.
Where to Share Recipes
- Food Blog: A WordPress blog with WP Recipe Maker is ideal for professional, SEO-friendly recipe sharing. It allows branding, categorization, and monetization.
- Social Media: Share teasers (photos and links) on Instagram, Pinterest, or Facebook to drive traffic to your blog.
- YouTube: Create detailed cooking videos to showcase your personality and link back to your blog.
Action Step: Start a WordPress blog for primary recipe sharing and use social media/YouTube as supplementary channels.
Conclusion
Sharing recipes properly is about respecting creators, following copyright laws, and using the right tools to enhance your content. By writing original introductions, linking to instructions, requesting photo permissions, and using platforms like WP Recipe Maker, you can share recipes ethically and professionally. For collaborative sharing, tools like Paprika, ForYouEats, or Notion offer robust solutions for groups, with features like categorization, media support, and mobile apps. Whether you’re a blogger or a home cook, these practices ensure your recipe-sharing efforts are legal, respectful, and engaging.
Final Action Steps:
- Install WP Recipe Maker for professional recipe cards on your blog.
- Choose a collaborative platform like Paprika or ForYouEats for group sharing.
- Always credit original creators and link to their content.
- Experiment with social media and YouTube to expand your reach.
By following these steps, you’ll share recipes in a way that’s ethical, effective, and enjoyable for everyone involved.
Please share these How To Share A Recipe Properly – Step By Step Instructions with your friends and do a comment below about your feedback.
We will meet you on next article.
Until you can read, How to Organize Your Recipes Like a Pro