iPhone Food Photography Lighting
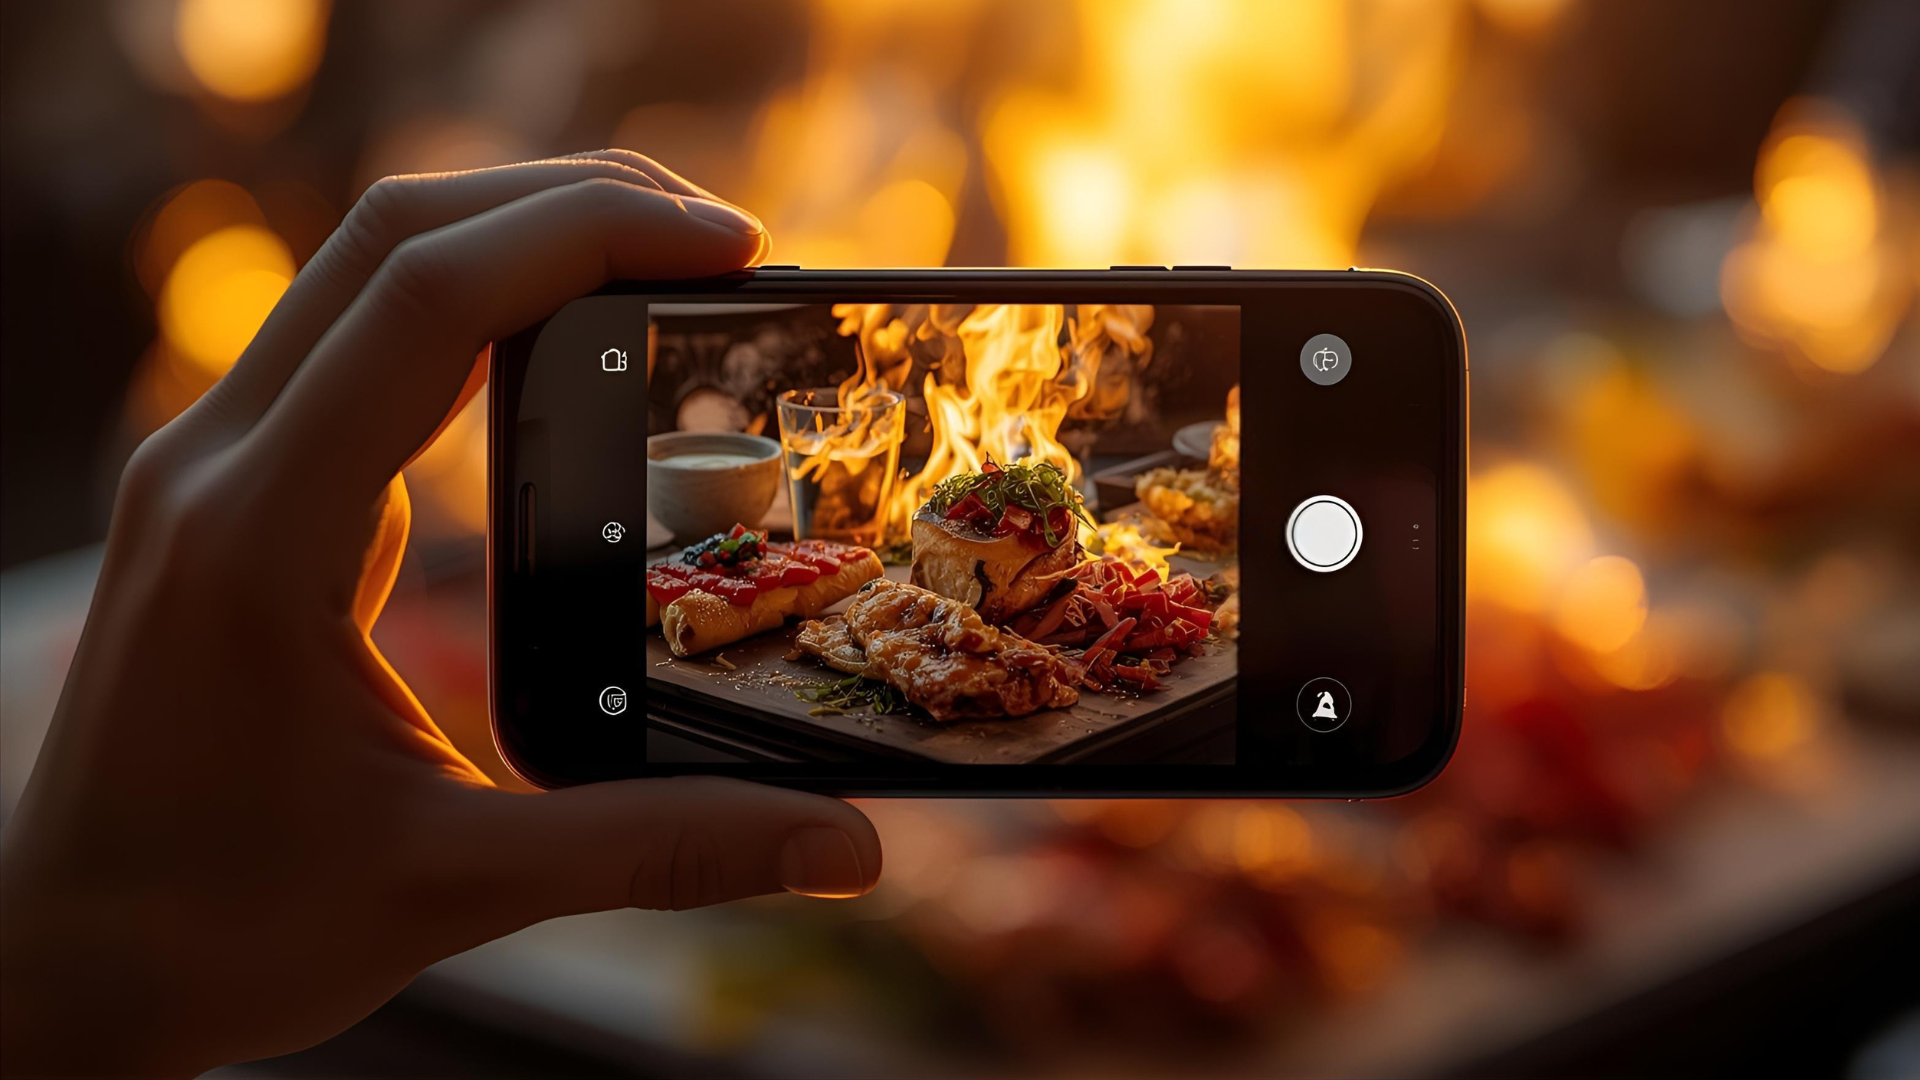
Lighting is the cornerstone of stunning food photography, and with an iPhone, you can achieve professional-grade results without complex gear. Whether you’re a food blogger, a chef, or an enthusiast sharing dishes on social media, mastering lighting can transform your images from mundane to mouthwatering. This comprehensive guide dives into iPhone food photography lighting, offering practical tips for natural and artificial light setups, exposure adjustments, and essential equipment. With the right techniques, your iPhone can capture vibrant colors, rich textures, and inviting compositions that make food irresistible.
Why Lighting Matters in iPhone Food Photography
Photography is about painting with light, and food photography is no exception. The iPhone’s camera, while powerful, has limitations like a fixed 28mm wide-angle lens and a small sensor, making lighting critical for overcoming these constraints. Proper lighting enhances textures, highlights colors, and creates mood, whether you’re aiming for bright and airy or moody and dramatic. Unlike DSLR or mirrorless cameras, the iPhone’s default Camera app offers limited manual controls, but apps like Lightroom Mobile and simple lighting tools can unlock professional results.
iPhone vs. Traditional Cameras
The iPhone’s fixed lens makes it ideal for flat-lay shots but less versatile for close-ups or portraits compared to a 50mm or 100mm lens on a DSLR. However, with the right lighting, you can compensate for these limitations. The iPhone’s portability and apps like Lightroom Mobile provide manual controls (ISO, shutter speed, white balance) that rival traditional cameras. Lighting tools like diffusers and reflectors further bridge the gap, making the iPhone a lightweight, cost-effective choice for food photography.
Essential Equipment for iPhone Food Photography Lighting
To elevate your lighting setup, invest in affordable tools that enhance control and quality. Below is a table of recommended equipment with specifications and prices (sourced from Amazon unless noted):
| Equipment | Description | Specifications | Price (USD) | Purpose |
|---|---|---|---|---|
| JOBY TelePod Mobile Tripod | Versatile tripod with selfie stick, monopod, and overhead capabilities. | Adjustable height: 22–56 inches, 1.1 lbs. | ~$40 | Stabilizes iPhone for steady shots. |
| Metal iPhone Tripod Mount | Secures iPhone to tripod, supports vertical/horizontal orientation. | Fits devices 2.3–3.3 inches wide. | ~$10 | Ensures stable mounting. |
| Neewer 40×60” Diffuser | Translucent panel for softening natural light. | 40×60 inches, foldable, portable. | ~$30 | Reduces harsh shadows from windows. |
| White Foam Boards (20×30”) | Lightweight boards to bounce light. | 20×30 inches, 5mm thick, 2-pack. | ~$10 | Fills shadows for even lighting. |
| Black Foam Boards (20×30”) | Boards to add contrast and shadows. | 20×30 inches, 5mm thick, 2-pack. | ~$10 | Shapes light for dramatic effects. |
| Godox SLB60W Continuous Light | 60W LED with softbox for artificial lighting. | 5600K, CRI 95+, Bowens mount. | ~$150 | Provides consistent, modifiable light. |
| Glow EZ Lock Octa 36” Softbox | Easy-to-use softbox for soft, natural light. | 36-inch diameter, includes grid. | ~$60 | Diffuses artificial light for even spread. |
| Neewer Snoot Kit | Directs light for focused, dramatic effects. | Includes grid and color gels. | ~$25 | Creates strong shadows or color effects. |
| Boling BL-P1 LED Light | Portable LED for on-the-go lighting. | 2500–8500K, 1400 lumens, rechargeable. | ~$100 | Enhances lighting in low-light settings. |
These tools are budget-friendly and versatile, ensuring professional results without heavy investment.
Natural Light Tips for iPhone Food Photography
Natural light is a go-to for food photography due to its ability to render accurate colors and soft shadows. However, its variability—changing with time, weather, and season—requires strategic control. Here’s how to master natural light with your iPhone:
1. Find the Right Window
Position your setup 1–2 meters from a large window to leverage soft, diffused light. Overcast days are ideal, as clouds act as a natural diffuser, minimizing harsh shadows. Avoid direct sunlight, which creates unflattering hot spots and hard shadows. North-facing windows (in the Northern Hemisphere) provide consistent, soft light throughout the day.
2. Use a Diffuser
A diffuser softens harsh window light, spreading it evenly across your subject. Place a 40×60” Neewer diffuser between the window and your food setup. Alternatives include sheer curtains or parchment paper for budget-friendly diffusion. This ensures gentle shadows, perfect for highlighting textures like pastry flakes or vegetable surfaces.
3. Bounce Light with White Foam Boards
If the side of your dish opposite the window is too dark, place a white foam board (20×30”) to bounce light back, filling shadows. Adjust the board’s angle and distance to control light intensity. For example, a closer board brightens shadows more, ideal for light and airy shots like salads or desserts.
4. Add Contrast with Black Foam Boards
For moody, high-contrast images, use black foam boards to absorb light and deepen shadows. Position them around your food to shape light direction, enhancing drama in dishes like chocolate cakes or charcuterie boards. Experiment with placement to balance light and shadow.
5. Manage Exposure
In the iPhone Camera app, tap the screen to focus on your subject, revealing a yellow square with a sun icon. Slide the sun icon up to brighten or down to darken the image. For precise control, use Lightroom Mobile’s Professional mode to adjust ISO (keep below 100 for minimal noise) and shutter speed. Use a tripod for slow shutter speeds to avoid camera shake.
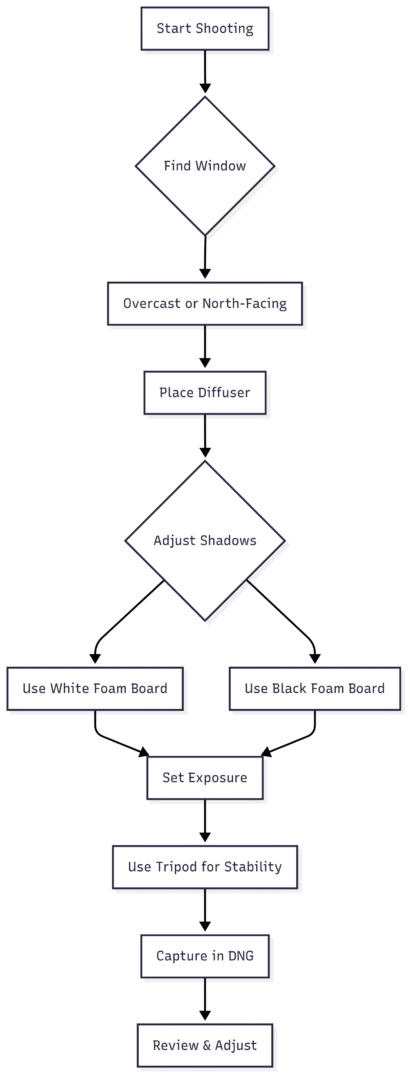
Chart for Natural Light Setup:
Artificial Light Tips for iPhone Food Photography
Artificial light offers unmatched control, allowing you to shoot anytime, anywhere, regardless of natural light conditions. Continuous lights are ideal for iPhone photography, as they provide real-time feedback without complex setups.
1. Choose Continuous Lights
Opt for a continuous LED light like the Godox SLB60W (60W, 5600K) for bright, consistent illumination. Unlike flash, continuous lights let you see the lighting effect instantly, making adjustments intuitive. The Godox SLB60W’s high CRI (95+) ensures accurate colors, critical for food photography.
2. Use Light Modifiers
Soften artificial light with a Glow EZ Lock Octa 36” softbox for a natural, diffused effect similar to window light. For dramatic, focused lighting, use a Neewer Snoot Kit to create strong shadows or add color gels for creative effects. Position the softbox or snoot 1–2 feet from your subject for optimal spread.
3. Position the Light
Experiment with light direction to achieve your desired mood:
- Sidelighting: Place the light to the side for depth and texture, ideal for crispy foods like roasted vegetables or grilled meats.
- Backlighting: Position the light behind the food for a halo effect, perfect for translucent items like beverages or thin sauces.
- Aspect Lighting: Angle the light to highlight specific features, such as garnishes or layers in a cake.
4. Control Shadows
Use a white foam board as a reflector opposite the light to fill shadows, or a black foam board to deepen them for contrast. Adjust the reflector’s distance to fine-tune shadow intensity.
5. Portable LED Option
For on-the-go shooting, the Boling BL-P1 LED Light (1400 lumens, 2500–8500K) is compact and powerful. Its adjustable color temperature lets you match ambient light, and its rechargeable battery ensures portability. Use it handheld or on a tripod for low-light scenarios, like evening kitchen shots.
Comparison of Light Directions:
| Light Direction | Effect | Best For |
|---|---|---|
| Sidelighting | Adds depth, emphasizes textures | Crispy foods, baked goods |
| Backlighting | Creates halo effect, highlights translucency | Beverages, sauces |
| Aspect Lighting | Accentuates specific features | Layered dishes, garnishes |
Lightroom Mobile for Enhanced Control
Lightroom Mobile’s Professional mode transforms your iPhone into a powerful camera with manual controls. Here’s how to use it for lighting:
- Switch to Professional Mode: Open Lightroom Mobile, tap the camera icon, and select “Professional” from the “Auto” menu.
- Adjust ISO: Keep ISO low (50–100) to minimize noise, especially in natural light. Increase slightly in low-light conditions, but avoid exceeding 400 to prevent grain.
- Set Shutter Speed: Use faster speeds (e.g., 1/1000s) for bright scenes or slower speeds (e.g., 1/10s) with a tripod for low light.
- White Balance (WB): Match WB to your light source (Daylight for natural light, Tungsten for warm artificial light) to ensure accurate colors.
- Manual Focus: Slide the focus slider to highlight critical areas (e.g., food textures) in green, ensuring sharp details.
- Capture in DNG: Shoot in DNG for maximum editing flexibility, as it retains more data than JPG.
Editing in Lightroom Mobile
Post-processing enhances lighting effects:
- Exposure & Contrast: Adjust Exposure for brightness, then tweak Highlights (-10 to -20) and Shadows (+20 to +50) for balance. Increase Contrast (+10 to +20) for vibrancy.
- White Balance: Fine-tune Temperature and Tint to correct color casts (e.g., +5 Temp for warmer tones).
- Clarity & Vibrance: Boost Clarity (+10 to +20) for texture and Vibrance (+10 to +15) for subtle color enhancement.
- Masking: Brighten specific areas (e.g., a garnish) or remove blemishes with the Healing tool.
- Presets: Use food-specific presets like TLP Simple Wood or Dark Green Wood ($20, tlp.com) for quick, cohesive edits.
Example Editing Adjustments:
| Setting | Adjustment | Effect |
|---|---|---|
| Exposure | +0.5 | Brightens overall image |
| Highlights | -15 | Reduces overexposed areas |
| Shadows | +40 | Brightens dark areas |
| Clarity | +15 | Enhances food textures |
| Vibrance | +12 | Boosts subtle colors |
Advanced Lighting Techniques
1. Soft vs. Hard Light
Soft light, with gentle shadows, is the most common for food photography, as it flatters textures and colors. Achieve it with a diffuser or softbox. Hard light, with sharp shadows, suits dramatic shots (e.g., a rustic loaf). Use a snoot or direct light without modifiers for hard light.
Soft vs. Hard Light Comparison:
| Type | Shadow Quality | Best For |
|---|---|---|
| Soft Light | Gentle, diffused shadows | Most foods, light and airy style |
| Hard Light | Sharp, defined shadows | Dramatic, rustic dishes |
2. Time of Day
Natural light varies by time:
- Mid-Morning/Afternoon: Soft, even light for balanced shots.
- Golden Hour: Warm, golden tones for cozy dishes like desserts.
- Noon: Intense overhead light, ideal for flat-lays but harsh for other angles.
Observe how light changes in your shooting space hourly to find the best time for your style.
3. Low-Light Photography
In low-light conditions (e.g., winter evenings), use these tips:
- Get Closer to the Light: Position your setup near the window to maximize available light.
- Use Slow Shutter Speeds: Set a slow shutter speed (e.g., 1/4s) with a tripod to capture more light without noise.
- Avoid Clipping Blacks: Check the histogram in Lightroom Mobile to ensure shadows retain detail.
- Use a Flashlight for Focus: Use your iPhone’s flashlight to assist autofocus in dim conditions.
4. Creative Light Manipulation
- Light Fall-Off: Increase distance from the light source for moody, chiaroscuro effects with deep shadows.
- Color Gels: Add gels to artificial lights (e.g., Neewer Snoot Kit) for warm or cool tones, enhancing mood.
- Reflectors for Fill: Use silver or gold reflectors for stronger or warmer fill light compared to white foam boards.
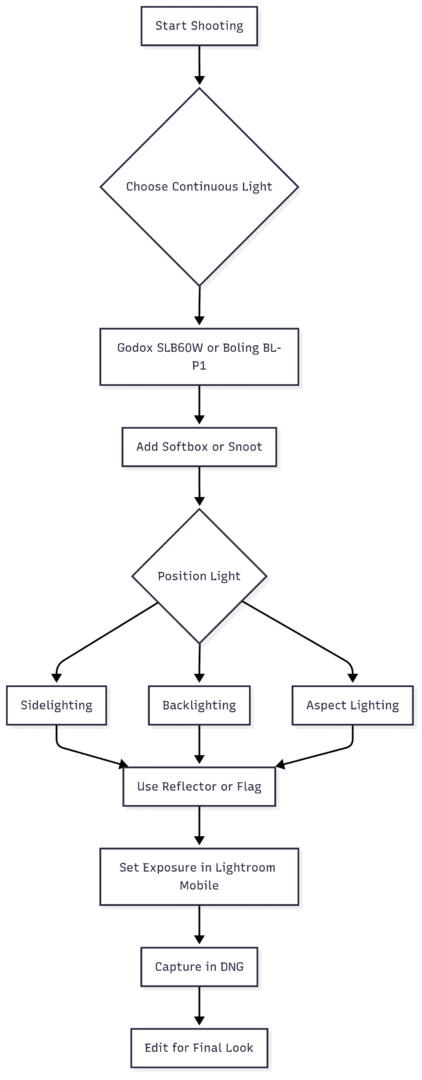
Chart for Artificial Light Setup:
15 Practical Tips for iPhone Food Photography Lighting
- Prioritize Natural Light: Shoot near a window with diffused light for accurate colors. Avoid artificial room lights to prevent color casts.
- Soften Shadows: Use a diffuser (Neewer 40×60”) or a sheer curtain to soften harsh sunlight.
- Bounce Light: Place white foam boards opposite the light source to fill shadows, enhancing light and airy styles.
- Add Drama: Use black foam boards to deepen shadows for moody shots.
- Stabilize Your iPhone: Use a JOBY TelePod tripod with a metal mount for hands-free, shake-free shots.
- Adjust Exposure: In the Camera app, tap and slide the sun icon; in Lightroom Mobile, use manual ISO and shutter speed.
- Use HDR Mode: Enable HDR in the Camera app for balanced exposure in high-contrast scenes.
- Experiment with Angles: Try overhead for flat-lays, 3/4 for depth, or side angles for layered dishes.
- Choose Neutral Backgrounds: Use light, dark, or wooden backdrops (e.g., Best Ever Backdrops, ~$35–100, besteverbackdrops.com, code SKYBEST15 for 15% off) to keep focus on the food.
- Play with Colors: Use complementary colors (e.g., red food on green plates) for vibrancy or monochromatic tones for calm scenes.
- Style Thoughtfully: Arrange food with the Rule of Thirds, adding herbs or toppings for visual interest.
- Capture Action: Use Burst Mode for dynamic shots like pouring syrup or sprinkling spices.
- Include Hands: Show hands holding food for relatability, ensuring they’re clean and groomed.
- Use Props: Add complementary props like cutlery or seasonal items (e.g., autumn leaves) to enhance the story.
- Edit for Impact: Use Lightroom Mobile to adjust exposure, clarity, and vibrance for natural, appetizing results.
Recommended Learning Resources
- Mastering iPhone Food Photography Course: A beginner-friendly course focusing on iPhone-specific techniques, covering lighting, composition, and editing (details at reganbaroni.com).
- Lightroom Mobile Presets: TLP Food Photography Preset Bundle ($20, tlp.com) includes Simple Wood, Darkest Wood, and Hazy Wood for quick, professional edits.
- eBook: Art of Light: A guide to mastering natural light, including diffuser and reflector techniques (available at reganbaroni.com).
Conclusion
Lighting is the key to elevating iPhone food photography, transforming simple dishes into captivating images. By mastering natural light with diffusers and reflectors, leveraging continuous artificial lights with softboxes, and using Lightroom Mobile for precise control, you can achieve professional results on a budget. Experiment with light direction, time of day, and editing to craft your unique style, whether light and airy or moody and dramatic. With practice and the right tools, your iPhone can capture food photos that are as delicious to look at as they are to eat.
Please share this iPhone Food Photography Lighting with your friends and do a comment below about your feedback.
We will meet you on next article.
Until you can read, How To Use Lightroom Mobile For iPhone Food Photography