Light & Airy Food Photography Tips
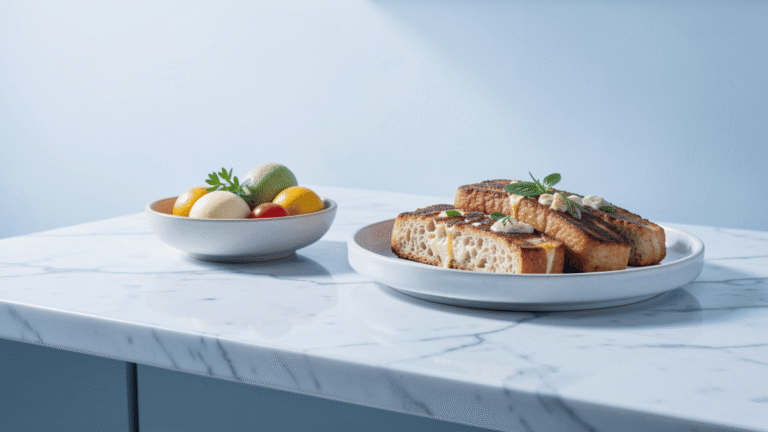
Light and airy food photography is a captivating style, beloved for its fresh, appetizing aesthetic that draws viewers in. This style, popular on platforms like Instagram, emphasizes soft lighting, neutral colors, and minimalistic compositions to create images that feel bright and approachable. Whether you’re a beginner or a seasoned photographer, mastering this aesthetic can elevate your portfolio, engage your audience, and even boost social media performance. This comprehensive guide offers practical tips, equipment recommendations, and creative strategies to help you achieve stunning light and airy food photos. From lighting setups to post-processing, we’ll cover everything you need to create images that pop.
Why Light & Airy Food Photography?
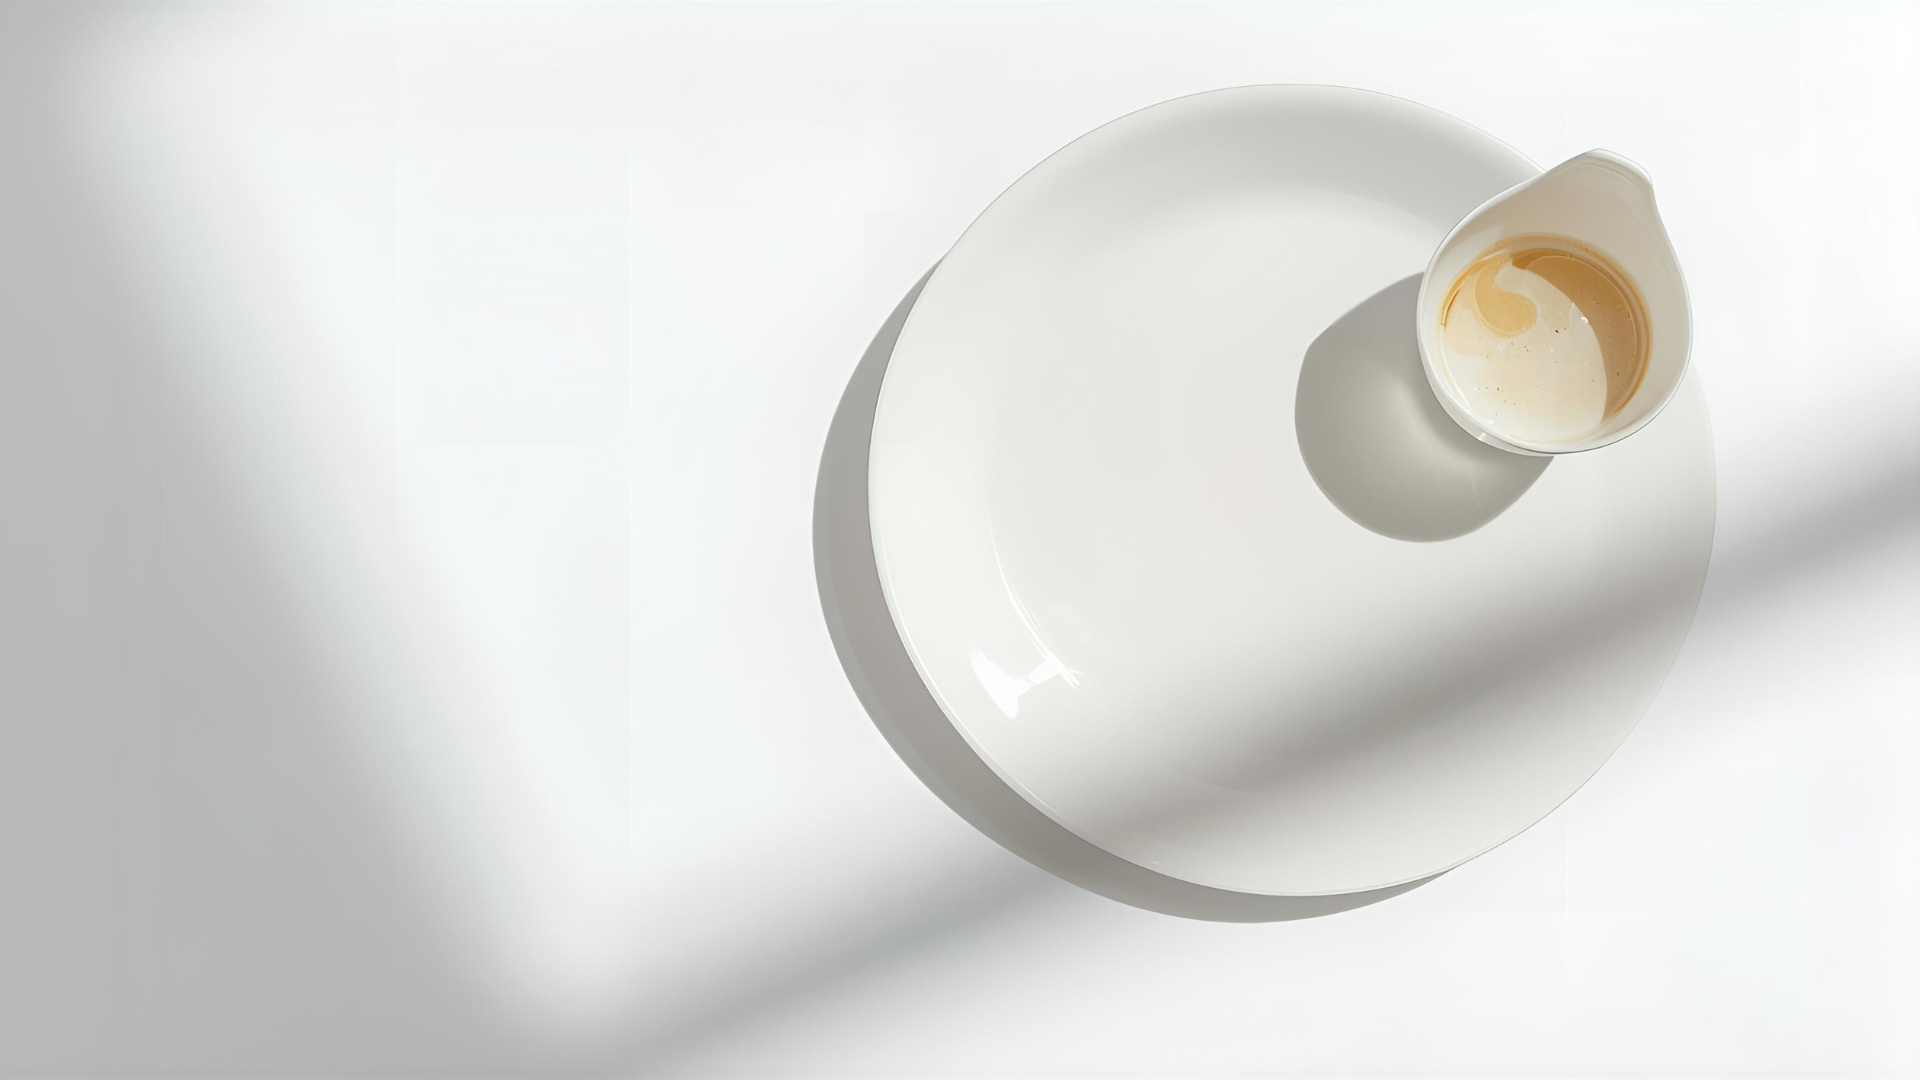
The light and airy style is defined by soft, diffused lighting, light-colored backgrounds, and a clean, uncluttered composition. It evokes freshness, simplicity, and elegance, making dishes look inviting and delicious. This aesthetic performs well in editorial, commercial, and social media contexts because it highlights food details without overwhelming the viewer. According to a study by Social Media Today, bright images tend to garner 24% more engagement on platforms like Instagram. Whether you’re shooting for a blog, a brand, or your portfolio, these techniques will help you craft images that resonate.
Essential Tips for Light & Airy Food Photography
Below are actionable strategies to create the light and airy look, complete with equipment suggestions, composition techniques, and editing tips.
1. Master Your Lighting Setup
Lighting is the cornerstone of light and airy food photography. Soft, diffused light creates gentle shadows and highlights, enhancing the fresh aesthetic. Here’s how to achieve it:
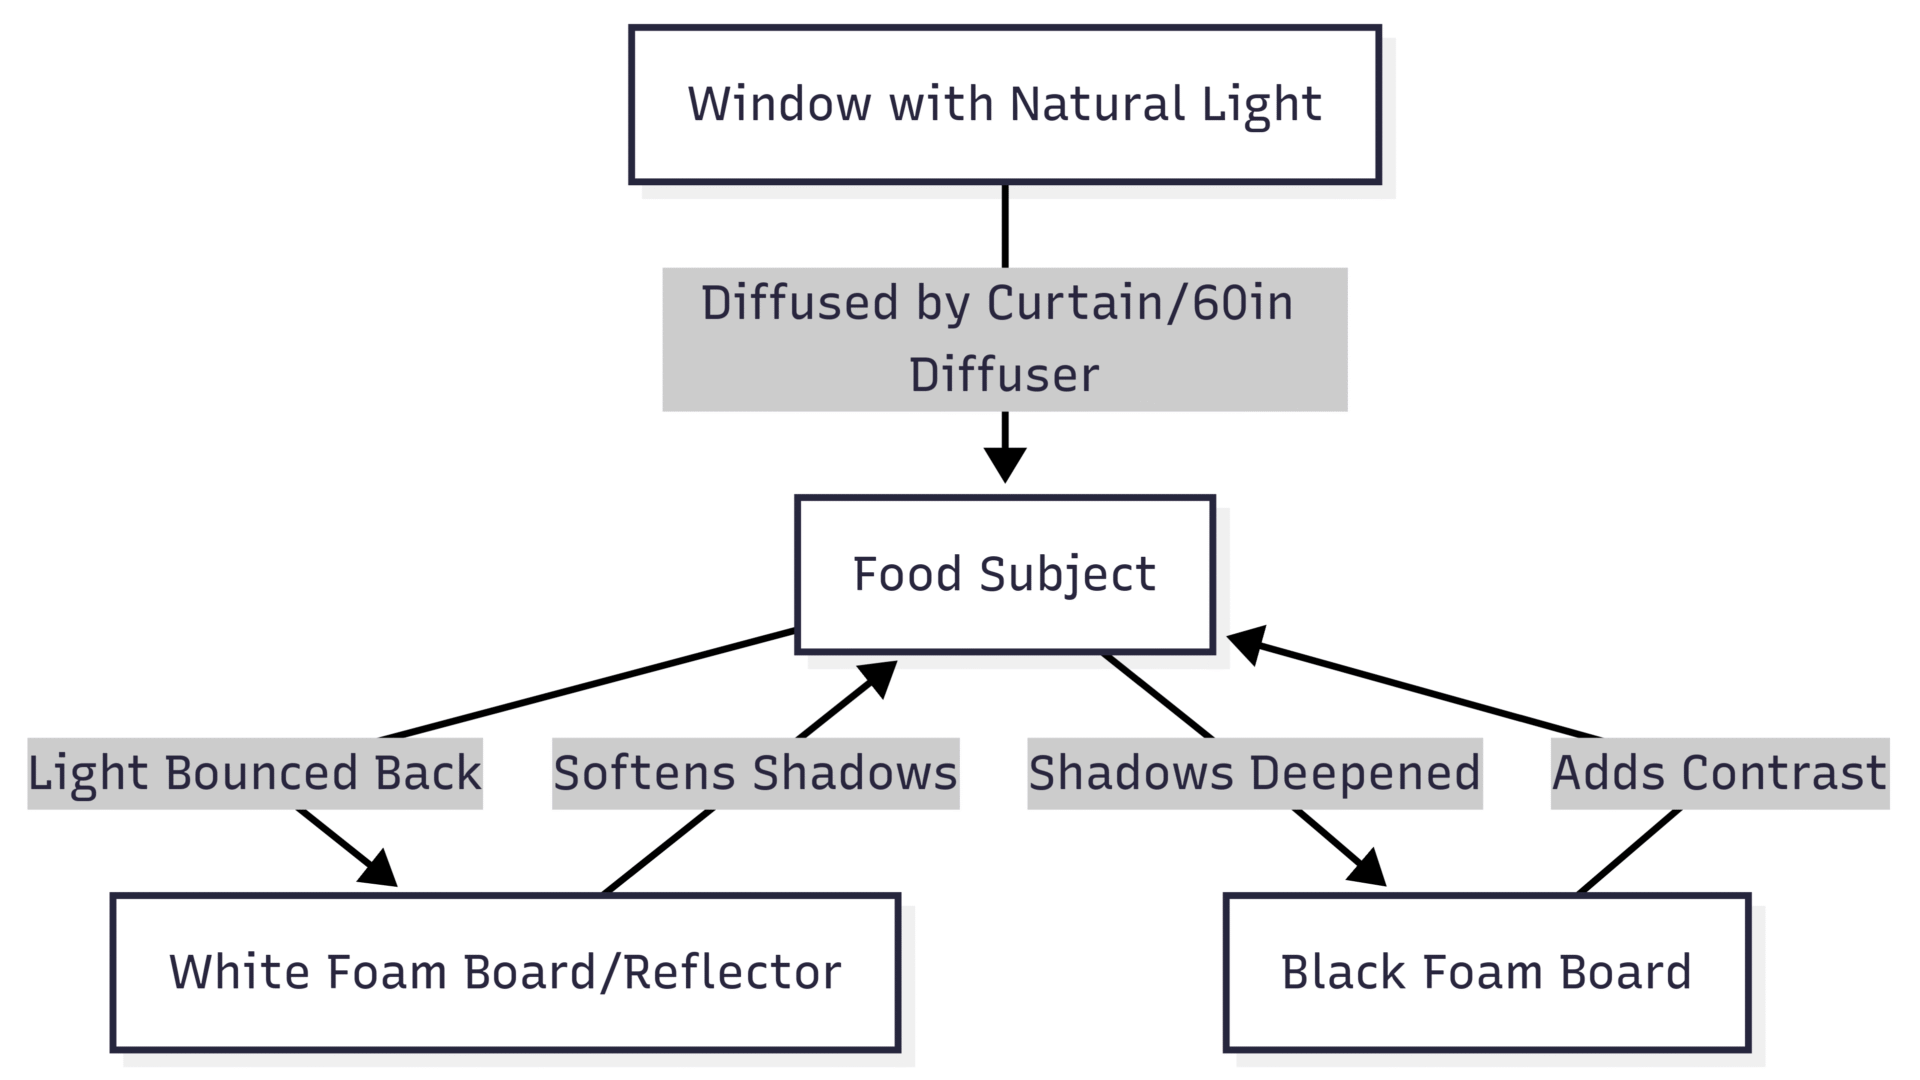
- Use Soft Natural Light: Position your setup near a large window on a cloudy day for naturally diffused light. Cloudy skies act as a giant softbox, softening shadows and evenly illuminating your subject. If sunlight is too harsh, place a white curtain or a diffuser (like a 60-inch Neewer 5-in-1 Circular Reflector, ~$30) between the window and your food to soften the light.
- Avoid Harsh Artificial Lights: Turn off overhead lights, which can cast yellow tints or harsh shadows. If using artificial light, opt for a softbox (e.g., Godox Softbox) with a diffuser to mimic natural light.
- Back or Side Lighting: Position your light source behind or to the side of the food to add depth and subtle shadows. Backlighting highlights textures, like the crust of a pastry, while side lighting emphasizes shapes. Experiment by moving the food or light to find the best angle.
- Use Reflectors: Place a white foam board (~$10 at craft stores) or a reflector opposite the light source to bounce light into shadows, brightening the scene without losing the airy feel. For contrast, use black foam boards to deepen shadows selectively.
- Control Shadows: Soft shadows are key. Avoid direct sunlight, which creates harsh contrasts. If shadows are too dark, adjust the reflector’s distance or angle to fill them lightly.
Lighting Setup Diagram:
| Lighting Tool | Purpose | Approx. Price |
|---|---|---|
| Neewer 5-in-1 Reflector | Diffuses/reflects light | $30 |
| Godox Softbox | Softens artificial light | $50 |
| Godox FV200 | Continuous artificial light | $300 |
| White Foam Board | Reflects light | $10 |
| Black Foam Board | Deepens shadows | $10 |
2. Choose Light-Colored Backdrops and Surfaces
The background sets the mood for light and airy photography. Light surfaces act as natural reflectors, enhancing brightness.
- Select Neutral Tones: Use white, cream, or light gray backdrops (e.g., vinyl backdrops from Bessie Bakes, ~$40 with code REGANBARONI for 15% off). Avoid busy patterns that distract from the food.
- Textures for Depth: Opt for subtle textures like wood, linen, or marble to add visual interest without overpowering the dish. A beige tablecloth or light wooden board works well.
- DIY Options: Create your own backdrop with painted plywood or contact paper for a budget-friendly solution (~$15-$20).
Backdrop Comparison:
| Backdrop Type | Effect | Source |
|---|---|---|
| White Vinyl | Clean, bright | Bessie Bakes (~$40) |
| Light Wood | Warm, rustic | Hardware store (~$15) |
| Linen Tablecloth | Soft, homey | Thrift stores (~$5) |
3. Use Neutral, Light Props
Props enhance the story but should never overshadow the food. Light and airy photography thrives on minimalism.
- Neutral Color Palette: Choose white, cream, or pastel props like plates, linens, or utensils. Avoid shiny materials like porcelain, which reflect light harshly. Matte ceramics or vintage pieces with patina (~$5-$20 at thrift stores) work best.
- Incorporate Ingredients: Scatter ingredients like herbs, crumbs, or fruit slices to add a natural, lived-in feel. For example, a sprig of rosemary or scattered crumbs can enhance a breakfast scene.
- Keep It Simple: Limit props to 2-3 items to maintain a clean composition. A single spoon or a linen napkin can be enough.
Prop Selection Guide:
| Prop Type | Example | Effect |
|---|---|---|
| Matte Ceramic Plate | White side plate | Clean, neutral focus |
| Linen Napkin | Cream-colored | Adds texture, softness |
| Vintage Spoon | Patina-finished | Adds character, non-reflective |
4. Optimize Camera Settings
Manual settings give you control over the light and airy aesthetic, whether using a DSLR, mirrorless, or smartphone.
- Exposure for Highlights: Set your exposure to preserve highlight details. Use a histogram to avoid blowing out bright areas. In low light, slow your shutter speed (e.g., 1/15 sec) and use a tripod to prevent blur.
- Aperture for Depth: Use a moderate aperture (f/4 to f/7.1) to keep the food in focus while softly blurring the background (bokeh). Wide apertures (e.g., f/1.8) may blur too much of the dish.
- White Balance: Set a custom white balance using a gray card (~$10) to ensure accurate colors, especially in RAW. Avoid auto white balance, which can introduce color casts. For natural light, aim for 5000-6000K.
- ISO: Keep ISO low (100-400) for clean images. Full-frame cameras like the Canon EOS R6 Mark II (~$2,500) handle higher ISOs well if needed.
- Lens Choice: A 50mm prime lens (e.g., Canon RF50mm f/1.8 STM, ~$200) is ideal for natural perspective. For flat lays, a 35mm lens (e.g., Canon RF35mm f/1.8 Macro, ~$500) minimizes distortion on crop-sensor cameras.
Recommended Gear:
| Gear | Purpose | Approx. Price |
|---|---|---|
| Canon EOS R6 Mark II | Full-frame camera | $2,500 |
| Canon RF50mm f/1.8 STM | Natural perspective | $200 |
| Canon RF35mm f/1.8 Macro | Flat lays, less distortion | $500 |
| Gray Card | Accurate white balance | $10 |
5. Use a Tripod for Stability and Flexibility
A tripod is essential for precise framing and sharp images, especially in low light.
- Why Use a Tripod?: It eliminates camera shake, allowing slower shutter speeds (e.g., 1/15 sec) for proper exposure in natural light. It also frees your hands to adjust styling.
- Recommended Tripods:
- Manfrotto 055 with Ball Head for overhead shots.
- C-Stand (~$150): Perfect for flat lays, allowing greater distance to reduce distortion.
- iPhone Tripod Mount (~$15): Secures smartphones to tripods like the Manfrotto for mobile photography.
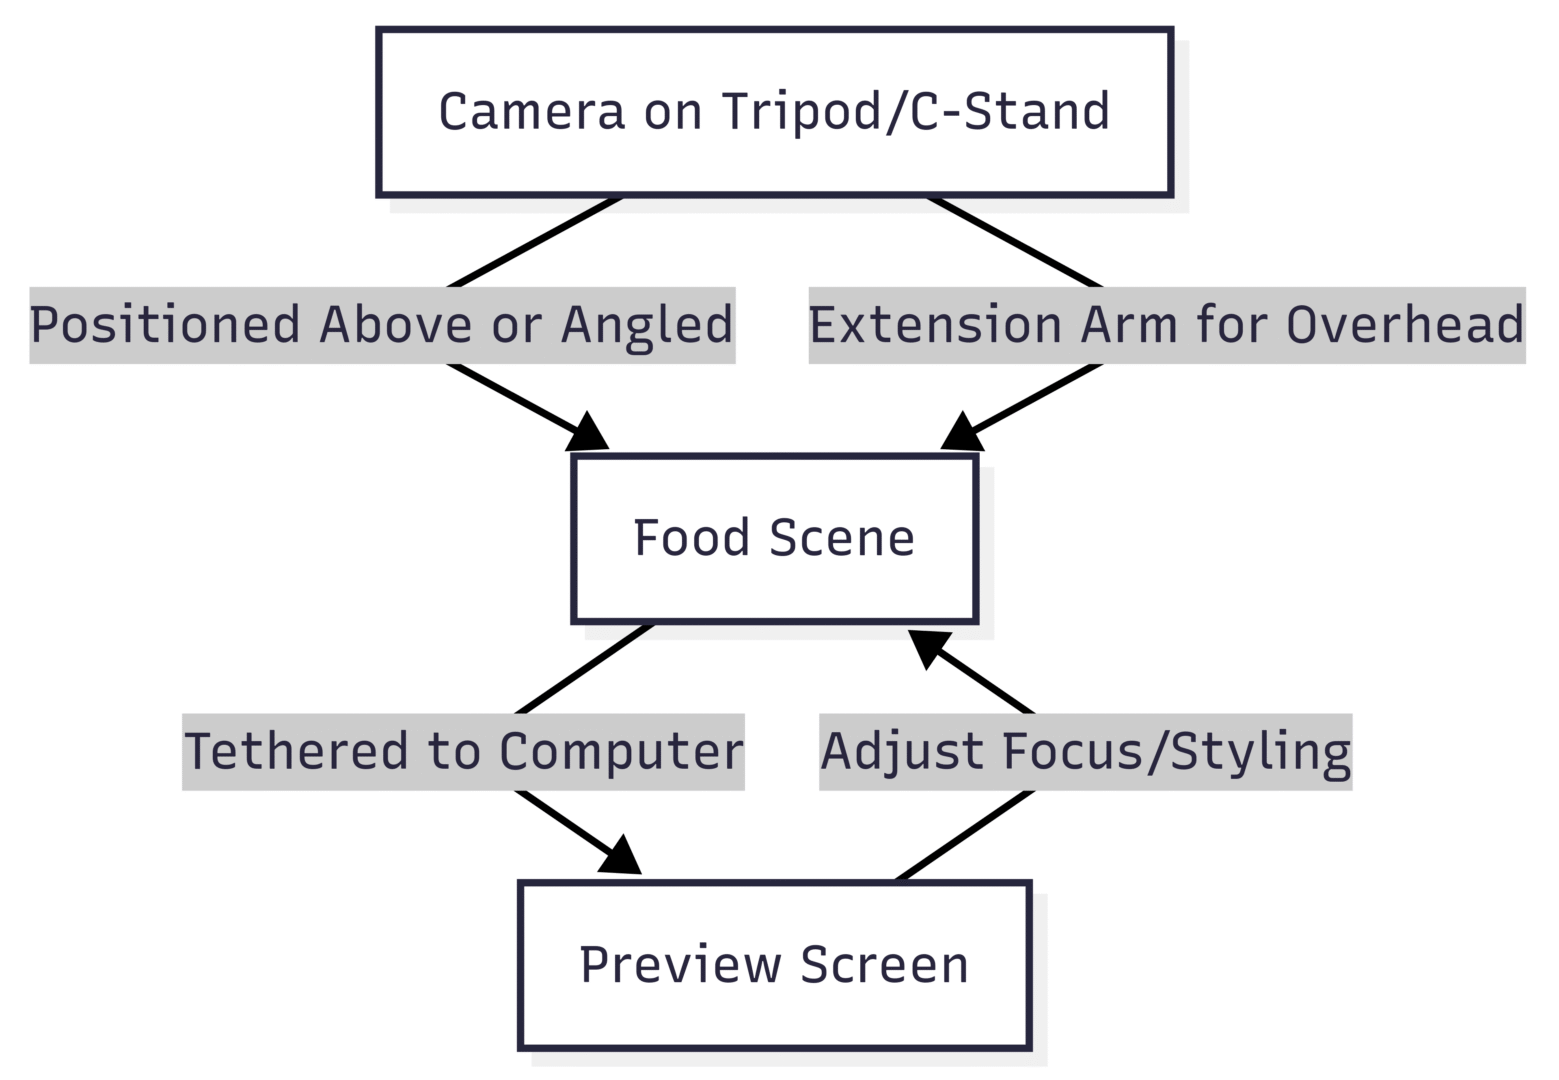
- Overhead Setup: For flat lays, a C-stand or tripod with an extension arm saves time by avoiding constant adjustments. Tethered shooting (using Canon EOS Utility, free) lets you preview shots on a computer for precise focus.
Tripod Setup Diagram:
6. Craft Airy Compositions
Composition enhances the airy feel by creating space and movement.
- Negative Space: Leave empty areas around the food to give it room to breathe, emphasizing simplicity. Place the subject off-center using the rule of thirds for balance.
- Leading Lines: Use props like utensils or linens to guide the viewer’s eye to the food. For example, a fork’s handle can point to a dish.
- Subtle Movement: Add dynamic elements like scattered crumbs, a drizzle, or a hand reaching for the food to create a lively, airy vibe.
- Angles:
- Flat Lay (Overhead): Ideal for showcasing multiple elements, like a breakfast spread. Use a 35mm lens to capture a wider scene.
- 45-Degree Angle: Shows both food and setup, perfect for layered dishes like cakes.
- Eye-Level: Highlights height, great for burgers or stacks.
Composition Techniques:
| Technique | Effect | Example |
|---|---|---|
| Negative Space | Airy, uncluttered | Empty table around a single plate |
| Leading Lines | Guides eye to food | Fork pointing to dish |
| Subtle Movement | Dynamic, lively | Scattered crumbs, hand reaching |
7. Enhance with Post-Processing
Editing polishes the light and airy look, bringing out brightness and vibrancy.
- Software: Use Adobe Lightroom for computers, or free apps like Lightroom Mobile, Snapseed, or VSCO for smartphones.
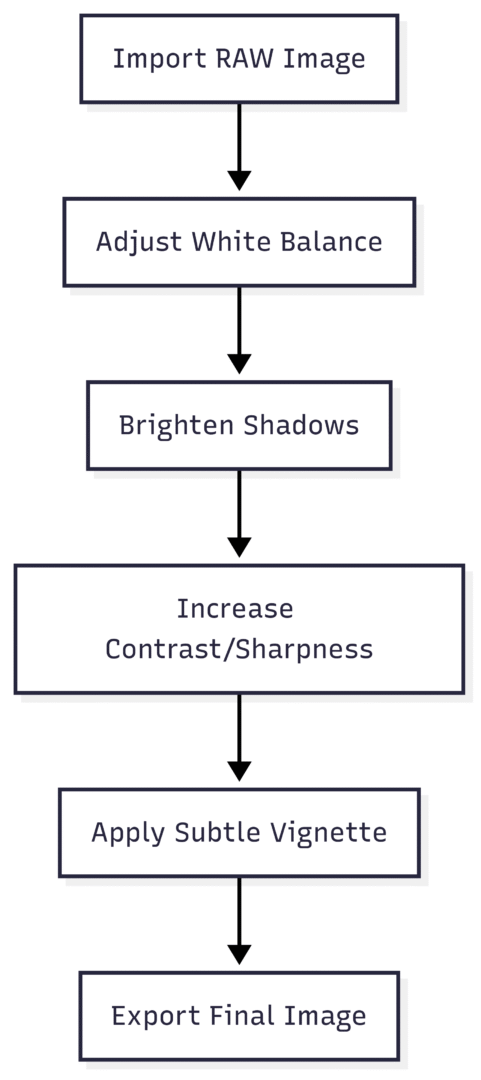
- Adjust White Balance: Fine-tune to remove color casts, aiming for neutral tones (5000-6000K for natural light).
- Brighten Shadows: Increase shadow sliders to enhance the airy feel without losing highlights. Avoid over-saturation; use luminance sliders for precise color adjustments.
- Add Subtle Vignette: Apply a light vignette to draw attention to the food, keeping edges slightly darker.
- Sharpen Details: Enhance texture with moderate sharpening to make food details pop.
Editing Workflow:
8. Build a Consistent Portfolio
Consistency strengthens your brand and makes your work recognizable.
- Unified Aesthetic: Use similar lighting, props, and editing styles across your portfolio. For light and airy, stick to neutral tones and soft lighting.
- Practice Regularly: Shoot weekly to refine your skills. Experiment with fresh ingredients from markets to inspire new setups.
- Study and Recreate: Analyze images from photographers like @healthygoodiesbylucia on Instagram. Recreate their setups with your resources to learn techniques.
Advanced Tips for Light & Airy Flat Lays
Flat lays are a staple of light and airy food photography, perfect for breakfast scenes or spreads. Here’s how to elevate them:
- Equipment: Use a Canon EOS R6 Mark II with a 35mm lens for wider shots. A C-stand (~$150) allows greater distance, reducing distortion.
- Color Scheme: Choose an analogous color palette (e.g., purple plums, red oranges, orange croissants) for harmony. Add a pop of color (e.g., yellow tea in transparent glasses) for vibrancy.
- Composition: Combine dynamic symmetry, leading lines, and C-curves for a balanced, engaging layout. Place props at intersections of a dynamic symmetry grid for visual flow.
- Lighting: Use a large diffuser with artificial light (e.g., Godox FV200) or a big window. Reflect light with white cards to soften shadows; deepen contrast with black cards if needed.
Practical Hacks for Beginners
- DIY Diffusers: Use white bedsheets or parchment paper as budget diffusers (~$5).
- Use Household Items: Repurpose kitchen linens or wooden boards as backdrops.
- Shoot on a Full Stomach: Avoid eating your subject before capturing the perfect shot.
- Sketch Your Setup: Draw your composition to plan props, lighting, and angles before shooting.
Recommended Resources
- Courses: Enroll in a Food Photography Masterclass (~$100-$300) for in-depth tutorials on lighting and styling.
- Books: “Food Photography: From Snapshots to Great Shots” by Nicole S. Young (~$25).
- YouTube: Channels like The Bite Shot offer free tutorials on white balance and lighting.
- Communities: Join food photography groups like Click Love Grow for feedback and inspiration.
Conclusion
Light and airy food photography is an art that combines soft lighting, neutral props, and thoughtful composition to create inviting, appetizing images. By mastering natural light, using tripods for stability, selecting light backdrops, and refining your editing, you can craft photos that stand out. Experiment with angles, practice regularly, and study other photographers to develop your unique style. With these tips, you’re ready to capture stunning, bright food photos that captivate your audience.
Please share this Light & Airy Food Photography Tips with your friends and do a comment below about your feedback.
We will meet you on next article.
Until you can read, Unrealistic Project Requests & How To Handle Them


![How To Create a Weight Loss Blog [9 Steps to Success!]](https://yumtonight.com/wp-content/uploads/2025/07/Untitled-design-2-4-768x432.jpg)