One Light Photography: Five Awesome Ways to Shoot Food
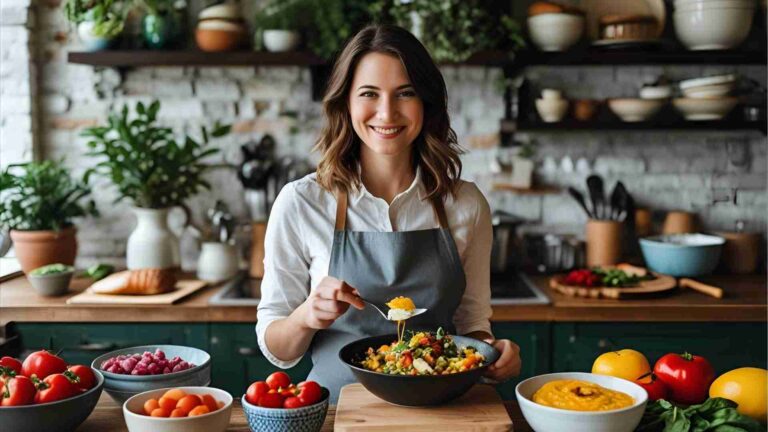
Food photography is an art form that transforms everyday dishes into visual feasts, and contrary to popular belief, you don’t need a studio full of expensive lighting equipment to create stunning images. For beginners and seasoned photographers alike, the assumption that multiple lights are essential often overshadows the creative potential of a single light source. One light photography not only simplifies the process but also sharpens your understanding of light’s behavior—its angles, intensity, and quality. By mastering one light, you unlock a range of effects, from bold, high-contrast compositions to soft, inviting glows, all tailored to make food look irresistible. This comprehensive guide delves into five distinct techniques using a single light, offering practical setups, equipment recommendations, troubleshooting tips, and visual aids to help you capture mouthwatering food photography with minimal gear. Whether you’re shooting for a blog, social media, or a portfolio, these methods will elevate your craft while keeping costs low and creativity high.
The Power of One Light Photography
At its core, one light photography is about harnessing a single light source—be it a flashgun, strobe, or continuous LED—to illuminate your subject. This minimalist approach strips away complexity, allowing you to focus on how light interacts with food: highlighting the crisp edges of a grilled steak, the dewy sheen of fresh fruit, or the creamy texture of a dessert. Unlike multi-light setups, which can create competing shadows or muddy effects, one light isolates variables like angle, distance, and modifier impact, making it easier to learn and control.
The benefits are twofold: affordability and skill-building. A single light setup reduces the need for costly equipment, making it accessible for beginners. More importantly, it forces you to experiment with positioning, diffusion, and reflection, fostering a deep understanding of light dynamics. Food photography demands precision—texture, color, and shape must pop to entice viewers. One light encourages resourcefulness, pushing you to manipulate shadows and highlights creatively.
Key variables in one light photography include:
- Angle: Side, back, or overhead positioning shapes shadows and highlights.
- Distance: Closer light intensifies contrast; farther softens it.
- Modifiers: Scrims, softboxes, or snoots alter light quality (hard vs. soft).
- Intensity: Adjustable via power settings or distance from the subject.
To begin, choose a versatile light source. Continuous LEDs like the Godox SL-150W ($241) offer real-time previews, ideal for beginners, while strobes like the Godox AD200 Pro ($349) provide precise burst control for advanced users. Pair with a sturdy light stand ($35-$50) for flexible positioning.
| Equipment | Specifications | Price (USD) |
|---|---|---|
| Godox SL-150W LED Light | 150W, 5600K, CRI 96+, dimmable 10-100%, bowens mount | $241 |
| Godox SL-200W LED Light | 200W, 5600K, CRI 96+, dimmable 10-100%, bowens mount | $338 |
| Godox AD200 Pro Strobe | 200Ws, 5600K, TTL, HSS, battery-powered | $349 |
| Lightweight Light Stand | 2-6.5ft height, 11lbs load, aluminum | $35 |
| 5-in-1 Reflector (40in) | White, silver, gold, black, translucent | $25 |
Avoid mixing light sources to prevent color casts. Set color temperature to 5600K for daylight-like results, and measure Kelvin with a meter for accuracy.
Way 1: Unmodified Hard Light for Bold, Graphic Impact
An unmodified light source, such as a bare flashgun or LED, creates a small, intense beam similar to harsh midday sunlight. Positioned 2-3 feet from the subject at a 45-degree angle (side and above), it produces crisp, dark shadows and even highlights, delivering a high-contrast, graphic look. This method is perfect for bold food photography—think sizzling barbecue ribs, vibrant picnic spreads, or colorful smoothies against solid backgrounds.
The hard light emphasizes textures like grill marks or the glossy surface of fresh berries, making images pop on social media. For example, a burger with charred patties and melted cheese benefits from the stark contrast, creating a dynamic, appetizing shot. If shadows are too harsh, place a white foam board ($5) opposite the light to bounce subtle fill, maintaining the bold aesthetic.
Setup Tips:
- Light: Godox V1 Speedlight ($259, 76Ws, portable) or SL-150W at full power.
- Position: 45 degrees, 2-3ft away for sharp shadows; 4-5ft for softer edges.
- Background: Solid color (black, white, or vibrant) to enhance graphic appeal.
Challenge: Harsh glare on glossy sauces or wet surfaces.
Solution: Tilt the dish slightly or raise the light to 4 feet to diffuse reflections. Alternatively, use a polarizing filter ($20) to reduce glare.
| Pros | Cons |
|---|---|
| Bold, eye-catching contrast | Can be too harsh for delicate foods |
| Simple, no modifiers needed | Limited versatility for soft looks |
| Ideal for social media | May require reflectors for shadow control |
Diagram for setup:

This method teaches shadow placement and contrast control, laying a foundation for more nuanced techniques.
Way 2: Large Scrim for Ultra-Soft, Diffused Light
Mimicking the soft, flattering glow of a north-facing window, a large scrim (7×9 feet) diffuses light to create even, low-contrast illumination. Hang the scrim between the light and subject, with the light 3-4 feet behind it. This scatters rays, softening shadow edges and reducing highlight intensity, ideal for large table scenes or delicate foods like pastries and salads.
The scrim’s effect recalls Dutch Masters’ paintings, wrapping light around subjects for a natural, inviting look. It’s versatile, handling everything from sprawling charcuterie boards to close-up shots of creamy soups. Budget options include a polyester translucent scrim ($50) or a DIY setup with baking paper stapled to a cardboard frame ($10).
Setup Tips:
- Light: Godox SL-200W for broad coverage, 75-100% power.
- Scrim Distance: 1-2ft from light for maximum softness; 3ft for slight directionality.
- Position: Overhead or side for even light spread.
| Scrim Options | Material | Size | Price (USD) |
|---|---|---|---|
| Polyester Scrim | Translucent polyester | 7x9ft | $50 |
| DIY Baking Paper | Parchment on cardboard | Custom | $10 |
| Professional Silk Scrim | Silk fabric | 6x6ft | $80 |
Challenge: Uneven lighting on large setups.
Solution: Increase light power or add a second scrim layer. Use a 5-in-1 reflector ($25) for fill if shadows persist.
Diagram:

This technique hones diffusion skills, critical for natural-looking food photography.
Way 3: Double-Diffused Softbox for Soft, Directional Control
A 120cm octagonal softbox with double diffusion combines softness with directionality. The inner reflective lining bounces light internally before it passes through two diffusion panels, creating bendable rays that fill shadows subtly while maintaining control. Position at a 30-45 degree angle, 2-4 feet from the subject, for a balanced effect—soft like a scrim but with less spill due to closed sides.
This is the go-to one-light setup for food photography, versatile for everything from cakes to grilled vegetables. It highlights textures without flattening the image, offering a professional look. Recommended: Neewer 120cm Octagonal Softbox ($60) or Godox SB-UE120 ($85), both with bowens mounts.
Setup Tips:
- Light: Godox SL-150W or AD200 Pro, 50-75% power.
- Angle: 30-45 degrees for balanced shadows; higher for moodier effects.
- Distance: 2ft for focused light; 4ft for broader spread.
| Softbox | Diffusion Layers | Mount | Price (USD) |
|---|---|---|---|
| Neewer 120cm Octagonal | Double | Bowens | $60 |
| Godox SB-UE120 | Double | Universal | $85 |
| Budget 24x36in | Single | Speedring | $40 |
Challenge: Background washout from excess light.
Solution: Add black foam board ($5) to absorb spill or use a grid ($20) for tighter focus.
Diagram:

This method refines your ability to balance softness and control, a cornerstone of food photography.
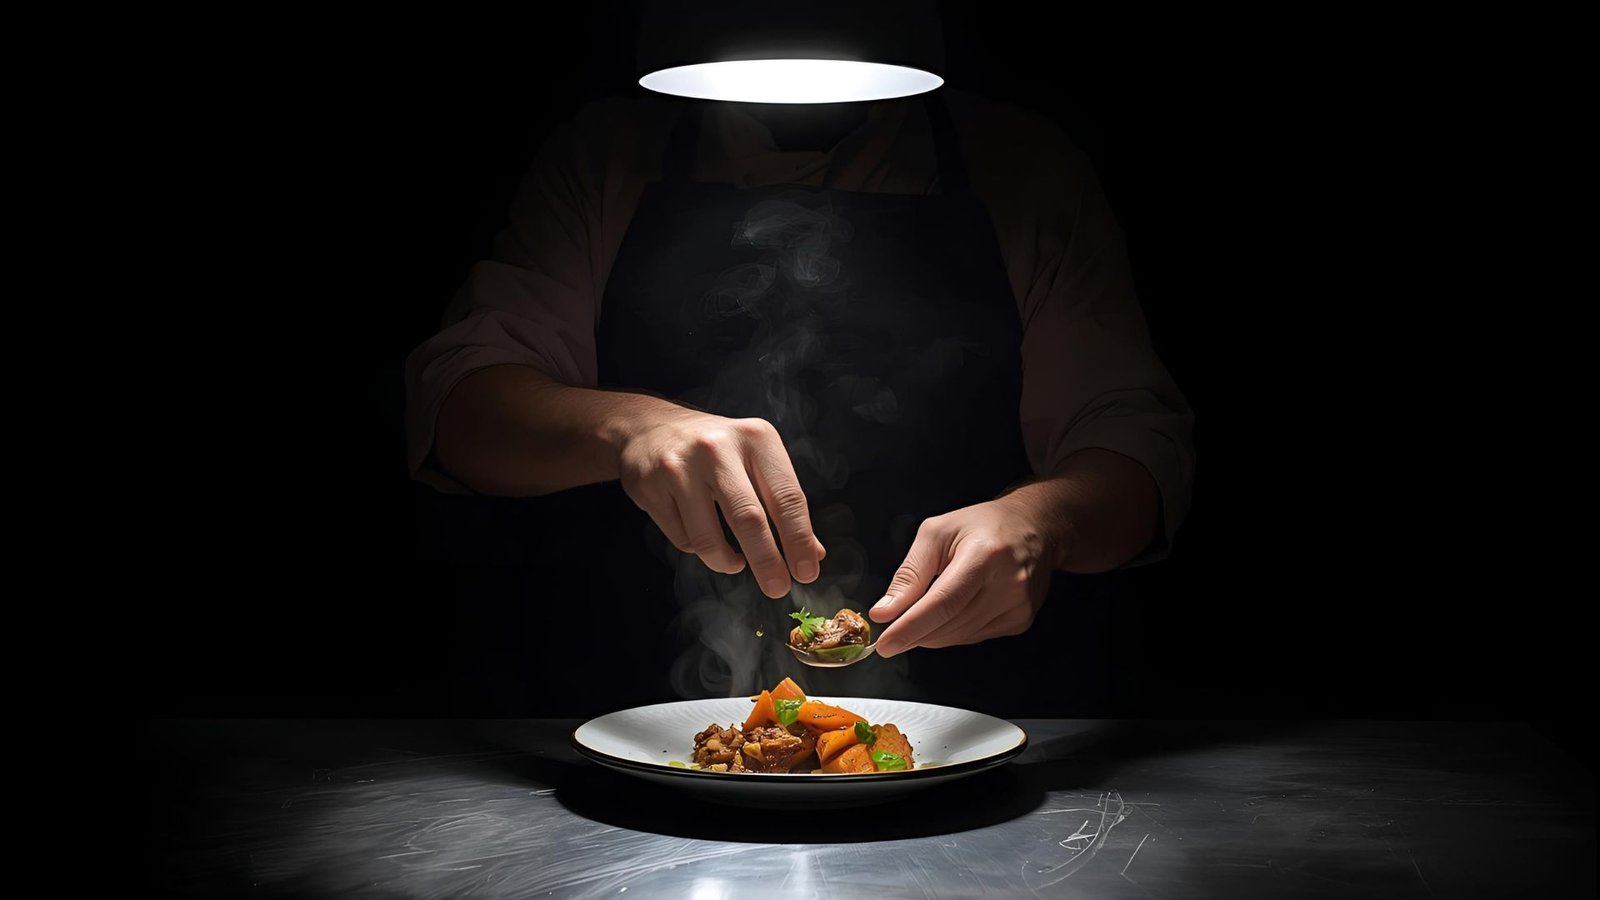
Way 4: Strip Softbox for Selective, Moody Lighting
A 1×4 foot strip softbox narrows light into a beam, like sunlight through a long window. Positioned behind and to the side (2-3 feet away), it selectively illuminates the subject, letting backgrounds fade into shadow. This creates depth and drama, perfect for moody shots like a dark chocolate tart or a rustic bread loaf.
The diffused yet focused light highlights specific areas, emphasizing shapes and textures while controlling spill. Use a Godox 30x120cm Strip Softbox ($70) with an optional honeycomb grid ($15) for precision.
Setup Tips:
- Light: Godox SL-200W, 60-80% power.
- Position: Side-back, 30 degrees, for depth.
- Modifiers: Grid for tighter focus; reflector for subtle fill.
| Strip Softbox | Dimensions | Features | Price (USD) |
|---|---|---|---|
| Godox 30x120cm | 1x4ft | Grid option, bowens mount | $70 |
| Neewer 9x48in | 0.75x4ft | Foldable, universal mount | $45 |
Challenge: Excessive shadow falloff.
Solution: Use a small white reflector ($10) to lift shadows slightly without losing mood.
Diagram:
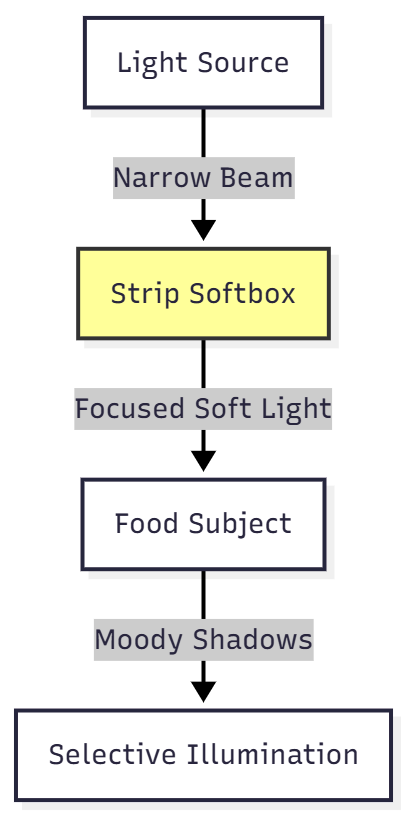
This technique sharpens precision in light placement, ideal for dramatic compositions.
Way 5: Snoot for Spotlight Focus and Creative Effects
A snoot creates a tight, spotlight-like beam, concentrating light on a specific area. Typically a secondary modifier, it excels as a key light for unique effects. Position 1-2 feet from the subject for a soft yet focused glow, perfect for highlighting details like a cocktail’s bubbles or a dessert’s drizzle.
This stands out for creative differentiation—vignette effects or isolated highlights make images memorable. Use a Neewer Metal Snoot ($20) or Godox Snoot with Grid ($30).
Setup Tips:
- Light: Godox V1 or SL-150W, 50% power.
- Position: Close (1-2ft) for soft spotlight; farther for harder edges.
- Modifiers: Add diffusion gel ($5) inside for softer transitions.
| Snoot | Material | Compatibility | Price (USD) |
|---|---|---|---|
| Neewer Metal | Aluminum | Bowens/Speedlight | $20 |
| Godox Snoot with Grid | Metal | Universal | $30 |
Challenge: Harsh beam edges.
Solution: Use diffusion gel or slightly increase distance to 3 feet.
Diagram:

This method encourages bold experimentation, setting your work apart.
Essential Equipment and Budget Alternatives
Building a one-light kit prioritizes versatility and affordability. Core components:
- Light Source: Godox SL-150W ($241) for continuous; Godox AD200 Pro ($349) for strobes.
- Modifiers: Scrim ($50), softbox ($60), snoot ($20), 5-in-1 reflector ($25).
- Stand: Lightweight aluminum ($35).
- Tripod: Manfrotto 055 ($200) for stability, especially overhead. iPhone users add a mount ($15).
Budget alternatives leverage household items:
- HDX 500W Halogen Work Light ($38) vs. Godox SL-200W ($338).
- Parchment Paper Diffuser ($5) vs. professional scrim ($50).
- Foam Boards ($5 each) vs. 5-in-1 reflector ($25).
| Budget Item | Professional Equivalent | Price Savings |
|---|---|---|
| HDX 500W Halogen | Godox SL-200W | $300 |
| Parchment Paper | Scrim | $45 |
| Foam Boards | 5-in-1 Reflector | $20 |
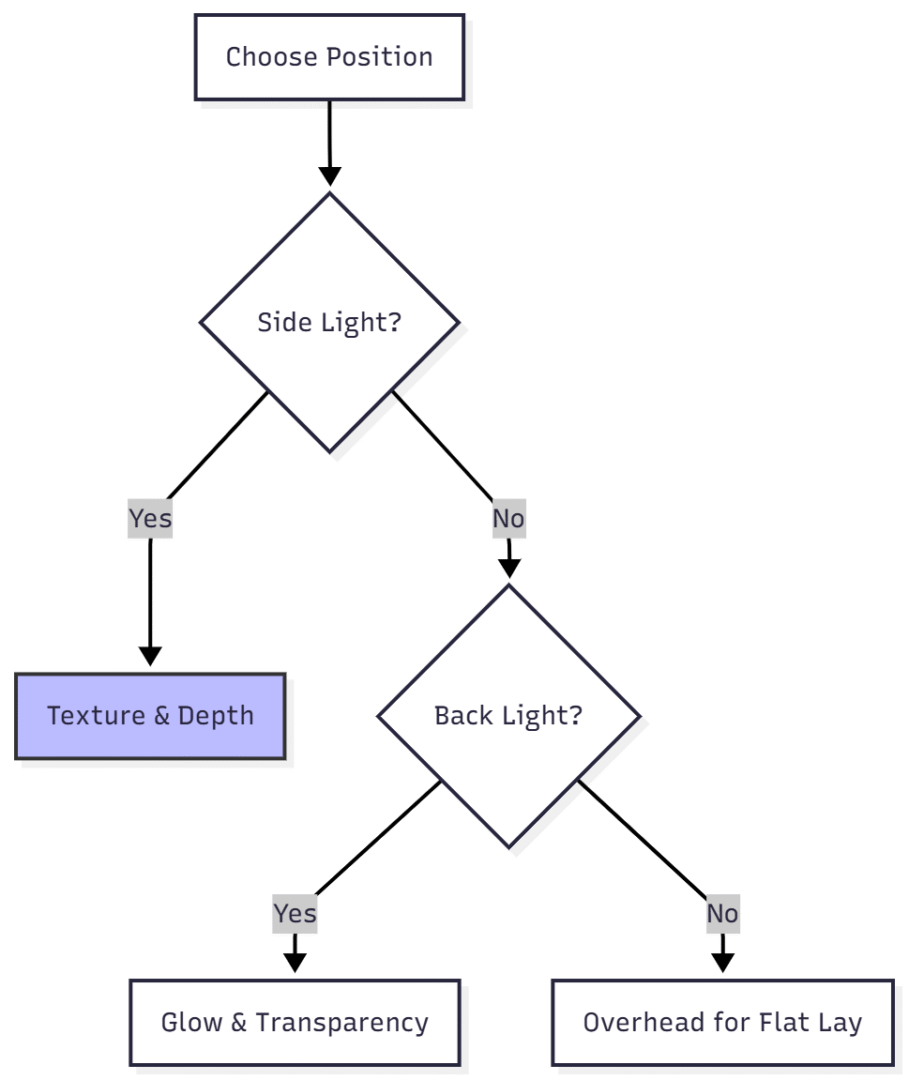
Positioning and Techniques for Optimal Results
- Side Lighting: 45 degrees, 2-3ft, for texture (e.g., bread crusts).
- Backlighting: Behind, 3-4ft, for glow (e.g., soups, drinks). Add diffuser to soften.
- Overhead: For flat lays, ensuring even exposure across props.
- Color Temperature: 5600K for natural; adjust for warmth (3200K) or coolness (6500K).
- Reflectors: White for fill, black for contrast.
Positioning flow:
Common Challenges and Solutions
| Problem | Cause | Solution |
|---|---|---|
| Glossy Sauce Glare | Direct light angle | Tilt dish, use diffuser, polarizing filter |
| Melting Ice Cream | Heat from light | Use stand-ins (e.g., mashed potatoes), speed up |
| Flat Textures | Poor angle | Side or back lighting |
| Mixed Tones | Multiple sources | Single light, cover windows |
| Reflections | Shiny props | Black boards, brushed metal props |
Post-Processing for Perfection
Editing enhances one-light setups. Use Adobe Lightroom ($10/month) to adjust:
- Exposure: Brighten underexposed areas (+0.5 to +1.5).
- Vibrancy: Boost food colors (+20 to +40) if washed out.
- Shadows: Lift for detail (+10 to +30) or deepen for drama (-10 to -20).
Shoot in RAW for flexibility. Manual camera settings: ISO 100-400, aperture f/5.6-f/8, shutter 1/125s. For iPhone, use Lightroom Mobile (free) for similar controls.
Showcasing Your Work with WP Recipe Maker
Great photos deserve great presentation. WP Recipe Maker offers SEO-optimized recipe cards, mobile-friendly layouts, and step-by-step photo integration. This ensures your one-light images shine online, engaging audiences with clickable enlargements and ingredient visuals.
Advanced Tips for One Light Mastery
- Hybrid Lighting: Combine one artificial light with natural light (e.g., window + LED) for dynamic effects. Use a scrim to blend seamlessly.
- Low-Key Lighting: Underexpose with black reflectors for film noir-style drama (e.g., dark chocolate shots).
- High-Key Lighting: Overexpose with white reflectors for bright, airy looks (e.g., citrus desserts).
- Texture Focus: Backlight translucent foods (e.g., sliced oranges) to pop details.
Frequently Asked Questions
The Godox SL-150W LED Light ($241) is ideal for beginners due to its continuous illumination, adjustable brightness (10-100%), and 5600K color temperature, mimicking natural daylight. It allows real-time previewing, making it easier to adjust angles and modifiers like scrims or softboxes for soft, appetizing results.
Absolutely! A single light, when paired with modifiers like a 120cm softbox ($60) or a large scrim ($50), can produce diverse effects—from bold, high-contrast shots to soft, diffused looks. By mastering light positioning and reflection, you can create professional images without complex setups.
To soften harsh shadows, use a diffuser (e.g., scrim or softbox) between the light and subject to scatter light evenly. Alternatively, place a white reflector ($10 foam board) opposite the light to bounce fill, lifting shadows without losing contrast. Adjust light distance (3-4 feet) for softer edges.
A softbox (e.g., Neewer 120cm, $60) offers directional, soft light with controlled spill due to its closed sides and double diffusion, ideal for precise illumination. A scrim (e.g., 7x9ft polyester, $50) scatters light broadly for ultra-soft, even lighting, mimicking a large window but with less directionality.
Create affordable modifiers using household items: tape parchment paper ($5) to a cardboard frame for a DIY scrim to diffuse light; use white poster boards ($5) as reflectors to fill shadows; or employ black cardboard to absorb light for moody effects. These alternatives rival professional tools like 5-in-1 reflectors ($25).
Conclusion
One light photography is a gateway to mastering food photography. By experimenting with these five techniques—unmodified hard light, large scrim, double-diffused softbox, strip softbox, and snoot—you’ll develop a nuanced understanding of light’s role in shaping mood, texture, and appeal. Start with a single light and versatile modifiers before scaling up. Practice positioning, diffusion, and reflection to create professional, appetizing images that stand out. With creativity and minimal gear, you’ll craft a signature style that makes every dish look delectable.
Please share this One Light Photography: Five Awesome Ways to Shoot Food with your friends and do a comment below about your feedback.
We will meet you on next article.
Until you can read, Mastering Lightroom: How to Blur Backgrounds