How To Do Photoshop Composites In Food Photography
Food photography often demands scenes bursting with energy—hands pouring sauces, ingredients cascading, or multiple actions unfolding simultaneously. Achieving this in a single shot can be challenging, especially when working solo.
Photoshop compositing solves this by layering multiple aligned images, allowing photographers to build complex, high-energy compositions from separate captures. This technique transforms static food setups into vibrant narratives, ideal for social media, blogs, or commercial work. In this comprehensive guide, we’ll cover essential equipment, shooting strategies, post-processing workflows, and advanced tips to produce professional-grade composites.
Understanding Photoshop Compositing in Food Photography
Photoshop compositing involves stacking multiple photographs taken under identical conditions and selectively revealing elements from each layer using masks. This method is particularly effective for food photography, where timing actions like pouring liquids or sprinkling spices in one frame is impractical. By shooting layers separately—such as a base food plate followed by action shots—you can blend them seamlessly.
The core advantage is control: isolate elements without compromising the overall scene. For instance, capture a pristine food arrangement, then add dynamic components like falling herbs or interacting hands. This not only adds realism but also elevates visual storytelling, making images more engaging for viewers on platforms like Instagram or Pinterest.
Compositing relies on consistency. Any mismatch in lighting, angle, or exposure will break the illusion. Tripod-mounted shooting ensures alignment, while manual camera settings maintain uniformity. In post-production, tools like layer masks and adjustment layers refine the blend, ensuring elements integrate naturally.
Essential Equipment for Food Compositing
To execute composites effectively, gather these tools. While specific brands aren’t mandatory, prioritize quality for precision.
- Tripod: Critical for alignment. Opt for models with sturdy legs and a ball head for quick adjustments. Example: Manfrotto MT055XPRO3 with MHXPRO-BHQ2 head (approximately $300–$400). Ensures no perspective shifts between shots.
- Camera: DSLR or mirrorless with manual controls. Full-frame sensors like those in Canon EOS R6 (around $2,000) offer better low-light performance and depth of field control, ideal for food close-ups.
- Lens: Prime lenses for sharpness, such as a 50mm f/1.8 (about $200) or macro like 100mm f/2.8 (around $600–$1,000). Fixed focal length maintains consistency.
- Lighting: Artificial sources for reliability. Softbox kits like Godox SL-60W LED (approximately $150) provide even illumination. Avoid natural light variations.
- Props and Food: Styled elements that won’t move between shots. Use stands or wires for suspending items like flying ingredients.
- Computer and Software: Adobe Photoshop (subscription $20/month) and optionally Lightroom ($10/month bundle). High-RAM setup (16GB+) for handling layered files.
This setup minimizes errors, focusing effort on creativity rather than corrections.
Preparation: Setting Up for Success
Preparation ensures seamless integration in post-production. Follow these steps:
- Mount the Tripod: Position your camera at a fixed angle and height. Lock all adjustments to prevent movement. This eliminates the need for auto-alignment later, saving time.
- Configure Lighting: Use artificial lights for consistency. Place softboxes at 45-degree angles to the subject for balanced shadows. Measure light intensity with a meter if available, aiming for uniform exposure across the scene.
- Style the Scene: Arrange food and props meticulously. Once set, avoid repositioning. Test compositions with test shots to confirm balance and focus.
- Camera Settings: Switch to manual mode. Set ISO low (100–200) for minimal noise, aperture for desired depth of field (f/8–f/11 for sharpness), and shutter speed to match lighting (1/125s or slower with tripod). Use a remote shutter or timer to avoid camera shake.
- Plan Layers: Visualize the final composite. Identify base elements (static food) and action layers (hands, pours). Shoot 5–10 variations to provide options.
Consistency here prevents mismatches, making Photoshop work straightforward.
Shooting Techniques for Layered Composites
Capture images in a structured sequence to build your composite.
- Base Shot: Photograph the core scene without actions. This serves as the foundation, ensuring the food looks pristine.
- Action Layers: Shoot isolated elements. For hands, position them differently in each frame—stirring, reaching, or holding. Use a timer for self-shooting.
- Dynamic Elements: For pours, capture mid-action with faster shutter speeds (1/500s+) if needed, but revert to base settings immediately. For falling ingredients, drop them from above and time the shot.
- Multiple Exposures: Take extras for flexibility, like varying splash intensities or hand positions.
Maintain identical framing. If adjustments are needed, note them for minor corrections in post.
Common pitfalls: Inconsistent focus—use manual focus locked on the key subject. Overexposure from actions—bracket if uncertain, but prioritize matching the base.
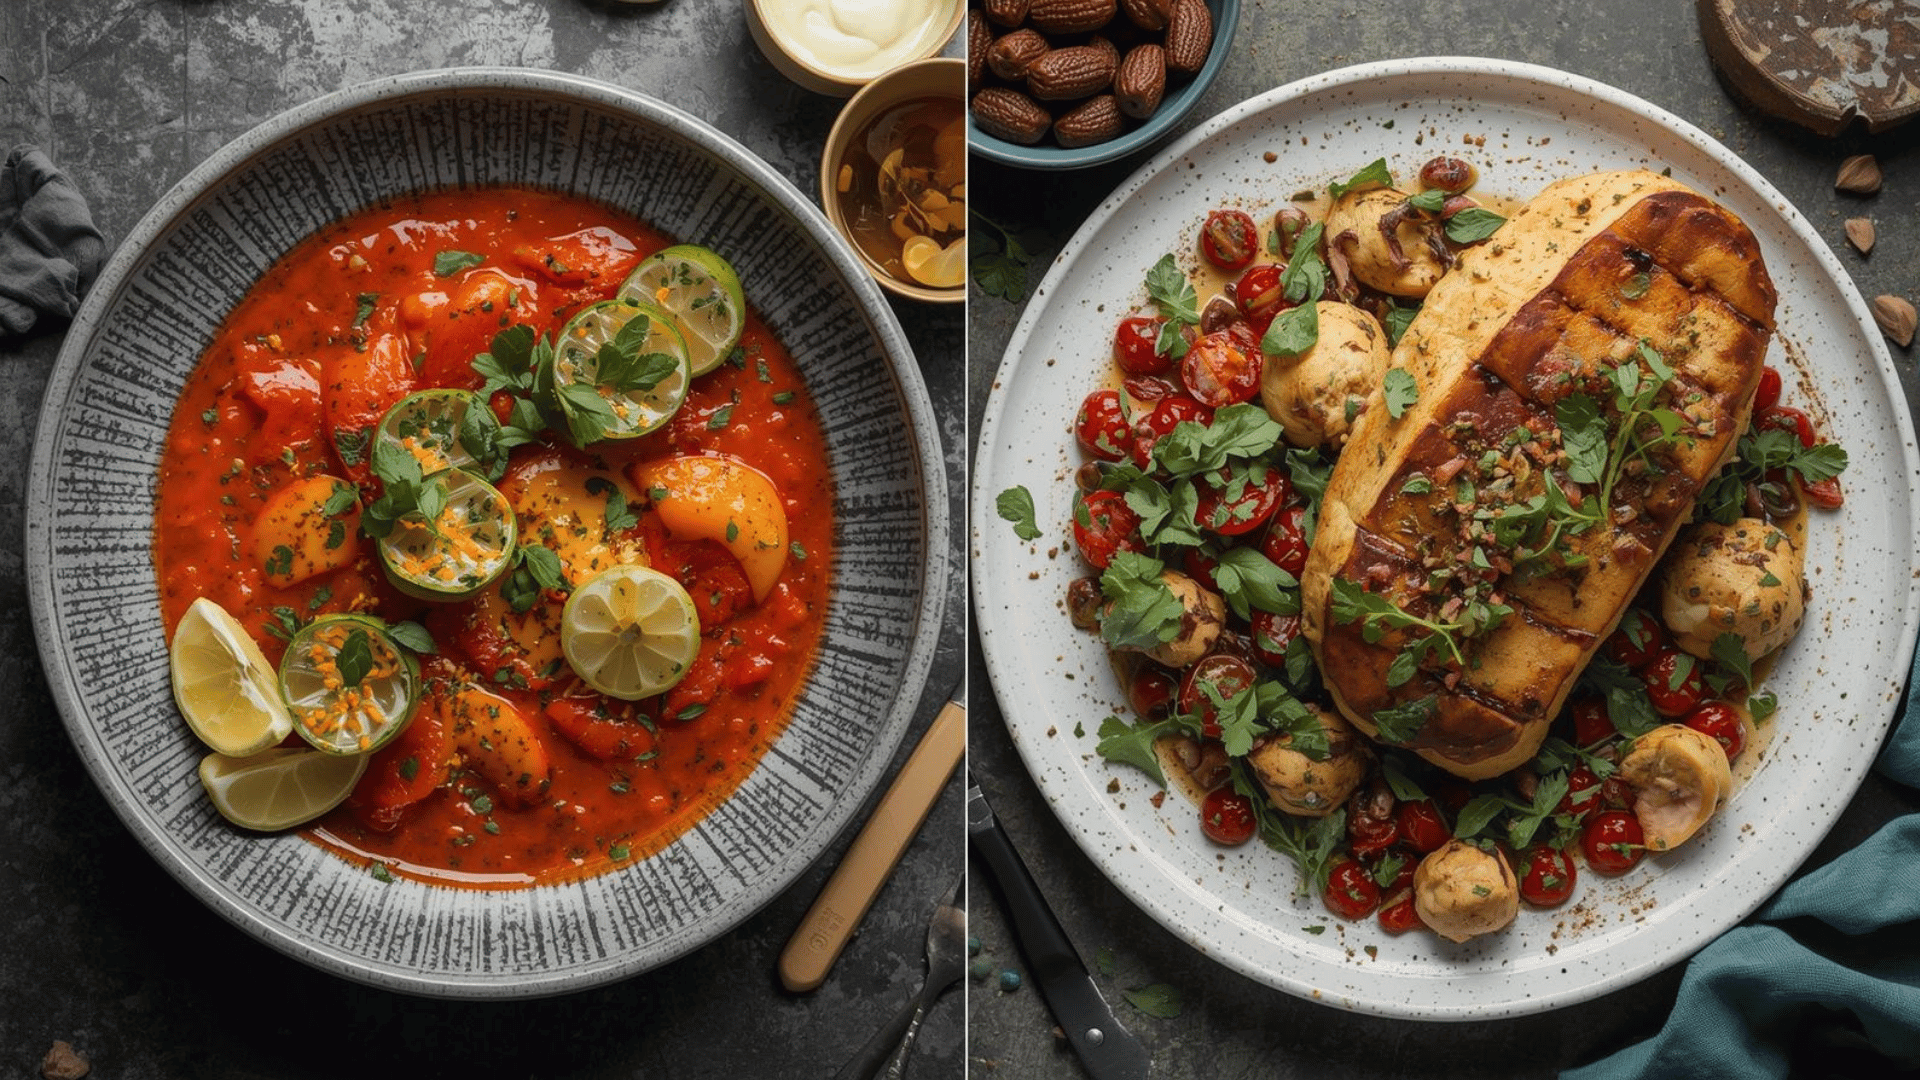
Common Busy Scenes in Food Composites
Apply compositing to these popular scenarios for high-impact results:
- Hands in Action: Simulate a crowded kitchen. Shoot hands in various poses—chopping, serving, toasting. Layer 3–5 for busyness without clutter.
- The Perfect Pour: Capture liquid streams or splashes separately. Select the ideal frame for masking, adding motion to static setups.
- Falling Ingredients: Drop spices, flour, or garnishes. Use high-speed bursts to catch mid-fall, then blend for a sprinkling effect.
- Fuller Plates: Enhance sparse dishes by compositing fuller versions. Mask in additional food elements for abundance.
- Exploding or Flying Food: For whimsical effects, suspend items with wires (remove in post). Layer explosions or trajectories for drama.
These scenes add narrative depth, turning ordinary food shots into stories.
Editing Workflow: From Raw to Composite
Post-production divides into initial adjustments and compositing.
Initial Edits in Lightroom (or Similar)
- Import and Select: Bring in all shots. Choose the best 4–6 for the composite.
- Edit Base Image: Adjust exposure, contrast, white balance, and color. Focus on natural food tones—boost vibrancy without oversaturation.
- Sync Edits: Select all images and sync settings from the base. This ensures color and tone uniformity.
- Export: Save as high-resolution JPEGs or TIFFs at full size. Avoid compression artifacts.
This step standardizes files for Photoshop.
Advanced Compositing in Photoshop
Open Photoshop for layering.
- Load Images as Layers: Open all files. Copy and paste into a single document, or use File > Scripts > Load Files into Stack for automation.
- Align Layers: If minor shifts occur, select all and use Edit > Auto-Align Layers (Projection: Auto).
- Base Layer Setup: Designate the static shot as Layer 0. Unlock it if it’s a background.
- Add Subsequent Layers: For each action image, create a new layer above. Paste the image.
- Apply Layer Masks: Add a mask to each upper layer. Invert (Ctrl+I/Cmd+I) to hide it initially.
- Reveal Elements: Select the Brush tool (B). Set to white, 100% opacity, 30% flow, soft edge (10% hardness). Brush over desired areas (e.g., hands) to reveal them. Adjust brush size with [ ] keys.
- Refine Masks: Use Quick Selection for rough cuts, then Refine Edge: Feather 2–3 pixels, shift edge inward slightly, add contrast (10–15%) for realism. Avoid sharp edges.
- Clean Up: Employ Healing Brush or Clone Stamp to erase imperfections like dust or wires.
- Color Matching: Add Adjustment Layers (Curves, Color Balance) clipped to individual layers. Match shadows, highlights, and tones to the base.
- Add Realism: Create shadows on new layers using eyedropper-sampled dark tones. Set blend mode to Overlay. Add overlays like subtle dust or sparks via additional layers.
- Manipulate Elements: Use Transform (Ctrl+T/Cmd+T) or Puppet Warp for positioning, like bending flying food naturally.
- Final Touches: Group layers (Ctrl+G/Cmd+G) for organization. Assess overall cohesion.
- Export: Save as PSD for edits, then export JPEG for sharing.
This workflow yields polished composites.
Key Techniques for Professional Results
- Layer Masking Mastery: Black conceals, white reveals. Invert masks for precise control.
- Edge Refinement: Feather edges to blend seamlessly. Overly crisp cuts look artificial.
- Blending Modes: Screen for light elements like smoke; Overlay for shadows.
- Shadows and Highlights: Manually paint shadows matching scene direction. Add highlights for dimension.
- Puppet Warp: Distort elements realistically, e.g., curving poured liquids.
Practice on simple composites before complex ones.
Keyboard Shortcuts Table
Efficient editing relies on shortcuts. Here’s a reference:
| Action | Windows Shortcut | Mac Shortcut |
|---|---|---|
| New Layer | Ctrl + Shift + N | Cmd + Shift + N |
| Select All | Ctrl + A | Cmd + A |
| Copy | Ctrl + C | Cmd + C |
| Paste | Ctrl + V | Cmd + V |
| Invert Layer Mask | Ctrl + I | Cmd + I |
| Brush Tool | B | B |
| Increase Brush Size | ] | ] |
| Decrease Brush Size | [ | [ |
| Increase Brush Hardness | Shift + ] | Shift + ] |
| Decrease Brush Hardness | Shift + [ | Shift + [ |
| Group Layers | Ctrl + G | Cmd + G |
Memorize these to speed up your process.
Workflow Flowchart
To visualize the process, here’s a flowchart outlining the steps:
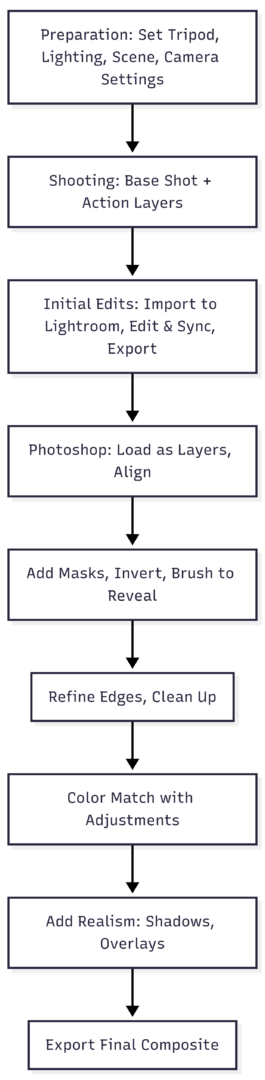
This diagram illustrates the linear yet iterative nature of compositing.
Advanced Tips for Realism and Creativity
- Lighting Consistency: Match light direction in all shots. Variations in shadows reveal fakes.
- Element Integration: Consider physics—falling items should cast appropriate motion blur or shadows.
- Overlays for Texture: Add subtle noise or gradients to unify layers.
- Scale and Perspective: Ensure added elements match the base’s scale using Transform.
- Common Errors to Avoid: Overcompositing (too many elements clutter); ignoring depth of field mismatches.
For explosive scenes, like flying lasagna, photograph elements separately on matching backgrounds. Use Quick Selection for cutouts, refining with feathering.
Experiment with blending modes for effects: Multiply for deepening colors in shadows.
Conclusion: Elevate Your Food Photography
Photoshop compositing empowers solo photographers to craft bustling, narrative-driven food images. By mastering preparation, shooting layers, and precise masking, you’ll produce composites that rival multi-person shoots. Start simple—try a basic hand-action scene—then scale to complex dynamics. This technique not only saves resources but unlocks creative possibilities, making your portfolio stand out.
Please share this How To Do Photoshop Composites In Food Photography with your friends and do a comment below about your feedback.
We will meet you on next article.
Until you can read, Choosing The Best Focal Point In Food Photography