Best Food Photography Tripod: Quick Guide
Discover the best food photography tripods for sharp, professional images. Explore top picks, features, and iPhone setups.
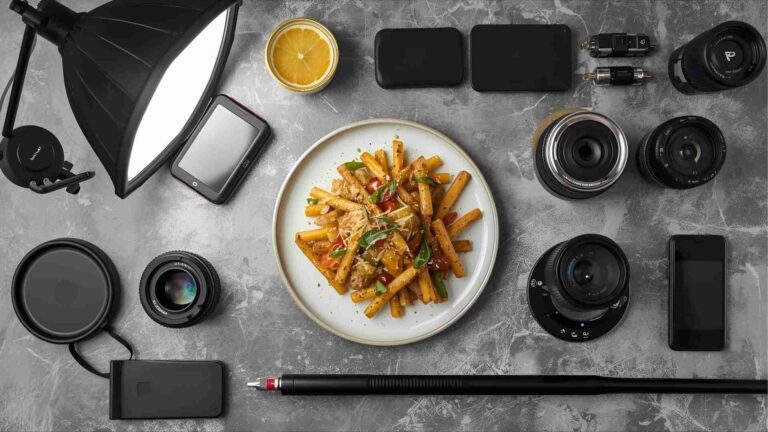
Food photography demands precision, creativity, and stability to capture mouthwatering images that stand out. Whether you’re a professional photographer, a food blogger, or an enthusiast using a DSLR or iPhone, a high-quality tripod is the backbone of your setup. This comprehensive guide explores the best tripods for food photography, key features to consider, and specialized setups for iPhone users. From studio to on-location shoots, we’ll cover top recommendations, specifications, and practical tips to elevate your food photography game.
Why a Tripod is Essential for Food Photography
In food photography, every detail matters—sharp focus, perfect angles, and consistent framing are non-negotiable. Handholding a camera, whether a DSLR or an iPhone, often leads to issues like camera shake, blurry images, and inconsistent composition. A tripod eliminates these problems by providing:
- Stability for Sharp Images: Prevents camera shake, especially in low-light conditions or with slower shutter speeds.
- Precise Framing: Allows you to lock the camera in place and adjust the food within the frame.
- Hands-Free Operation: Frees your hands to tweak lighting, props, or camera settings.
- Versatile Angles: Enables popular food photography angles like overhead (flat lay), 45-degree, or straight-on shots.
- Consistency: Maintains consistent framing for multiple shots, ideal for editorial or commercial work.
For iPhone users, tripods are equally critical. Handholding a smartphone can result in shaky images, awkward angles, and limited flexibility to adjust composition. A tripod transforms your iPhone into a professional tool, delivering sharper images and more creative control.
Key Features to Look for in a Food Photography Tripod
Choosing the right tripod involves balancing stability, versatility, and ease of use. Here are the essential features to prioritize:
- Stability: A sturdy tripod is crucial for sharp images, especially when shooting with long exposures or heavy camera setups. Look for tripods with robust legs and a solid build to withstand studio or outdoor conditions.
- Weight Capacity: Ensure the tripod and head can support at least 1.5 times the weight of your camera, lens, and any accessories. This prevents wobbling or tipping during shoots.
- Height and Adjustability: The tripod should offer enough height for overhead shots and flexibility for low-angle or table-level compositions. A center column that can tilt or extend horizontally is ideal for flat-lay photography.
- Leg Locks: Quick-release or twist-lock mechanisms should be easy to use for fast setup and adjustments.
- Tripod Head: The head determines how easily you can adjust the camera’s position. Ball heads offer fluid movement, while pan-tilt heads provide precise control for vertical and horizontal adjustments.
- Portability: For on-location shoots, a lightweight yet durable tripod is essential.
- Ease of Use: The tripod should integrate seamlessly into your workflow, with intuitive controls and quick setup.
For iPhone users, additional considerations include a secure phone mount and compatibility with overhead shooting setups.
Top Tripod Recommendations for Food Photography
Below, we dive into the best tripods for food photography, covering both professional studio setups and lightweight options for on-location shoots. Each recommendation includes specifications, pros, cons, and approximate pricing (based on typical market rates).
1. Manfrotto 055 Series
The Manfrotto 055 series is a favorite among food photographers for its versatility and rock-solid stability. This tripod is ideal for studio work, offering a center column that can be positioned horizontally for overhead shots—a must for flat-lay food photography.
Specifications:
- Material: Aluminum or carbon fiber
- Maximum Height: ~66 inches (with center column extended)
- Minimum Height: ~3.5 inches
- Weight: ~4.4–5.5 lbs (depending on model)
- Weight Capacity: Up to 19.8 lbs
- Leg Sections: 3
- Leg Locks: Quick-release flip locks
- Price: ~$200–$350 (tripod only, depending on material)
Pros:
- Exceptional stability for heavy DSLR setups
- Horizontal center column for overhead shots
- Durable build for long-term use
- Easy-to-use flip locks for quick adjustments
Cons:
- Heavier than some alternatives, less ideal for travel
- Higher price point for carbon fiber models
Best For: Studio photographers needing a reliable, versatile tripod for overhead and angled shots.
2. Manfrotto 058B Triaut Tripod with 410 Junior Geared Head
For professionals seeking a premium studio setup, the Manfrotto 058B Triaut Tripod paired with the 410 Junior Geared Head and 131DB Overhead Arm is a powerhouse. This combination excels in precision and flexibility, particularly for complex overhead compositions.
Specifications:
- Material: Aluminum
- Maximum Height: ~85 inches
- Minimum Height: ~17.3 inches
- Weight: ~13.6 lbs (tripod only)
- Weight Capacity: Up to 26.5 lbs
- Leg Sections: 3
- Leg Locks: Automatic leg release system
- Price: ~$600 (tripod), ~$200 (410 Junior Geared Head), ~$100 (131DB Overhead Arm)
Pros:
- Unmatched stability for heavy camera setups
- Geared head allows precise micro-adjustments
- Overhead arm enables complex angles and dual-head setups
- Ideal for professional studio environments
Cons:
- Expensive compared to other options
- Heavy and bulky, not suited for on-location shoots
- Steeper learning curve for geared head adjustments
Best For: Professional food photographers working in controlled studio settings with heavy equipment.
3. Induro Alloy 8M AT214
The Induro Alloy 8M AT214 is a robust, versatile tripod suitable for both studio and on-location food photography. Its sturdy build and adjustable design make it a reliable choice for various shooting angles.
Specifications:
- Material: Aluminum
- Maximum Height: ~67 inches
- Minimum Height: ~17 inches
- Weight: ~5.4 lbs
- Weight Capacity: Up to 22 lbs
- Leg Sections: 4
- Leg Locks: Twist locks
- Price: ~$150–$200
Pros:
- Strong build quality for stable shots
- Lightweight enough for on-location shoots
- Smooth twist locks for quick setup
- High weight capacity for DSLR setups
Cons:
- No horizontal center column (requires additional arm for overhead shots)
- Less premium feel compared to Manfrotto options
Best For: Photographers needing a balance of portability and stability for studio and location shoots.
4. Gitzo GT2542 Mountaineer Tripod Series 2 with Acratech Ultimate GP Ball Head
The Gitzo GT2542 Mountaineer is a premium carbon fiber tripod designed for photographers who prioritize portability without sacrificing strength. Paired with the Acratech Ultimate GP Ball Head, it’s perfect for on-location food photography.
Specifications:
- Material: Carbon fiber
- Maximum Height: ~65.7 inches
- Minimum Height: ~5.9 inches
- Weight: ~3.7 lbs (tripod), ~1 lb (ball head)
- Weight Capacity: Up to 26.5 lbs
- Leg Sections: 4
- Leg Locks: Twist locks
- Price: ~$600 (tripod), ~$400 (ball head)
Pros:
- Lightweight and portable for travel
- Exceptional build quality and durability
- Ball head offers smooth, precise adjustments
- High weight capacity for professional setups
Cons:
- Premium price point
- No built-in horizontal column for overhead shots
Best For: On-location food photographers seeking a lightweight, high-end tripod.
Tripod Heads: Choosing the Right One
The tripod head is just as important as the tripod itself. It determines how easily you can position your camera for precise framing. Here’s a breakdown of the two most suitable heads for food photography:
Ball Head
- Description: Offers fluid movement in any direction, ideal for quick adjustments and versatile angles.
- Best For: Photographers who need flexibility and speed, such as during dynamic shoots with multiple angles.
- Example: Acratech Ultimate GP Ball Head (~$400)
- Pros: Smooth movement, compact, lightweight
- Cons: Less precise for fine adjustments compared to pan-tilt heads
Pan-Tilt Head
- Description: Allows independent control of vertical and horizontal movements, perfect for controlled framing.
- Best For: Studio photographers requiring precise adjustments for editorial or commercial work.
- Example: Manfrotto 410 Junior Geared Head (~$200)
- Pros: Precise control, ideal for complex compositions
- Cons: Bulkier, slower to adjust than ball heads
Manfrotto 131DB Overhead Arm
- Description: Extends the center column for overhead shots and supports dual-head setups.
- Best For: Studio photographers shooting flat-lay images.
- Price: ~$100
- Pros: Enables complex overhead angles, sturdy design
- Cons: Adds weight and cost to the setup
Best iPhone Tripod Setup for Food Photography
Smartphones, especially iPhones, have become powerful tools for food photography, offering convenience and impressive image quality. However, handholding an iPhone often leads to issues like camera shake, inconsistent framing, and limited angle options. A dedicated tripod setup solves these problems, delivering professional results. Here’s the ideal iPhone tripod setup:
Recommended Equipment
- Tripod with Center Column: A tripod like the Manfrotto 055 (~$200–$350) with a center column is essential for overhead shots, the most popular angle in food photography.
- Ball Head: A ball head (included with some Manfrotto 055 models or ~$50–$150 separately) allows easy angle adjustments.
- Metal Phone Tripod Mount: A sturdy mount (~$20–$50) securely holds the iPhone, accommodating various phone sizes and orientations.
- Remote Shutter (Optional): A Bluetooth remote shutter (~$10–$30) prevents camera shake when triggering shots, especially in low light.
Pros of iPhone Tripod Setup:
- Secure and stable for sharp images
- Flexible height and angle adjustments
- Supports overhead and flat-lay shots
- Frees hands for composition and lighting tweaks
- Easy to set up and portable
Cons:
- Slightly higher cost than selfie sticks or GorillaPods
- Requires multiple components
Why Avoid Selfie Sticks and GorillaPods?
While selfie sticks and Joby GorillaPods are affordable and portable, they fall short for food photography:
- Limited Stability: Prone to wobbling, especially with heavier smartphones.
- Height Restrictions: Cannot achieve overhead or high-angle shots.
- Cheap Build: Often feel flimsy and lack durability.
- Inflexible Angles: Not designed for precise framing or flat-lay compositions.
Comparison Table: iPhone Tripod vs. Selfie Stick/GorillaPod
| Feature | iPhone Tripod Setup | Selfie Stick/GorillaPod |
|---|---|---|
| Stability | High | Low to Moderate |
| Overhead Shot Support | Yes | No |
| Height Flexibility | High | Limited |
| Durability | High | Low to Moderate |
| Price Range | $230–$530 | $20–$100 |
| Best For | Professional shoots | Casual photography |
Practical Tips for Using a Tripod in Food Photography
To maximize your tripod’s potential, follow these tips:
- Invest in Quality: A $300 tripod may seem expensive, but cheap tripods often lack stability and durability, leading to costly replacements. Spending more upfront saves money in the long run.
- Test Weight Capacity: Always check that your tripod and head can handle your camera setup’s weight, including lenses and accessories.
- Use a Remote Shutter: For both DSLRs and iPhones, a remote shutter minimizes camera shake, especially in low-light conditions.
- Practice Overhead Shots: Use a tripod with a horizontal center column or an overhead arm to master flat-lay compositions, which are popular in food photography.
- Keep It Level: Use the tripod’s built-in level or a bubble level to ensure straight horizons, critical for professional-looking images.
- Adjust Lighting and Props: With the camera secured, focus on tweaking lighting, props, and food arrangement for the perfect shot.
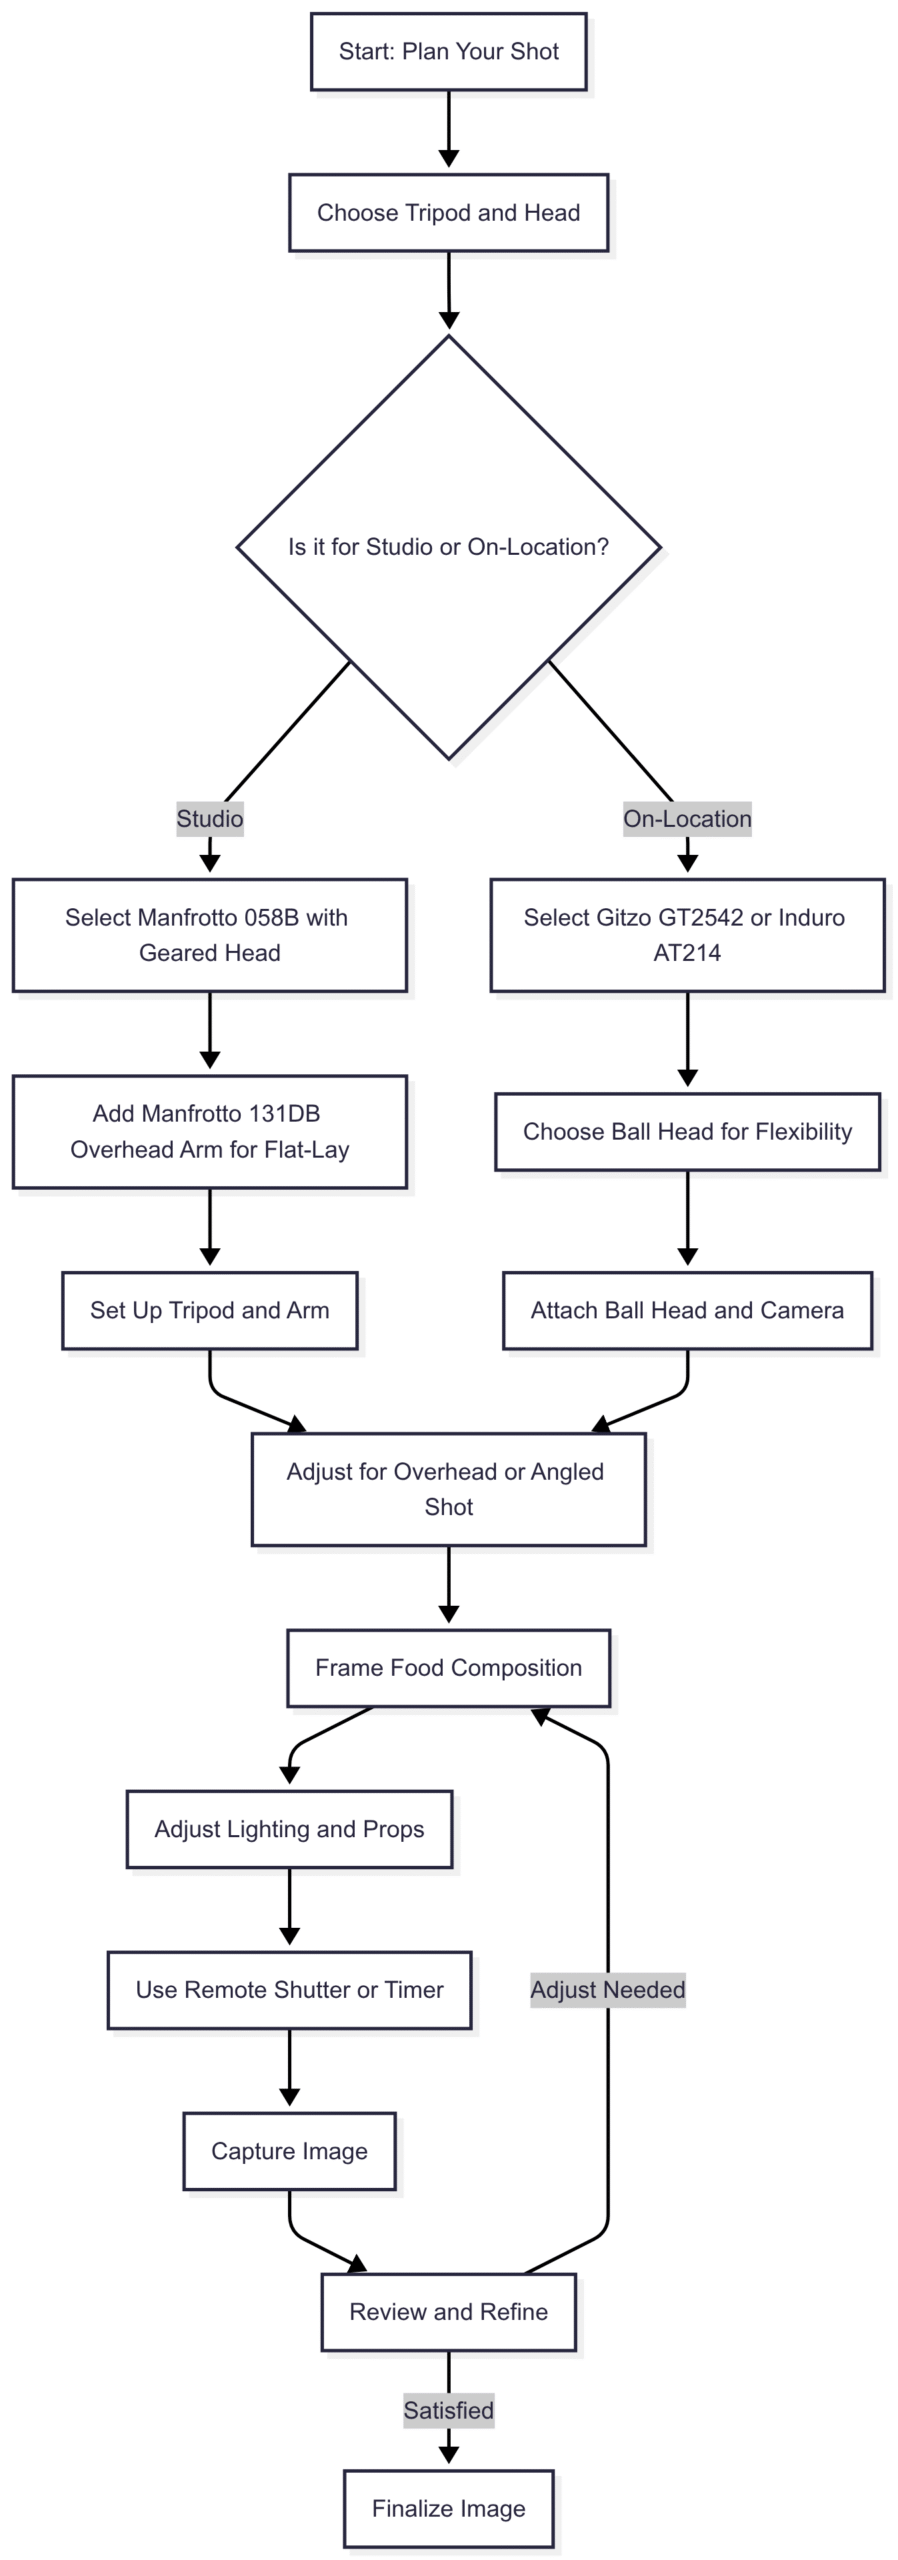
Chart: Food Photography Tripod Workflow
Below is a flowchart illustrating the process of setting up a tripod for food photography, ensuring an efficient workflow.
Choosing Between Studio and On-Location Tripods
The right tripod depends on your shooting environment:
- Studio Photography: Prioritize stability and versatility with tripods like the Manfrotto 058B or 055 series. These handle heavy setups and support overhead arms for flat-lay shots. Expect to spend $300–$900 for a complete setup.
- On-Location Photography: Opt for lightweight, portable options like the Gitzo GT2542 or Induro AT214. These are easier to carry but still offer robust performance, with prices ranging from $150–$1,000.
For iPhone users, a tripod like the Manfrotto 055 with a metal phone mount provides professional results without breaking the bank (~$230–$530 total).
Conclusion
A high-quality tripod is a game-changer for food photography, whether you’re using a DSLR or an iPhone. The Manfrotto 055 series, Manfrotto 058B with geared head, Induro Alloy 8M AT214, and Gitzo GT2542 Mountaineer are top choices, each excelling in different scenarios. For iPhone users, a tripod with a center column, ball head, and metal phone mount delivers professional-grade stability and versatility. By prioritizing stability, weight capacity, and ease of use, you can capture stunning, sharp food images that elevate your portfolio or social media presence.
Invest in the right tripod from the start to avoid costly upgrades later. Pair it with a suitable head and accessories, and follow our practical tips to streamline your workflow. Whether you’re shooting in a studio or on location, the perfect tripod setup will help you create mouthwatering images with ease.
For more in-depth guidance, check out our related article on iPhone photography tips or explore the recommended tripods and accessories online.
Please share this Best Food Photography Tripod: Quick Guide with your friends and do a comment below about your feedback.
We will meet you on next article.
Until you can read, A Guide to Buying Vinyl Food Photography Backdrops