
Recipe Blog Post Checklist for Food Bloggers
Food blogging is more than just sharing recipes—it’s about storytelling, connecting with an audience, and creating content that’s both delicious and discoverable. Crafting a recipe blog post that stands out in a crowded digital kitchen requires a thoughtful structure that balances creativity, usability, and search engine optimization (SEO). Whether you’re a seasoned food blogger or just starting out, having a reliable recipe blog post checklist can streamline your process, save time, and ensure your posts are polished, engaging, and optimized for both readers and Google. This comprehensive guide dives deep into the essential components of a winning recipe blog post, offering practical tips, tools, and strategies to elevate your food blog to the next level.
Why You Need a Recipe Blog Post Checklist
Creating a recipe blog post from scratch every time can feel like reinventing the wheel. Without a clear framework, you might miss critical elements that make your content shine, from captivating visuals to SEO-friendly details. A checklist serves as your culinary roadmap, ensuring consistency across posts, reducing writer’s block, and helping you meet your readers’ expectations. Here’s why a structured approach matters:
- Saves Time: A checklist eliminates guesswork, letting you focus on creativity rather than structure.
- Ensures Consistency: Readers come to know what to expect, building trust and loyalty.
- Boosts SEO: A well-structured post with the right elements increases your chances of ranking higher on search engines.
- Enhances User Experience: Clear, organized posts make it easy for readers to follow and recreate your recipes.
- Reduces Stress: For bloggers battling perfectionism or anxiety, a checklist provides a clear starting point, making the process less overwhelming.
Whether you’re sharing a family heirloom recipe or a trendy dish inspired by your travels, a checklist keeps you on track. Let’s break down the must-have components of a recipe blog post that will delight your audience and Google’s algorithms alike.
Step-by-Step Recipe Blog Post Checklist
1. Attention-Grabbing Headline
The introduction is your chance to hook readers and set the stage for your recipe. In just 2-3 sentences, pitch why this dish is worth making. Highlight key selling points like:
- Main Ingredients: Mention star players (e.g., “juicy shrimp” or “creamy avocado”).
- Preparation Time: Emphasize speed for busy readers (e.g., “ready in 20 minutes”).
- Flavor Profile: Use vivid descriptors (e.g., “spicy and tangy” or “rich and decadent”).
- Dietary Appeal: Note if it’s vegan, gluten-free, or keto-friendly.
Example Introductions
- Chimichurri Shrimp with Tomatoes: “Saucy, punchy, and delightful Chimichurri Shrimp! Served with a fresh tomato salad and a dollop of creamy tzatziki, this dish is a weeknight winner.”
- Vegan Chocolate Chip Muffins: “Pillowy soft with a crunchy caramelized top, these Vegan Chocolate Chip Muffins are packed with dark chocolate in every bite—gourmet taste, made simple.”
Keep it concise but enticing, drawing readers in without overwhelming them.
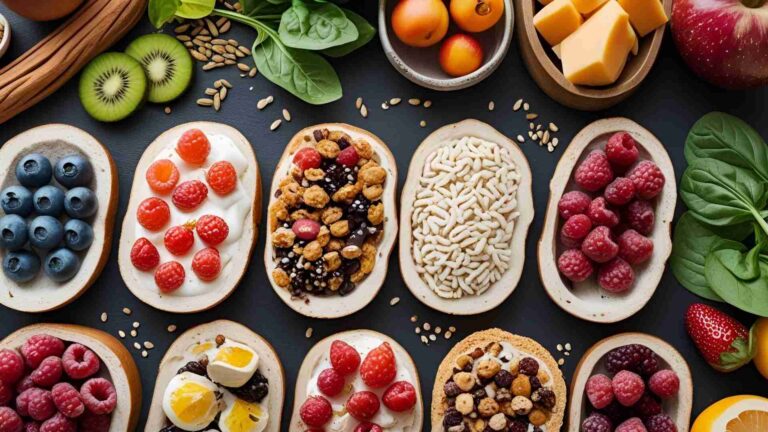
2. High-Quality Hero Image
Your hero photo is the first visual impression of your recipe, so make it count. This image should be high-quality, well-lit, and showcase the finished dish in all its glory. It’s often used as the Featured Image for your post and shared across social media, so invest time in getting it right.
Tips for a Winning Hero Photo
- Focus on the Dish: Highlight the food, not props or backgrounds.
- Use Natural Light: Soft, diffused light brings out colors and textures.
- Style Thoughtfully: Arrange the dish to look appetizing, with garnishes or plating that pops.
- Optimize for Web: Compress images to maintain quality without slowing down your site (aim for 100-300 KB).
- Optimize for SEO:
- File name:
chocolate-chip-cookies.jpg(notIMG_1234.jpg) - Alt text: “Homemade chocolate chip cookies with melty chocolate chunks”
- File name:
A great hero photo can increase click-through rates and keep readers engaged. Consider investing in a basic food photography course if you’re new to styling.
3. Share a Personal Story
The personal story section is where your voice shines. While some readers jokingly skip to the recipe, this part builds connection and sets your blog apart from AI-generated content or generic recipe sites. Share:
- Inspiration: Was it a family tradition, a trip abroad, or a restaurant dish you recreated?
- Why You Love It: What makes this recipe special to you?
- Development Process: Offer a peek behind the scenes—did you test it multiple times? Any fun mishaps?
- Serving Suggestions: How do you enjoy it (e.g., “perfect with a glass of chilled rosé”)?
Example Personal Story
From Pinch of Yum’s Banza Chicken Bowls: “This recipe came about during a busy week when I needed something quick but flavorful. Inspired by a spicy dish I tried in Santa Fe, I played with Calabrian chilis until I got that perfect kick. It’s now my go-to for cozy nights in!”
This section doesn’t need to be long—1-2 paragraphs are enough to add personality and context. In the age of AI, authentic storytelling is what keeps readers coming back.
4. Break Down Key Ingredients
An ingredients section before the recipe card gives readers a quick overview and builds anticipation. Highlight the most important ingredients and include:
- Purpose: Why is this ingredient essential? (e.g., “Smoked paprika adds a subtle warmth.”)
- Substitutions: Offer alternatives for hard-to-find items (e.g., “Swap tamari for soy sauce.”)
- Preparation Notes: Quick tips, like “zest the lemon before juicing.”
Include a photo of the ingredients laid out neatly for visual appeal. Add a note like, “Check the recipe card below for the full list and quantities,” to guide readers.
Ingredient Breakdown Example
For a Lemon Blueberry Cake:
- Fresh Blueberries: Bursting with sweetness, they add juicy pockets of flavor. Frozen works in a pinch.
- Greek Yogurt: Keeps the cake moist and adds a slight tang. Sour cream is a great substitute.
- Lemon Zest: Brightens the batter with citrusy zing. Don’t skip this!
This section also demonstrates your expertise, boosting your E-E-A-T (Experience, Expertise, Authoritativeness, Trustworthiness) for SEO.
5. Provide Step-by-Step Instructions with Photos
Before diving into the recipe card, walk readers through the cooking process with a conversational tone. This section is less rigid than the recipe card, allowing you to add personality and helpful tips. Include:
- Overview of Steps: Summarize the process (e.g., “Mix the batter, fold in berries, bake until golden”).
- Key Moments: Highlight tricky steps or techniques.
- Anecdotes: Share what you learned while testing (e.g., “Don’t overmix, or the cake gets dense!”).
Add 4-8 process photos to illustrate critical steps, like:
- Mixing the batter to the right consistency.
- How to layer ingredients in a dish.
- The texture of a sauce when it’s done.
Process Photo Tips
- Consistency: Use the same lighting and background for a cohesive look.
- Captions: Add brief explanations (e.g., “This is what ‘soft peaks’ look like”).
- Focus on Clarity: Show the action or result clearly, not just aesthetics.
Process shots build confidence in your readers, especially beginners, and improve engagement.
6. Include a Robust Recipe Card
The recipe card is the heart of your post, delivering the details readers need to recreate your dish. Tools like WP Recipe Maker make this easy by offering customizable, SEO-friendly templates. A great recipe card includes:
- Ingredients: List in order of use, with precise measurements.
- Instructions: Clear, numbered steps with concise directions.
- Metadata: Prep time, cook time, servings, and difficulty level.
- Notes: Storage tips, substitutions, or serving suggestions.
- Schema Markup: Ensures Google understands your recipe for rich snippets.
Why WP Recipe Maker?
- Customizable Templates: Match your blog’s branding effortlessly.
- SEO Boost: Built-in schema markup increases visibility in search results.
- Time-Saving Features: Auto-calculate nutrition facts, toggle metric/imperial units, and more.
- Central Dashboard: Manage all recipes in one place for bulk updates.
Pricing (as of the latest data):
- Basic Plan: $49/year (1 site, core features).
- Professional Plan: $99/year (3 sites, advanced features like nutrition calculations).
- Elite Plan: $149/year (unlimited sites, premium support).
User Reviews:
- Sarah, Food Blogger: “WP Recipe Maker transformed my blog. The recipe cards look professional, and I’ve noticed more traffic from Google since using their schema markup.”
- Mike, Home Cook: “As a reader, I love the clean layout and the ‘Jump to Recipe’ button. It makes cooking so much easier.”
A well-crafted recipe card ensures clarity and enhances your blog’s professionalism.
7. Add a Frequently Asked Questions (FAQ) Section
An FAQ section answers common reader questions, improves engagement, and adds structured data for SEO. Source ideas from:
- Google’s “People Also Ask” for your recipe keyword.
- Comments or DMs from readers.
- Common cooking concerns (e.g., “Can I make this ahead?”).
Example FAQ for a Lasagna Recipe
- Can I freeze lasagna? Yes, assemble it, wrap tightly, and freeze for up to 3 months. Bake from frozen, adding 15-20 minutes.
- What’s a good meat substitute? Try lentils or mushrooms for a vegetarian version.
- How do I prevent soggy lasagna? Drain excess liquid from veggies and don’t over-sauce.
FAQs keep readers on your page longer, reducing bounce rates and signaling quality to search engines.
8. Include Optional Enhancements
While not every post needs these, they can elevate your content when relevant:
- Related Recipes: Link to complementary dishes (e.g., “Pair this chili with my cornbread recipe”).
- Nutrition Facts: Use tools like WP Recipe Maker to auto-calculate.
- Equipment Recommendations: Suggest tools like a stand mixer or cast-iron skillet, with affiliate links if applicable.
- Email Opt-In: Encourage readers to subscribe for exclusive recipes or tips.
- Video Content: Embed a short recipe video for visual learners (great for SEO and social media).
These extras add value without cluttering your post.
Optimizing Your Recipe Blog Post for SEO
A great recipe post isn’t just about the content—it needs to be discoverable. Here’s how to optimize for SEO without sacrificing quality:
1. Conduct Keyword Research
Use tools like Ahrefs, Semrush, or RankIQ to find low-competition, high-traffic keywords. For example:
- Primary Keyword: “Vegan Chocolate Chip Muffins”
- Variations: “Easy Vegan Muffins,” “Dairy-Free Chocolate Muffins”
Incorporate keywords naturally in:
- Title (e.g., “The Best Vegan Chocolate Chip Muffins”).
- Headings (H2, H3).
- First 100 words.
- Alt text for images.
Tool Spotlight: RankIQ
- Price: $49/month (includes keyword reports and content optimization).
- Why It’s Great: Suggests keywords tailored for food bloggers, saving research time.
- User Review: Emma, Blogger: “RankIQ helped me rank on page 1 for ‘gluten-free pancakes’ within months. It’s a game-changer for beginners.”
2. Use Schema Markup
Plugins like WP Recipe Maker automatically add schema markup, telling Google your post is a recipe. This increases chances of appearing in rich snippets, like recipe carousels.
3. Optimize Images
- Alt Text: Describe images with keywords (e.g., “Vegan chocolate chip muffins fresh from the oven”).
- Compression: Use tools like TinyPNG to reduce file size without losing quality.
- File Names: Rename files descriptively (e.g., “vegan-muffin-recipe.jpg” instead of “IMG_1234.jpg”).
4. Internal and External Linking
- Internal Links: Link to related recipes or blog posts to keep readers on your site.
- External Links: Cite reputable sources (e.g., a study on ingredient benefits) to build credibility.
5. Write Engaging Meta Descriptions
Craft a 150-160 character description that includes your keyword and a call-to-action:
- “Craving fluffy vegan chocolate chip muffins? Try this easy recipe with a crunchy topping—ready in 30 minutes!”
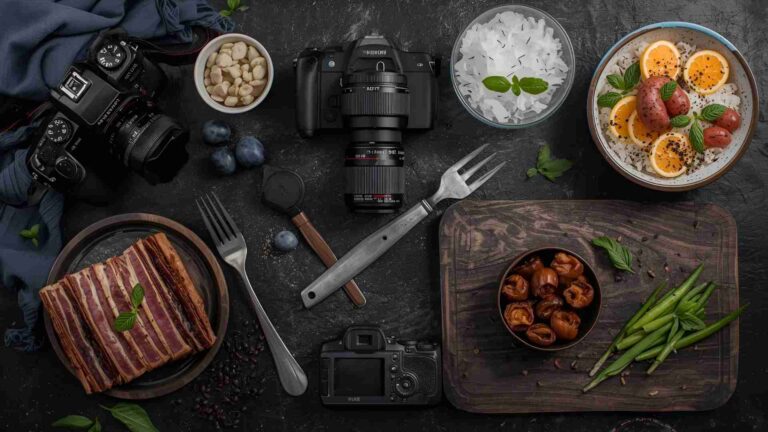
Tools to Streamline Your Recipe Blogging Process
Investing in the right tools can make your workflow smoother and your posts more professional. Here’s a rundown of essentials:
| Tool | Purpose | Price | Why It’s Worth It |
|---|---|---|---|
| WP Recipe Maker | Recipe card creation, SEO schema | $49-$149/year | Professional cards, SEO boost, time-saving features like nutrition calculations. |
| RankIQ | Keyword research | $49/month | Finds low-competition keywords tailored for food blogs, ideal for ranking quickly. |
| Canva | Graphics, logos, social media assets | Free or $119.99/year (Pro) | Easy-to-use design tool for creating branded visuals, even for non-designers. |
| Yoast SEO | On-page SEO optimization | Free or $99/year (Premium) | Guides SEO best practices, improves readability, and ensures keyword optimization. |
| Bluehost | Web hosting | $3.95-$13.95/month | Reliable hosting with 24/7 support, perfect for beginners scaling their blogs. |
User Review for Canva:
- Lisa, Food Blogger: “Canva’s free version let me create Pinterest pins that tripled my traffic. Upgrading to Pro was worth it for the brand kit feature.”
Starting a Food Blog: Additional Tips for Beginners
If you’re new to food blogging, the process can feel daunting, especially with perfectionism or anxiety in the mix. Here are actionable steps to get started:
- Define Your Niche: Focus on what you love—vegan desserts, quick weeknight meals, or regional cuisine. A niche helps you stand out.
- Choose a Reliable Platform: WordPress.org is the gold standard for food bloggers due to its flexibility and plugins.
- Invest in a Theme: Premium themes like Feast Themes ($99-$149) or Foodie Pro ($129.95) offer food-specific layouts and SEO benefits.
- Learn Basic Photography: Courses like Artificial Light Academy ($199) teach lighting and styling to make your dishes pop.
- Research Competitors: Analyze top food blogs in your niche to understand what works (e.g., post structure, visuals, tone).
- Start Small: You don’t need a perfect site to launch. Publish 3-5 posts, then refine as you learn.
User Comment from Reddit:
- u/foodieforever: “I was overwhelmed starting my blog, but focusing on just one recipe a week helped me build momentum. WP Recipe Maker was a lifesaver for formatting!”
Monetizing Your Recipe Blog
Once your blog gains traction, you can turn your passion into profit. Here are popular monetization strategies:
- Affiliate Marketing: Earn commissions by linking to products (e.g., Amazon Associates, 3-7% per sale).
- Display Ads: Join networks like Mediavine ($1,000-$2,000/month potential with 50,000 pageviews).
- Sponsored Posts: Partner with brands for paid content ($500-$5,000 per post, depending on audience size).
- Digital Products: Sell e-cookbooks or courses ($10-$50 per sale).
Example Success Story:
- Kyleigh, Barley & Sage: “My first Mediavine month earned $1,000 with 50,000 pageviews. Affiliate links for kitchen tools add $200-$300 monthly.”
Common Mistakes to Avoid
Even with a checklist, pitfalls can derail your efforts. Watch out for:
- Overloading with Photos: Too many images slow down your site and overwhelm readers.
- Skipping SEO: Ignoring keywords or schema markup limits discoverability.
- Vague Instructions: Ambiguous recipe steps frustrate readers.
- Neglecting Mobile: Ensure your site and recipe cards are mobile-friendly, as 60%+ of traffic is mobile.
- Ignoring Feedback: Monitor comments and adjust based on reader questions.
Sample Recipe Blog Post Outline
Here’s a quick template to copy and paste for your next post:
- Title: [Keyword-Rich, Catchy Title]
- Hero Photo: Stunning image of the finished dish
- Introduction: 2-3 sentences pitching the recipe
- Personal Story: 1-2 paragraphs sharing inspiration or experience
- Ingredients Breakdown: Highlight key ingredients, substitutions, and a photo
- Step-by-Step Guide: Conversational overview with 4-8 process photos
- Recipe Card: Detailed ingredients, instructions, and metadata
- FAQ Section: 3-5 common questions with answers
- Optional Extras: Related recipes, tips, or email opt-in
Conclusion
A well-structured recipe blog post is your secret ingredient for success in food blogging. By following this checklist—complete with a captivating introduction, stunning visuals, personal storytelling, and SEO-friendly elements like WP Recipe Maker’s recipe cards—you’ll create content that’s both reader-friendly and search-engine-ready. Whether you’re battling writer’s block or scaling your blog into a business, this framework saves time, reduces stress, and ensures consistency.
Start small, experiment with what resonates with your audience, and don’t be afraid to invest in tools that make your life easier. With dedication and the right checklist, your food blog can rise to the top of Google’s results and your readers’ hearts. What’s your go-to tip for crafting recipe posts? Share in the comments below!
Please share this Recipe Blog Post Checklist for Food Bloggers with your friends and do a comment below about your feedback.
We will meet you on next article.
Until you can read, How to Write About Food in a Personal, Engaging Way?


This checklist is gold! As a food blogger, it’s easy to overlook small details that make a big difference in readability and SEO. I especially appreciated the reminder about including step-by-step photos and clear recipe formatting. Definitely bookmarking this—thanks for putting it together!
Great checklist! Perfect for keeping blog posts organized, SEO-friendly, and reader-ready. A must-have guide for any food blogger!