
Structuring the Perfect Recipe Blog Post
Crafting a recipe blog post that captivates readers, ranks well on search engines, and showcases your culinary expertise is both an art and a science. Whether you’re a seasoned food blogger or just starting out, having a structured framework can streamline your process, enhance user experience, and boost your blog’s visibility. In this in-depth guide, we’ll explore how to structure the perfect recipe blog post, covering essential components, optional enhancements, and tools like WP Recipe Maker and Grigora to elevate your content. We’ll also dive into SEO strategies, user engagement techniques, and real-world examples to ensure your posts are as delicious to read as the dishes you create.
Why You Need a Recipe Blog Post Template
Food blogging is a labor of love that involves recipe development, photography, writing, and technical optimization. Without a clear structure, each post can feel like starting from scratch, leading to writer’s block or inconsistent content. A well-designed template offers several benefits:
- Saves Time: A predefined structure reduces the time spent planning each post, allowing you to focus on creativity.
- Ensures Consistency: Readers appreciate predictability. A consistent format helps them navigate your blog easily.
- Boosts SEO: Search engines favor structured content with clear headings, schema markup, and user-focused elements.
- Enhances Reader Experience: A logical flow makes it easier for readers to find what they need, whether it’s the recipe, a story, or cooking tips.
Think of a template as your kitchen mise en place—everything organized and ready to go, so you can cook up a stellar blog post with ease.
The Anatomy of the Perfect Recipe Blog Post
A great recipe blog post balances storytelling, practical information, and visual appeal. Below is a detailed breakdown of the must-have sections, with optional enhancements to consider based on your audience and niche.
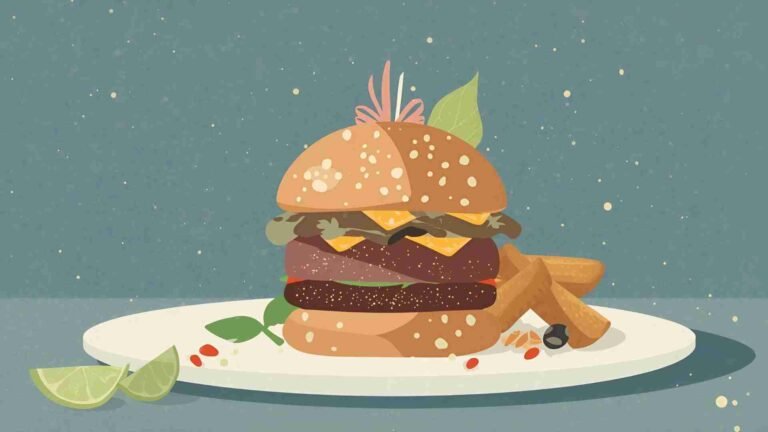
1. Hero Photo and Quick Recipe Overview
Why It Matters: The first impression sets the tone. A stunning hero photo grabs attention, while a quick overview provides key details for busy readers.
How to Do It:
- Hero Photo: Choose a high-quality image of the finished dish, ideally in bright, natural light. This is often your Featured Image, so make it count. For example, a vibrant shot of a creamy pasta dish or a perfectly golden cake can entice readers to stay.
- Overview: Include prep time, cook time, servings, and a “Jump to Recipe” button. This caters to readers who want the recipe immediately while encouraging others to explore the full post.
Example:
For a “Vegan Chocolate Chip Muffins” post, your overview might read: “Prep Time: 10 minutes | Cook Time: 20 minutes | Servings: 12 muffins | Jump to Recipe.”
Tip: Use a consistent photo style (e.g., white background, overhead shot) to build brand recognition.
2. Zippy Introduction
Why It Matters: The introduction is your sales pitch. It hooks readers by highlighting what makes your recipe special.
How to Do It:
- Keep it concise (2-3 sentences).
- Highlight key selling points: main ingredients, flavor profile, dietary benefits (e.g., gluten-free, vegan), or ease of preparation.
- Use vivid, sensory language to spark curiosity.
Examples:
- Pinch of Yum’s Chimichurri Shrimp: “Saucy, punchy, and delightful Chimichurri Shrimp! Served with a tomato salad, a pile of hot steamy rice, and a dollop of creamy tzatziki.”
- Tastes Better from Scratch’s Pulled Pork Nachos: “Nothing says party time like a giant platter of Pulled Pork Nachos with black beans, jalapeños, sour cream, BBQ sauce, and cheese.”
Tip: Incorporate keywords naturally (e.g., “easy vegan muffins”) to improve SEO without sounding forced.
3. Personal Story or Connection
Why It Matters: In an era of AI-generated content, personal stories differentiate your blog and build a loyal audience. They add authenticity and showcase your expertise, authority, and trustworthiness (E-E-A-T), which Google values.
How to Do It:
- Share a brief anecdote (1-2 paragraphs) about the recipe’s inspiration:
- A family tradition (e.g., “My grandmother’s apple pie recipe, passed down for three generations”).
- A travel experience (e.g., “I discovered this spicy Thai curry in a bustling Bangkok market”).
- A personal challenge (e.g., “I tweaked this recipe to make it gluten-free for my daughter”).
- Highlight why you love the dish or how you perfected it.
- Keep it relatable and avoid overloading with unnecessary details.
Example:
Lindsay from Pinch of Yum shares: “These Banza Chicken Bowls with Calabrian Chili Sauce were born out of a lazy Sunday craving for something spicy and comforting. After a few tries, I nailed the balance of heat and creaminess—now it’s my go-to weeknight dinner.”
Tip: Use this section to weave in keywords related to your niche, like “healthy dinner ideas” or “Italian family recipes.”
4. Ingredients Breakdown
Why It Matters: This section bridges the story and the recipe, offering context for key ingredients and demonstrating your expertise.
How to Do It:
- List the star ingredients with brief descriptions (e.g., “Fresh basil: Adds a peppery, aromatic note”).
- Suggest substitutions (e.g., “Swap maple syrup for honey if you’re vegan”).
- Include a photo of the ingredients laid out for visual appeal.
- Add a note: “See the recipe card below for the full list and quantities.”
Example Table:
| Ingredient | Purpose | Substitution |
|---|---|---|
| Fresh Basil | Adds herbaceous flavor | Dried basil (use 1/3 amount) |
| Roma Tomatoes | Provides tangy sweetness | Cherry tomatoes or canned diced tomatoes |
| Olive Oil | Enhances richness | Avocado oil |
Tip: Highlight seasonal or locally sourced ingredients to appeal to foodies and boost E-E-A-T.
5. Step-by-Step Instructions with Photos
Why It Matters: This section guides readers through the cooking process with personality and clarity, making the recipe approachable.
How to Do It:
- Break down the recipe into 4-8 key steps, focusing on major moments (e.g., “Sauté the onions until golden”).
- Use a conversational tone, like explaining to a friend.
- Include 4-8 process photos with captions (e.g., “The batter should look thick and glossy like this”).
- Avoid overly technical language; instead, share tips or anecdotes (e.g., “I learned to fold the dough gently to keep it airy”).
Example:
Step 3: Shape the Dough
After the dough has risen, punch it down and divide it into two equal portions. Shape each into a smooth ball, tucking the edges under. Don’t worry if it’s not perfect—rustic loaves have charm! (See photo: “This is how the dough should look before the second rise.”)
Tip: Optimize images with descriptive alt text (e.g., “Kneading sourdough bread dough”) for SEO and accessibility.
6. Frequently Asked Questions (FAQ)
Why It Matters: An FAQ section answers common reader queries, reduces confusion, and adds structured data for SEO.
How to Do It:
- Research questions via Google’s “People Also Ask” or reader comments.
- Cover topics like substitutions, storage, or dietary adjustments.
- Use a schema-friendly format with clear questions and answers.
Example FAQ:
- Can I make this recipe gluten-free?
Yes, swap all-purpose flour for a 1:1 gluten-free blend. Check the recipe card for tips on adjusting liquid ratios. - How long does this dish last in the fridge?
Store in an airtight container for up to 4 days. Reheat gently to maintain texture.
Tip: Update FAQs based on reader feedback to keep content relevant.
7. Recipe Card
Why It Matters: The recipe card is the heart of your post, providing clear, actionable instructions in a structured format.
How to Do It:
- Use a WordPress plugin like WP Recipe Maker or Tasty Recipes for professional formatting.
- Include:
- Ingredients in order of use.
- Precise measurements (volume and weight, e.g., “1 cup flour, 120g”).
- Step-by-step instructions with estimated times.
- Notes on storage, substitutions, or equipment.
- Enable schema markup for Google rich snippets.
Example Recipe Card (Simplified):
Vegan Chocolate Chip Muffins
Prep Time: 10 min | Cook Time: 20 min | Servings: 12
Ingredients:
- 2 cups (240g) all-purpose flour
- 1/2 cup (100g) sugar
- 1 cup almond milk
- 1 cup vegan chocolate chips
Instructions:
- Preheat oven to 375°F (190°C). Line a muffin tin.
- Mix dry ingredients in a bowl.
- Combine wet ingredients separately, then stir into dry. Fold in chocolate chips.
- Bake for 18-20 minutes.
Notes: Store in an airtight container for 3 days or freeze for a month.
Pricing for WP Recipe Maker:
- Basic: $49/year (1 site, core features).
- Professional: $99/year (3 sites, nutrition calculator, adjustable servings).
- Elite: $199/year (unlimited sites, premium support).
User Reviews:
- “WP Recipe Maker transformed my blog! The recipe cards are beautiful, and the schema markup boosted my Google rankings.” – Sarah, food blogger.
- “The nutrition calculator saves me hours. Worth every penny!” – Mike, health-focused blogger.
Tip: Fill out all recipe card fields (e.g., cuisine type, difficulty level) to maximize SEO potential.
8. Optional Sections
Why It Matters: These extras add value and engagement, tailoring the post to your audience’s needs.
Options to Consider:
- Related Recipes: Link to complementary dishes (e.g., “Pair this curry with my coconut rice recipe”).
- Nutrition Facts: Use a plugin to auto-calculate or manually add for health-conscious readers.
- Equipment Recommendations: Suggest tools like a specific pan or blender, with affiliate links.
- Call-to-Action: Encourage newsletter sign-ups or social media shares.
- Sponsored Disclosures: Clearly note if the post is sponsored to maintain trust.
Example:
Recommended Equipment:
- Muffin Tin ($15 on Amazon, affiliate link).
- Silicone Baking Cups ($8 for 12, affiliate link).
Tip: Use affiliate programs like Amazon Associates or Share-a-Sale for passive income, but disclose links transparently.
Optimizing Your Recipe Blog Post for SEO and Engagement
A well-structured post is only half the battle. To rank high on Google and keep readers coming back, optimize for both search engines and user experience.
SEO Best Practices
- Keyword Research:
- Use tools like Ahrefs or Google Keyword Planner to find low-competition, high-volume keywords (e.g., “easy vegan muffin recipe”).
- Incorporate primary keywords in the title, introduction, headings, and recipe card.
- Schema Markup:
- Plugins like WP Recipe Maker automatically add recipe schema, helping your post appear in rich snippets (e.g., star ratings, cooking times).
- Meta Descriptions:
- Write a compelling 160-character description with keywords (e.g., “Bake delicious vegan chocolate chip muffins in 30 minutes with this easy recipe!”).
- Internal and External Links:
- Link to related posts on your blog (e.g., “See my guide to vegan baking tips”).
- Reference authoritative sources (e.g., a nutrition study) to boost credibility.
- Image Optimization:
- Use descriptive file names (e.g., “vegan-chocolate-chip-muffins.jpg”).
- Add alt text for accessibility and SEO.
Engagement Strategies
- Encourage Comments:
- End with a question: “What’s your favorite muffin flavor? Let me know below!”
- Respond to comments to build community.
- Social Sharing:
- Add share buttons for Pinterest, Instagram, and X.
- Create pinnable images with tools like Canva.
- Mobile Optimization:
- Use a responsive theme (e.g., Grigora) to ensure your blog looks great on smartphones.
- Reader Feedback:
- Enable recipe ratings in your plugin for user reviews.
- Use feedback to refine future posts.
Grigora for Blog Management:
- Features: Customizable templates, SEO tools, analytics dashboard.
- Benefits: Simplifies content management, ensuring fast load times and mobile-friendliness.
- Pricing: Starts at $69/year for the Pro plan, suitable for recipe bloggers.
- User Review: “Grigora’s templates made my blog look professional without hiring a designer.” – Emma, food blogger.
Visuals: The Secret Ingredient
High-quality visuals are non-negotiable in food blogging. They make recipes more approachable and your blog more shareable.
Tips for Process Shots
- Focus on Key Steps:
- Capture critical moments (e.g., “How the dough looks after kneading”).
- Aim for 4-8 photos to avoid overwhelming readers.
- Consistency:
- Use the same backdrop and lighting for a cohesive look.
- Natural light works best for vibrant colors.
- Captions:
- Add short, descriptive captions (e.g., “The sauce should be thick and glossy”).
- Explain why the step matters.
Video Content
- Why It Works: Videos clarify complex steps and boost engagement.
- How to Start: Use a smartphone for simple overhead shots. Edit with free tools like DaVinci Resolve.
- Example: A 1-minute clip showing how to fold muffin batter can increase reader confidence.
Tip: Embed videos hosted on YouTube or Vimeo to reduce site load time.
Monetizing Your Recipe Blog
A well-structured blog can also generate income. Here are practical ways to monetize without compromising authenticity:
- Affiliate Marketing:
- Promote kitchen tools or ingredients via Amazon Associates or Share-a-Sale.
- Example: Earn $1-$5 per sale of a recommended muffin tin.
- Sponsored Posts:
- Partner with brands that align with your niche (e.g., a vegan butter company).
- Disclose sponsorships clearly to maintain trust.
- Digital Products:
- Sell e-books, meal plans, or photography guides.
- Example: A $10 e-book with 20 vegan recipes could earn $1000 from 100 sales.
Tip: Balance monetization with value—readers prioritize helpful content over sales pitches.
Learning from the Pros
To inspire your journey, here are insights from top food bloggers:
- Bev Weidner: “Write what makes your heart skip. If that’s poetic descriptions of strawberries, go for it. Just sound like you.”
- Stephanie Le: “Tell stories that feel true. Maybe you made this dish to comfort a neighbor—it doesn’t have to be epic, just real.”
- Liz Harris: “Play to your strengths. If writing’s your thing, share stories. If not, let your photos and recipes shine.”
These voices remind us that authenticity is the key to connecting with readers.
Common Mistakes to Avoid
Even with a template, pitfalls can derail your post. Here’s what to watch for:
- Overloading with Text:
- Keep personal stories concise to respect readers’ time.
- Use subheadings to break up long sections.
- Vague Instructions:
- Specify measurements (e.g., “1 cup chopped onions, about 150g”) and techniques.
- Example Issue: “1 medium onion, finely chopped (about 2 ounces)” is confusing—onions vary widely in size.
- Neglecting Mobile Users:
- Test your blog on smartphones to ensure readability.
- Use plugins like Grigora for responsive design.
- Ignoring SEO:
- Skipping schema markup or keywords can bury your post in search results.
- Example Fix: Add “easy” or “quick” to titles for high-intent searches.
Conclusion: Cooking Up Success
Structuring the perfect recipe blog post is about blending creativity with strategy. By combining a compelling hero photo, a snappy introduction, personal storytelling, clear instructions, and a polished recipe card, you create content that delights readers and search engines alike. Tools like WP Recipe Maker and Grigora simplify the technical side, while SEO and engagement tactics ensure your posts reach a wide audience.
The ultimate goal? Make it easy for readers to recreate your recipe and feel inspired to return for more. Experiment with the template, adapt it to your voice, and don’t be afraid to sprinkle in your personality. Whether you’re sharing a family heirloom recipe or a trendy vegan dish, a well-structured post is your recipe for blogging success.
Call to Action: What’s your go-to trick for writing recipe posts? Share in the comments, and let’s swap ideas!
Please share this Structuring the Perfect Recipe Blog Post with your friends and do a comment below about your feedback.
We will meet you on next article.
Until you can read, How to Monetize a Food Blog: 12 Proven Ways


Absolutely loved this guide! As a food blogger, I found the tips super practical and easy to follow. It made me rethink how I structure my posts, and my latest recipe got way more engagement. A must-read for anyone serious about recipe blogging!