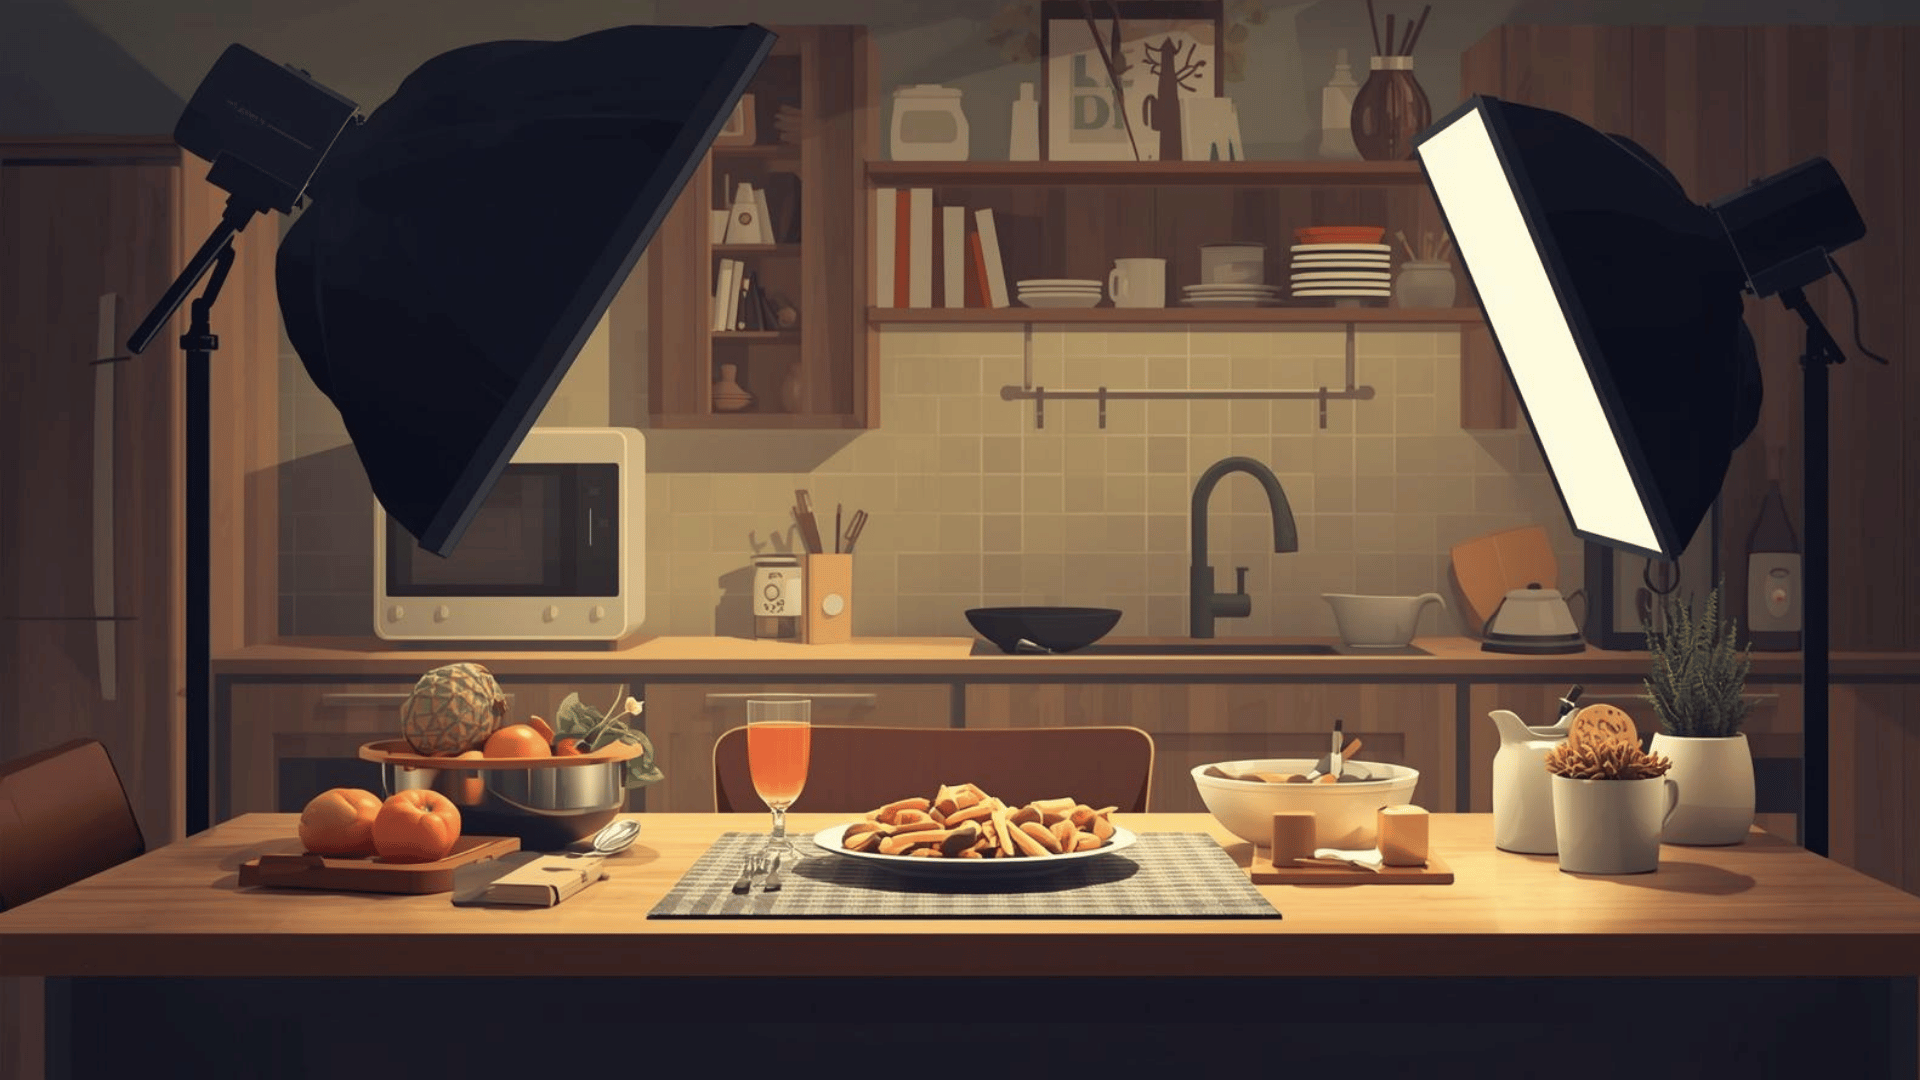
The Basic Light Setup For Food Photography
Lighting forms the foundation of all photography, and in food photography, it elevates ordinary dishes into visually captivating masterpieces. Without proper light, textures fade, colors dull, and the story behind the food remains untold. This comprehensive guide explores the core principles of lighting setups, starting with natural light fundamentals and extending to artificial alternatives.
Whether you’re a beginner capturing home-cooked meals or a professional styling elaborate spreads, understanding these setups will transform your work. We’ll cover key components like diffusers and reflectors, light types and directions, environmental factors, and practical gear recommendations. By the end, you’ll have the tools to manipulate light confidently, producing soft, dimensional images that highlight food’s appeal.
Why Lighting Matters in Food Photography
Photography translates to “painting with light,” and nowhere is this more evident than in food imagery. Light reveals form, texture, and color—essential for making food look appetizing. Harsh light can create unflattering shadows that make a dish appear flat or uninviting, while well-managed light adds depth and allure. Mastering lighting isn’t about complexity; it’s about control. A solid basic setup allows you to build skills progressively, adapting to moods from bright and airy to dramatic and moody.
In food photography, the goal is often soft, even illumination that mimics natural daylight, flattering ingredients without overwhelming them. This setup prioritizes simplicity: position your subject, modify the light source, and refine shadows. As you progress, you’ll experiment with variations, but the basics remain your anchor.
The Core Natural Light Setup
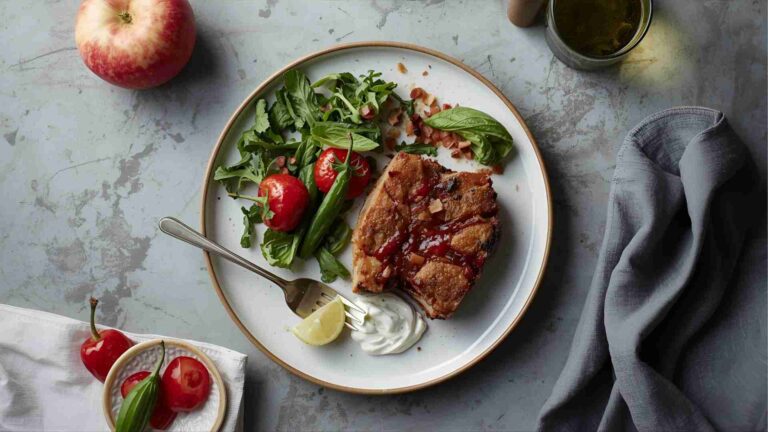
The standard natural light configuration for food photography relies on window light, modified for softness and balance. This sidelight approach is versatile, working for most scenes and providing a gentle gradient of highlights and shadows.
Key Components
- Light Source: Position your setup adjacent to a window. The light should enter from the side, perpendicular to your camera’s viewpoint. This creates natural dimension, emphasizing textures like the crumb of bread or the gloss on fresh fruit.
- Diffuser: Place a translucent material between the window and your subject to soften incoming light. Start with the diffuser closer to the window (about 1-2 feet away) and adjust toward the subject if needed. Diffusion scatters rays, reducing harsh contrasts.
- Reflector: Position this opposite the light source to bounce light back into shadowed areas, filling them without adding a new source. This evens exposure, preventing overly dark sides.
This trio—sidelight, diffuser, reflector—forms the bedrock. It produces the soft light prevalent in food photography, where subtle shadows enhance rather than detract.
Step-by-Step Implementation
- Select Your Space: Choose a window with indirect light, ideally north-facing for consistent softness. Avoid direct midday sun, which casts hard shadows.
- Arrange the Subject: Set your food on a surface parallel to the window. Camera faces the subject head-on, with light hitting from 90 degrees.
- Add Diffusion: Secure the diffuser vertically between window and subject. Test by observing shadow edges—they should blur softly.
- Incorporate Reflection: Place the reflector (e.g., white foam board) on the opposite side, angling it to lift shadows subtly. Move it closer for brighter fill or farther for more contrast.
This setup is forgiving for beginners. Once comfortable, vary reflector distance to control mood: closer for even, bright images; farther for dramatic shadows.
Essential Light Modifiers: Diffusers and Reflectors
Modifiers are inexpensive tools that transform raw light into photographic gold. Focus on these two essentials for your basic kit.
Diffusers
A diffuser spreads light evenly, turning direct rays into a broad, gentle wash. Materials range from professional panels to DIY options like sheer curtains. Placement is key: between source and subject, it eliminates hot spots and hard edges.
Recommended Options:
- Neewer 40″ x 60″ Translucent Diffuser Panel: Large enough for full scenes, compatible with natural and artificial light. Specifications: 40×60 inches, foldable, lightweight nylon material.
- Neewer 24″ Diffuser with Handle: Portable for on-location shoots. Specifications: 24-inch diameter, collapsible, includes grip for easy handling.
Reflectors
Reflectors redirect existing light to fill shadows, adding balance. White surfaces provide neutral fill; silver boosts intensity for highlights.
Recommended Options:
- White Foam Core Boards: Versatile, cuttable to size. Use 20×30-inch sheets for most setups.
- A-Clamps: Pair with foam boards for stability. Heavy-duty plastic or metal, 2-4 inch jaw opening.
These tools cost under $100 combined, making them accessible. For example, a Neewer 40×60 diffuser pairs well with two 20×30 foam boards and a set of four A-clamps.
| Gear Item | Specifications | Approximate Price (USD) | Use Case |
|---|---|---|---|
| Neewer 40″ x 60″ Diffuser | 40×60 inches, translucent nylon, foldable | 25-35 | Large setups, natural/artificial light |
| Neewer 24″ Diffuser with Handle | 24-inch round, collapsible, ergonomic handle | 15-20 | Portable, quick adjustments |
| White Foam Core Board (20×30 inch) | Lightweight foam, matte white surface, 3/16-inch thick | 5-10 per board | Reflection, shadow fill |
| A-Clamps (Set of 4) | 2-4 inch jaw, plastic/metal construction | 10-15 | Securing boards and diffusers |
This table summarizes budget-friendly options. Prices sourced from major retailers like Amazon; check for current deals.
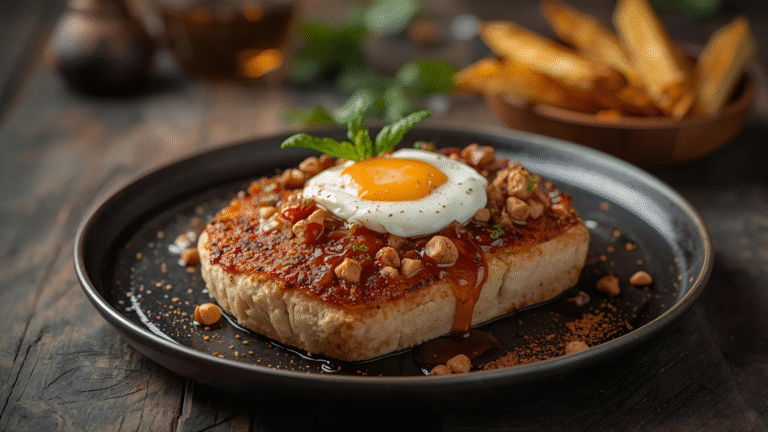
Understanding Light Types: Soft vs. Hard
Food photography favors soft light for its flattering effect on textures and forms. Soft light produces gradual shadows with blurred edges, revealing details without stark contrasts. It’s ideal for light-toned foods like pastries or salads.
Hard light, conversely, creates sharp, defined shadows—useful for dramatic effects but less common in food work. It highlights edges but can make food look unappetizing.
To visualize:
- Soft Light Example: Shadows fade gently, as in a diffused window setup.
- Hard Light Example: Crisp shadows from direct sun, emphasizing form but risking flatness.
Soft light isn’t tied to brightness; it can be dim for moody shots or bright for vibrant ones. The key is edge transition—soft edges mean diffused sources.
Light Directions: Side and Back
Direction shapes how light interacts with your subject, influencing perceived depth.
Side Light
Light enters from the side, casting shadows that define contours. It’s the default for food photography, versatile for most compositions. Shadows fall away from the camera, adding three-dimensionality without glare.
Back Light
Light comes from behind the subject, toward the camera. This creates rim lighting, highlighting edges and translucency (e.g., in berries or liquids). It’s trickier, risking lens flare, but excels in ethereal, glowing effects.
Compare:
- Side Light: Balanced, everyday use.
- Back Light: Dramatic, for translucent elements.
Experiment by rotating your setup relative to the window.
Here’s a simple diagram illustrating light paths in the basic setup:
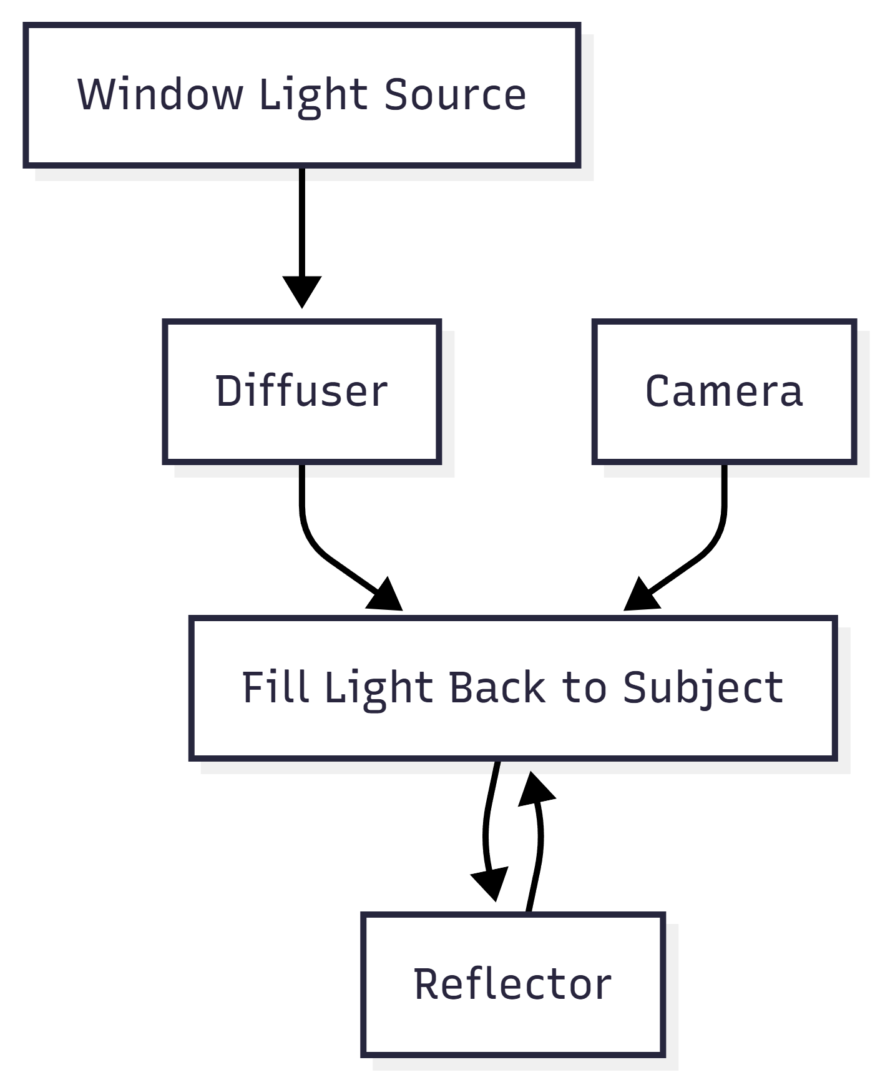
This flowchart shows the flow: light diffuses, hits the subject, reflects back for balance, with the camera capturing the result.
The Impact of Time and Environment
Natural light evolves with time, affecting intensity and quality. Morning light is soft and cool; midday is harsh and direct; evening warms with golden tones. Seasons alter this—winter light is diffuse and low-angle, summer brighter and higher.
Observe your space: Note window orientations (north for even light, south for intensity). Track changes hourly to identify optimal shooting windows. For consistency, shoot during overcast days for naturally diffused light.
This awareness builds intuition, allowing you to predict and adapt.
Transitioning to Artificial Light: Extending Your Setup
While natural light is ideal, it’s unpredictable—limited by weather, time, or location. Artificial light offers control, mimicking natural effects anytime. It’s not a replacement but an extension, especially for winter shoots or indoor studios.
The basic artificial setup replicates soft natural light using a flash and modifiers. It’s affordable, portable, and scalable.
Benefits of Artificial Light
- Consistency: Shoot 24/7 without daylight dependency.
- Control: Adjust power, direction, and color precisely.
- Portability: Compact gear fits small spaces.
- Versatility: Mimic soft daylight or create custom moods.
Many professionals blend both, using artificial to supplement weak natural light.
Basic Artificial Light Setup
This hack setup requires minimal gear: one flash, a diffuser, and basic supports. It produces soft, natural-looking light for under $150 total.
Required Gear
- Speedlight Flash: Provides burst light. Canon or Nikon compatible generics work well.
- Diffuser: Same as natural setup—large panel for broad diffusion.
- Wireless Trigger: Syncs flash to camera.
- Stands/Clamps: For positioning.
Recommended Budget Kit:
| Gear Item | Specifications | Approximate Price (USD) | Use Case |
|---|---|---|---|
| Godox TT600 Speedlight | Manual/TTL modes, 5600K color temp, recycle time 0.1-2.6s | 50-60 | Main light source |
| Neewer 40″ x 60″ Diffuser | As above | 25-35 | Softening flash output |
| Godox X2T Wireless Trigger | 2.4G frequency, 32 channels, compatible with most cameras | 30-40 | Remote flash firing |
| A-Clamps or Basic Stand | Adjustable height 2-6 ft, lightweight aluminum | 15-20 | Holding diffuser/flash |
Total estimated cost: $120-155. These items are widely available on Amazon or B&H Photo.
Step-by-Step Artificial Setup
- Prepare the Scene: Style food on a backdrop (e.g., textured linen for interest).
- Position Diffuser: Set it vertically, 6-12 inches from the subject, facing the setup. Clamp to a box or stand for stability.
- Place Flash: Aim at the diffuser’s center, 1-2 feet behind it. Use the included stand or prop upright.
- Camera Settings: Manual mode—ISO 100, shutter 1/160s (sync speed), aperture f/3.5-f/5.6. Ensure ambient light is blocked (frame appears black in live view without flash).
- Trigger and Test: Mount wireless trigger on camera. Fire test shots; adjust flash power (1/4 to 1/1) for exposure. Wider apertures blur backgrounds; underexpose slightly to preserve highlights.
- Refine: Add a reflector opposite for fill, as in natural setups. Edit on computer for real-time tweaks.
This creates soft sidelight mimicking window diffusion. For backlight, reposition flash behind the subject.
diagram for artificial flow:
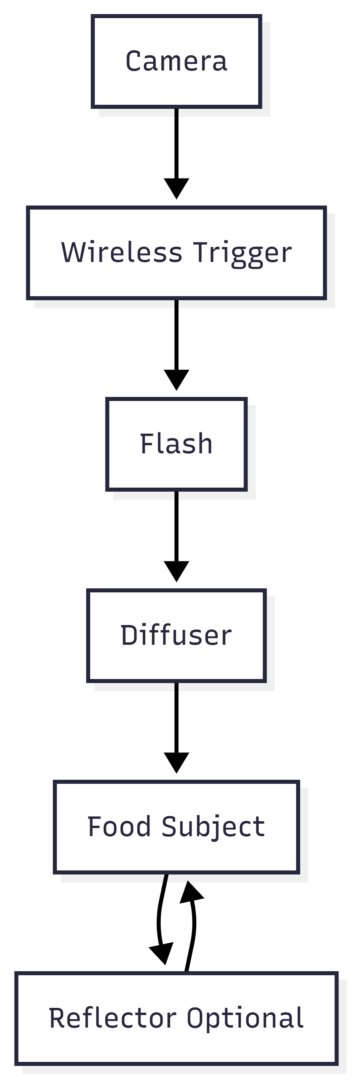
Light originates from flash, diffuses, hits subject; trigger ensures sync.
Comparing Natural and Artificial Setups
Both achieve similar results, but differ in application.
| Aspect | Natural Light | Artificial Light |
|---|---|---|
| Cost | Low (window free) | Moderate ($100-200 kit) |
| Control | Weather-dependent | Full (power, direction) |
| Setup Time | Quick if light available | 5-10 minutes |
| Portability | Fixed to windows | Highly portable |
| Learning Curve | Observational | Technical (settings) |
| Best For | Daytime, organic feel | Anytime, consistency |
Choose based on needs—natural for authenticity, artificial for reliability.
Advanced Tips for Mastery
Once basics are down, experiment:
- Moody Lighting: Reduce fill for deeper shadows.
- Color Temperature: Match gels on flash to ambient for seamless blends.
- Multiple Lights: Add a second flash for complex setups.
- Post-Processing: Adjust exposure, contrast in software like Lightroom to enhance light effects.
Practice with simple subjects like fruit bowls to see variations.
Conclusion
The basic light setup for food photography—whether natural or artificial—empowers you to create compelling images. Start with sidelight, diffusion, and reflection; expand to flash for flexibility. With affordable gear and mindful practice, you’ll capture food’s essence, turning meals into art. Observe, adjust, and iterate—light is your canvas.
Please share this The Basic Light Setup For Food Photography with your friends and do a comment below about your feedback.
We will meet you on next article.
Until you can read, Apple Rum Raisin Cake