Why You Should Shoot Tethered for Food Photography
Tethered shooting — connecting your camera directly to a computer during a food photography session — is one of the single most impactful changes you can make to your workflow. Whether you’re a professional food photographer shooting for agencies and brands, or a food blogger building a portfolio from your home kitchen, tethering elevates image quality in ways that a camera LCD simply cannot match.
It gives you a large, accurate preview of every frame in real time, lets you catch errors before they become expensive reshoots, and tightens the feedback loop between you, your styling, and your final image.
If you’ve been hesitant to try it because it sounds technical or complicated, the reality is that tethering is almost as simple as plugging a cable into your camera and opening a piece of software. The hesitation isn’t worth it. The photographers who tether consistently report shooting fewer frames, spending less time in post-production, and delivering better results to clients.
The Core Problem with Your Camera’s LCD
The LCD screen on the back of your camera is useful for a quick sanity check, but it is not an accurate representation of your final image. Its color rendering is influenced by ambient light in your shooting environment. Its size — typically 3 to 3.5 inches — makes it nearly impossible to verify critical details like precise focus, subtle lens flare, stray crumbs, or whether a glass is sitting perfectly straight.
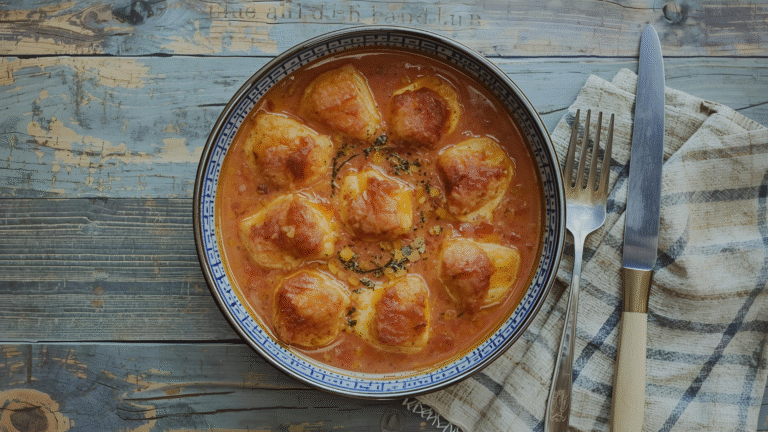
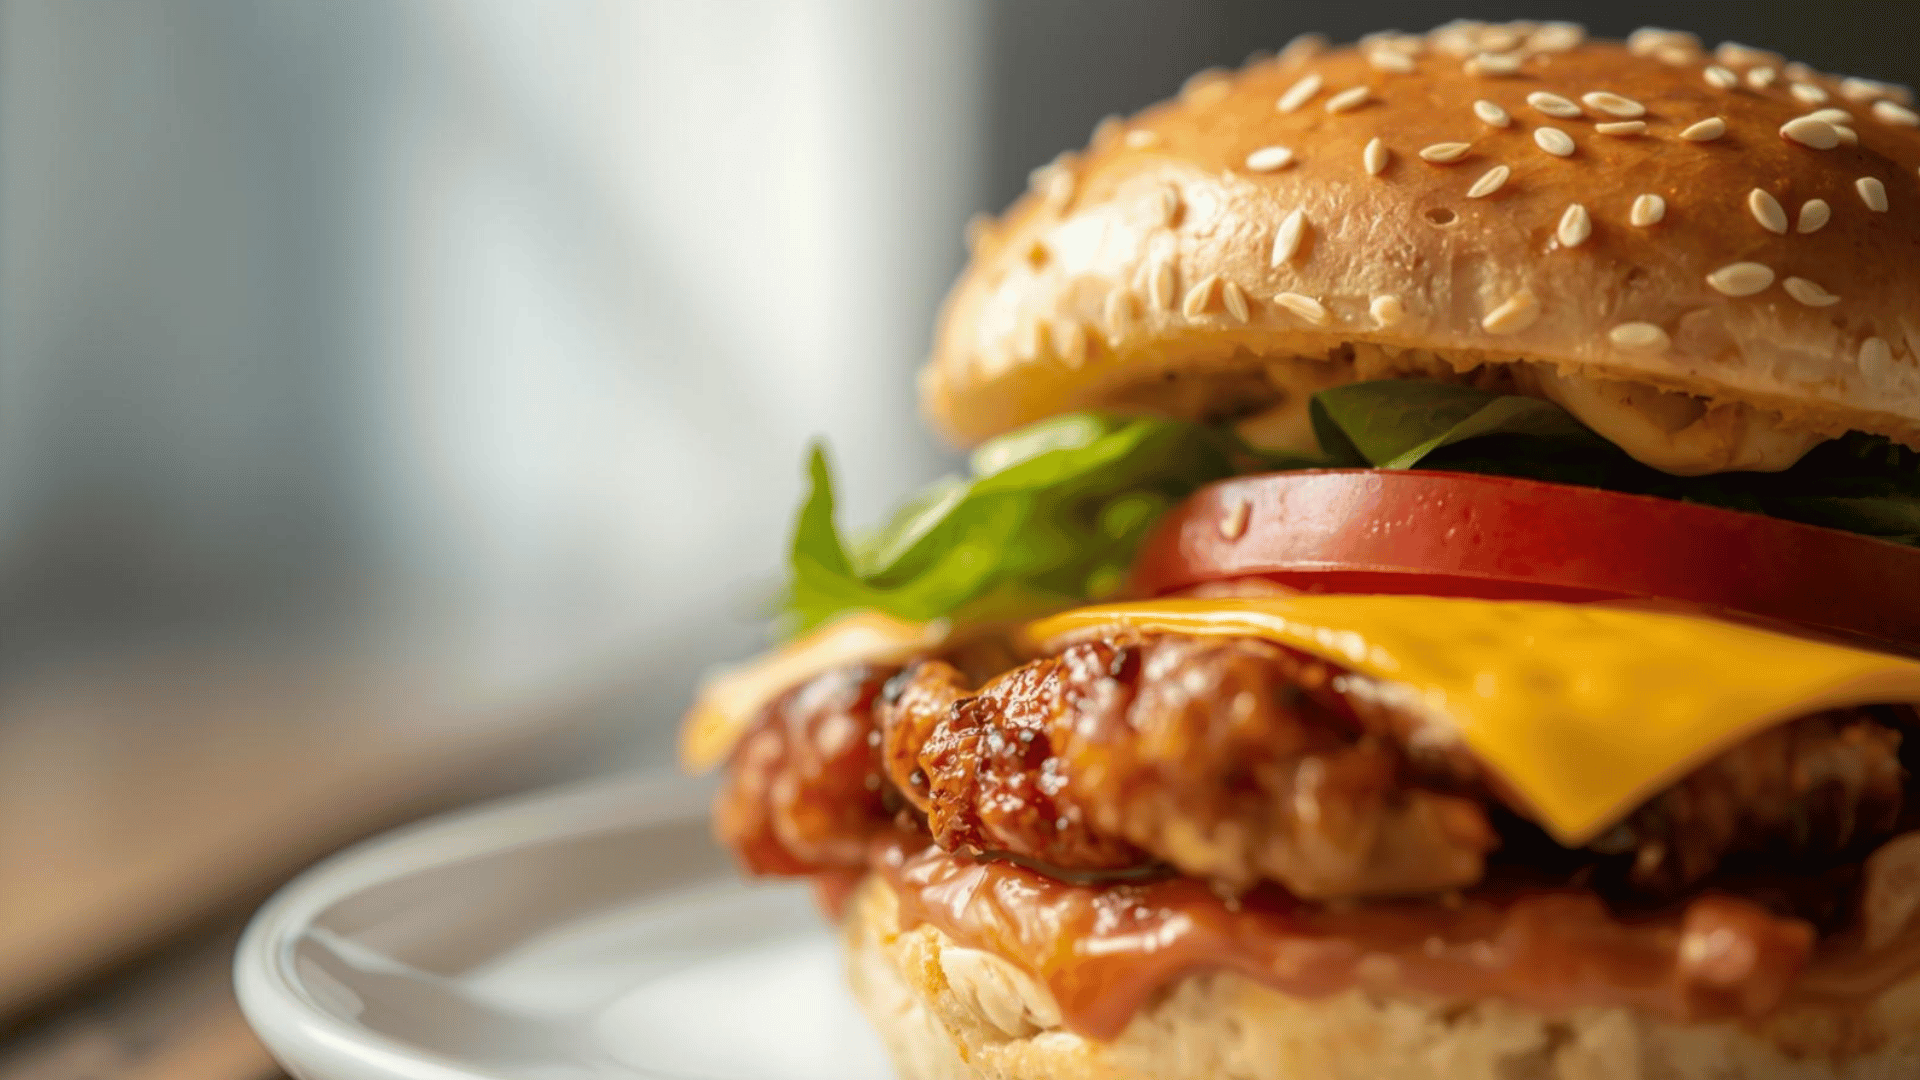
Food photography is a discipline of tiny details. A sauce that looks smooth on a 3-inch screen might reveal an unappealing skin on a 27-inch monitor. A focus point that seems sharp in a thumbnail could be soft by half a centimeter when viewed at full resolution. These are mistakes that cost time in Photoshop or, worse, require a reshoot entirely.
Tethering solves this by routing every captured frame directly to your computer screen in real time, at full resolution, where you can evaluate it accurately and immediately.
Four Reasons Tethered Shooting Is Non-Negotiable
1. Composition Precision You Can’t Achieve Otherwise
Food photography composition is deliberate work. Most photographers plan their shots in advance — sketching out placement, deciding on angles, choosing hero elements. Tethering is what gives that planning its payoff.
When you can see your composition on a large screen as you build the scene, you catch problems early: a fork that’s slightly off-axis, a sauce drizzle that reads as muddy at distance, a garnish competing with the hero food. You make those corrections in thirty seconds at the set rather than forty minutes in post.
Advanced tethering software like Capture One allows you to load custom composition overlays — dynamic symmetry grids, rule-of-thirds guides, or client-specific layout templates showing where headline text will sit over the image. This is especially critical for product packaging and editorial work where precise placement is non-negotiable.
2. Nail Focus Every Single Time
Shallow depth of field is a staple of food photography. It isolates the hero element, creates that sought-after creamy bokeh, and draws the viewer’s eye precisely where you intend. But it also leaves almost no margin for error. A focal plane that’s off by even a millimeter on a 50mm lens at f/1.8 can mean the difference between a sharp, usable shot and a soft, rejected one.
When you rely on the LCD, you’re guessing. When you tether, you zoom in on the focal point directly on your monitor and confirm it before moving to the next shot. For photographers using manual focus — which is common for static flat lay and overhead setups on a tripod — this is transformative. You stop burning frames trying to bracket your focus and instead nail it methodically the first time.
3. A Faster, More Intentional Shoot
One of the quieter benefits of tethering is that it slows you down in all the right ways. When you can see what you’re capturing clearly and accurately, you stop shooting defensively — firing off 50 frames hoping one will be usable. Instead, you build the frame, evaluate it on screen, adjust, and capture intentionally.
This changes the arithmetic of your shoot dramatically. Fewer frames captured means less culling, less ingestion time, and less editing. The time you spend evaluating on a large monitor during the shoot is returned to you many times over on the back end.
There’s also a file management benefit: when shooting tethered, images are written directly to your computer or external hard drive rather than your camera’s SD card. At the end of a shoot, your files are already on your machine, already backed up if you’re using a proper drive setup, and ready for editing. You skip the card transfer step entirely.
4. Professional Client Collaboration
If you work with clients — brands, food stylists, art directors, agency creatives — tethering is an expectation, not a bonus feature. Clients and their teams want to see what is being captured in real time. They want to be able to flag styling issues, confirm that brand colors are reading correctly, and sign off on hero shots before the set is broken down.
Capture One’s live sharing feature even allows remote clients to view your tethering session in real time, which has become increasingly valuable for shoots where not everyone can be in the room. Without tethering, you’re making assumptions about what the client wants and hoping a subsequent review doesn’t surface problems. With tethering, the feedback loop is immediate and everyone leaves the shoot confident.
Equipment You Need
Tethered shooting does not require a significant investment. The core gear list is straightforward:
| Item | Notes |
|---|---|
| Camera | Most modern DSLRs and mirrorless cameras support tethering |
| Tethering cable | USB-C to USB-C, USB-A to Mini-B, or USB-C to USB-3 depending on camera/laptop combo |
| Laptop or desktop | Any modern computer with sufficient screen size (15″+ recommended) |
| Tethering software | Capture One Pro, Lightroom, or manufacturer-native app |
| External hard drive | For direct-to-drive capture and redundant backup |
| Cable anchor/protector | Tether Tools Tether Block recommended to protect camera ports |
On cable selection: The specific cable you need depends entirely on your camera model and your computer’s available ports. Tether Tools maintains a compatibility tool on their website where you input your camera and computer combination and it returns the exact cable you need. This removes all guesswork. Cable length matters: a minimum of 3 meters (approximately 10 feet) is recommended, with 5 meters (approximately 15-16 feet) preferred for overhead setups where your laptop sits away from the shooting surface.
On cable quality: If you don’t use Tether Tools branded cables, ensure whatever cable you buy has gold-tipped connectors. Non-gold tips corrode faster, which leads to intermittent connectivity issues and dropped connections mid-shoot.
On port protection: Camera ports — USB, HDMI, sync ports — are expensive to repair and can render a camera unusable if damaged. A port anchor like the Tether Tools Tether Block prevents the cable from yanking the port if someone trips over the cord. It’s a minor investment that protects a major one.
Software Comparison
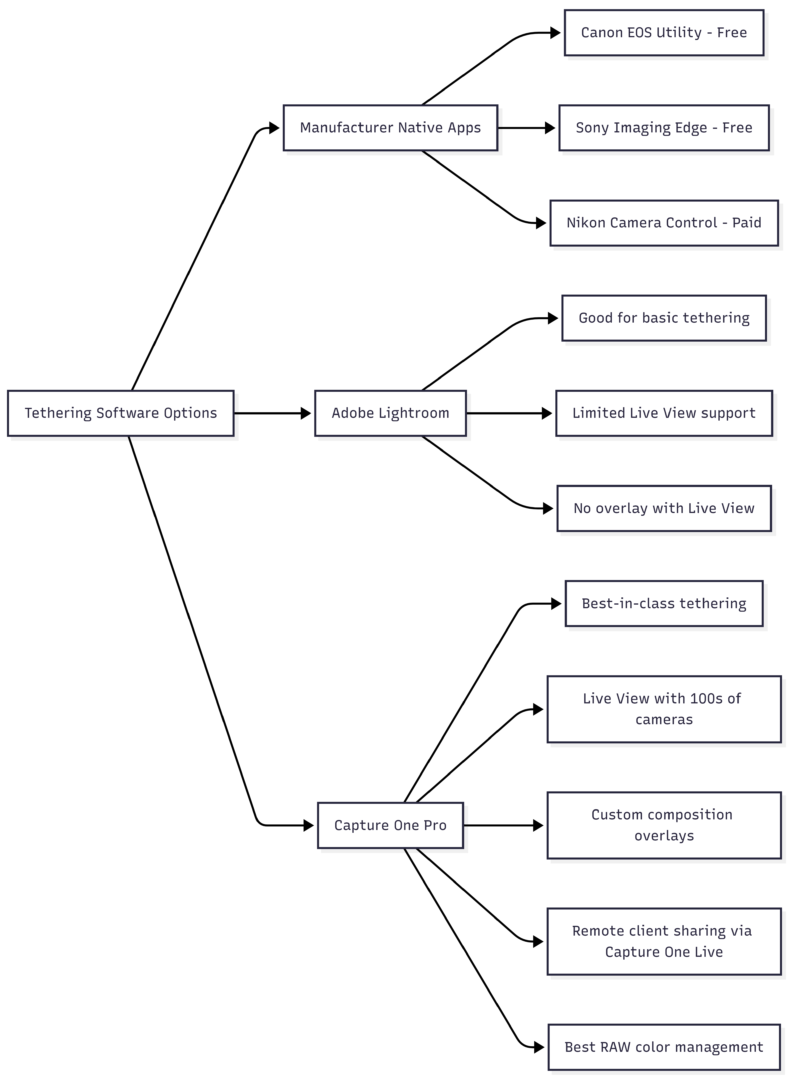
| Software | Cost | Live View Tethering | Custom Overlays | Remote Client Sharing | Best For |
|---|---|---|---|---|---|
| Canon EOS Utility | Free | Yes (Canon only) | No | No | Canon shooters starting out |
| Sony Imaging Edge | Free | Yes (Sony only) | No | No | Sony shooters starting out |
| Adobe Lightroom | Subscription | Limited camera support | Loupe overlay (not with Live View) | No | Photographers already in Adobe ecosystem |
| Capture One Pro | Subscription (~$24/mo or ~$180/yr) | Yes, 400+ cameras | Yes, fully custom | Yes (Capture One Live) | Professional food photographers |
Recommendation: If you’re shooting professionally or aspire to, Capture One is the standard. Its color rendering for still life and food is superior, its tethering capabilities are the most comprehensive in the industry, and its overlay support enables the kind of precise compositional work that client and editorial work requires. A 30-day free trial is available, which is enough time to run it through a real shoot and evaluate it properly.
If you’re a hobbyist or just starting out, your camera manufacturer’s native app is a perfectly functional starting point and costs nothing.
Tethered Workflow: How a Shoot Flows
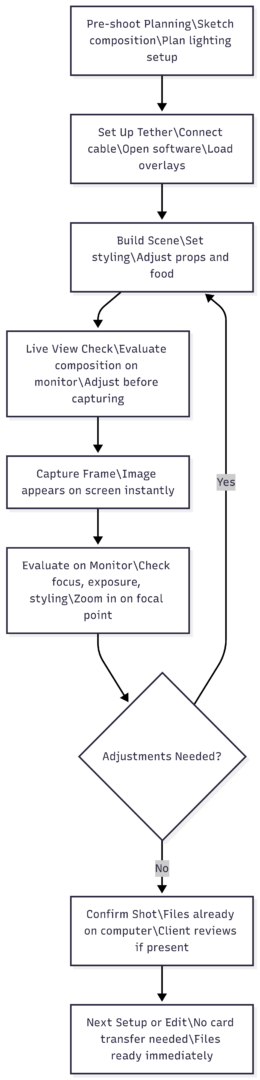
The workflow above represents how tethering compresses and streamlines what would otherwise be a fragmented process of shoot-transfer-review-reshoot. Each frame evaluated on-screen during capture is a potential correction made at the source rather than in post.
Common Hesitations — Addressed
“It seems complicated.” The physical setup is a cable connection and opening a software application. If you’ve ever connected a camera to a computer to transfer files, you already understand the fundamentals. Most tethering software guides you through camera detection automatically.
“I don’t want cables getting in the way.” A 5-meter cable with a port anchor gives you significant freedom of movement. Properly routed cables — taped to the floor or run along the edge of a shooting table — become invisible within a few minutes of working. Some photographers use wireless tethering solutions, though wired connections remain more reliable for professional work.
“Only professionals need this.” Tethering benefits any photographer who wants better images. The only real prerequisite is having a camera that supports it and a computer to connect to — both of which most photographers already have. The payoff is immediate and proportional to how seriously you take the output of your work.
The Bottom Line
Tethered shooting is not a professional luxury — it is a professional standard that also happens to benefit anyone who cares about the quality of their food photography. It eliminates the guesswork inherent in relying on a small camera LCD, enables precise compositional and focus control, reduces time spent in post-production, and creates the collaborative environment that client work demands.
The investment is modest: a quality tethering cable in the $30–$80 range, a port protector, and software you may already own or can trial for free. The return is sharper images, a faster workflow, and a fundamentally more intentional approach to every frame you capture.
If you’re not tethering yet, start with your camera manufacturer’s free app and a compatible cable. Run one shoot tethered and compare it to your previous workflow. The difference will be immediate enough that the question won’t be whether to tether — it will be why you waited.
Please share this Why You Should Shoot Tethered for Food Photography with your friends and do a comment below about your feedback.
We will meet you on next article.
Until you can read, Lean Beef and Asparagus Stir-Fry