The Best Food Photography Backdrops
In the art of food photography, the backdrop is far more than a mere supporting element—it’s the cornerstone that shapes the narrative, elevates the dish, and captivates the viewer. Whether you’re a professional photographer crafting images for Michelin-starred restaurants, a food blogger aiming to boost Instagram engagement, or a culinary enthusiast documenting homemade creations, the right backdrop can transform a simple plate into a visual masterpiece. Backdrops and surfaces set the mood, add depth, and complement the food’s colors, textures, and story, creating a cohesive aesthetic that draws the eye. This comprehensive guide dives deep into the world of food photography backdrops, exploring what to look for, the best types, setup techniques, top vendors with detailed specifications and pricing, and budget-friendly DIY options to suit all skill levels and budgets. Spanning 4,000 words, this resource draws on expert insights, market trends, and practical advice to help you craft stunning food imagery that stands out in a crowded digital landscape.
Understanding Backdrops and Surfaces in Food Photography
In food photography, backdrops and surfaces are critical tools that define the visual environment of your subject. While often used interchangeably, they serve distinct yet complementary roles, working together to eliminate distractions and enhance the dish’s appeal. A surface is the base beneath the food—think a wooden board under a rustic loaf or a marble slab beneath a delicate dessert. It interacts directly with the subject, influencing texture, color balance, and composition. A backdrop, conversely, is positioned behind the food, creating a seamless background that frames the scene and minimizes cluttered or busy environments, such as a cluttered kitchen counter. Together, they form the canvas for your culinary story, allowing you to control the mood—whether it’s cozy and rustic for a homemade pie or sleek and modern for a sushi platter.
Backdrops and surfaces are typically double-sided boards, offering two distinct looks in a single purchase, which maximizes versatility and value. For example, one side might feature a weathered wood grain for hearty dishes, while the other mimics polished concrete for urban-chic shots. This dual functionality allows photographers to adapt quickly to different creative visions without needing an extensive collection. For instance, in drink photography, a solid black backdrop behind a textured wooden surface keeps the focus on a vibrant cocktail, eliminating visual noise. Similarly, switching from a distressed barnwood surface to a clean white marble can shift a scene from farmhouse warmth to high-end elegance, all without post-production edits.
Having a diverse collection of backdrops and surfaces is essential for flexibility. A small arsenal—say, four to six boards—covers most scenarios, from dark and moody setups for rich chocolate cakes to light and airy ones for fresh summer salads. This versatility reduces reliance on editing software like Photoshop, saving time and preserving authenticity.
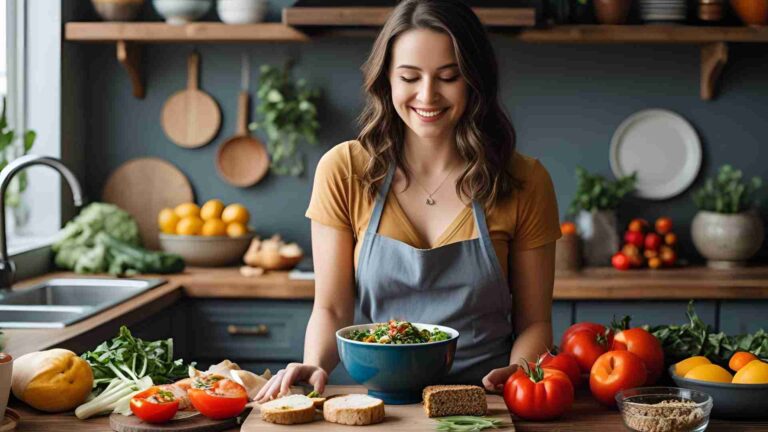
Real-world example: A food blogger shooting a Mediterranean spread might use a textured blue linen backdrop to evoke coastal vibes, paired with a whitewashed wood surface for contrast, creating a scene that feels both inviting and professional. The goal is to craft images that resonate emotionally, whether for a blog, restaurant menu, or social media feed with millions of scrolling eyes.
Key Factors to Consider When Choosing a Backdrop
Selecting the perfect backdrop for food photography requires balancing aesthetics, functionality, and practicality to ensure it enhances your work without creating logistical headaches. Here are the five critical factors to consider, each influencing the quality and ease of your shoots:
1. Color
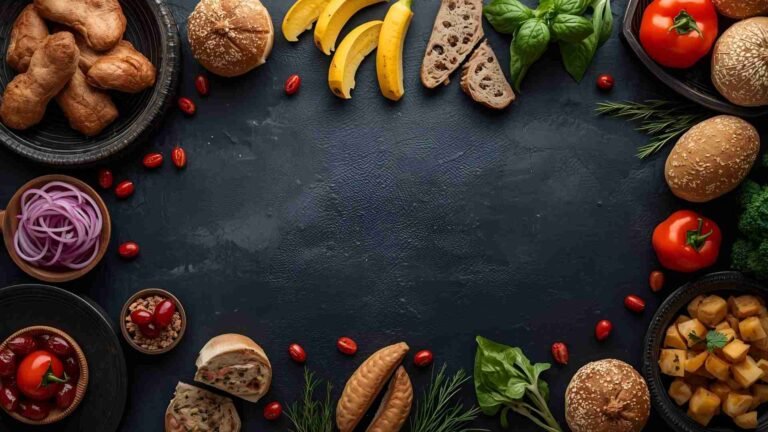
Color sets the tone and ensures the food remains the star. Neutral tones—off-whites, grays, soft blues, muted greens, or warm browns—are ideal as they complement most dishes without clashing. For example, a desaturated gray backdrop highlights the vibrant reds of a tomato bruschetta, while a soft beige enhances the golden crust of a sourdough loaf. Dark colors like charcoal or navy create moody, dramatic setups, perfect for rich dishes like steak or dark chocolate desserts.
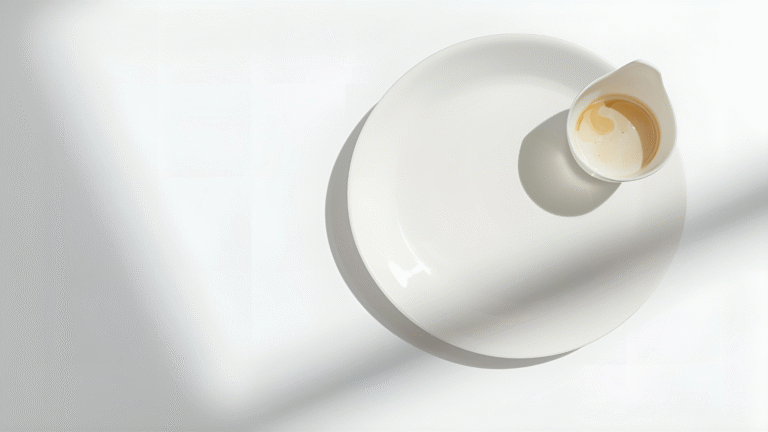
Light pastels or whites evoke freshness, ideal for salads, smoothies, or desserts like lemon tarts. Avoid bold primaries (red, yellow) or orange hues, as they can make food appear unappetizing—studies show orange backgrounds reduce appetite appeal by 20%. A versatile collection might include textured black for moody shots, pale blue for airy vibes, and warm wood for rustic warmth, covering 90% of food photography needs.
2. Texture
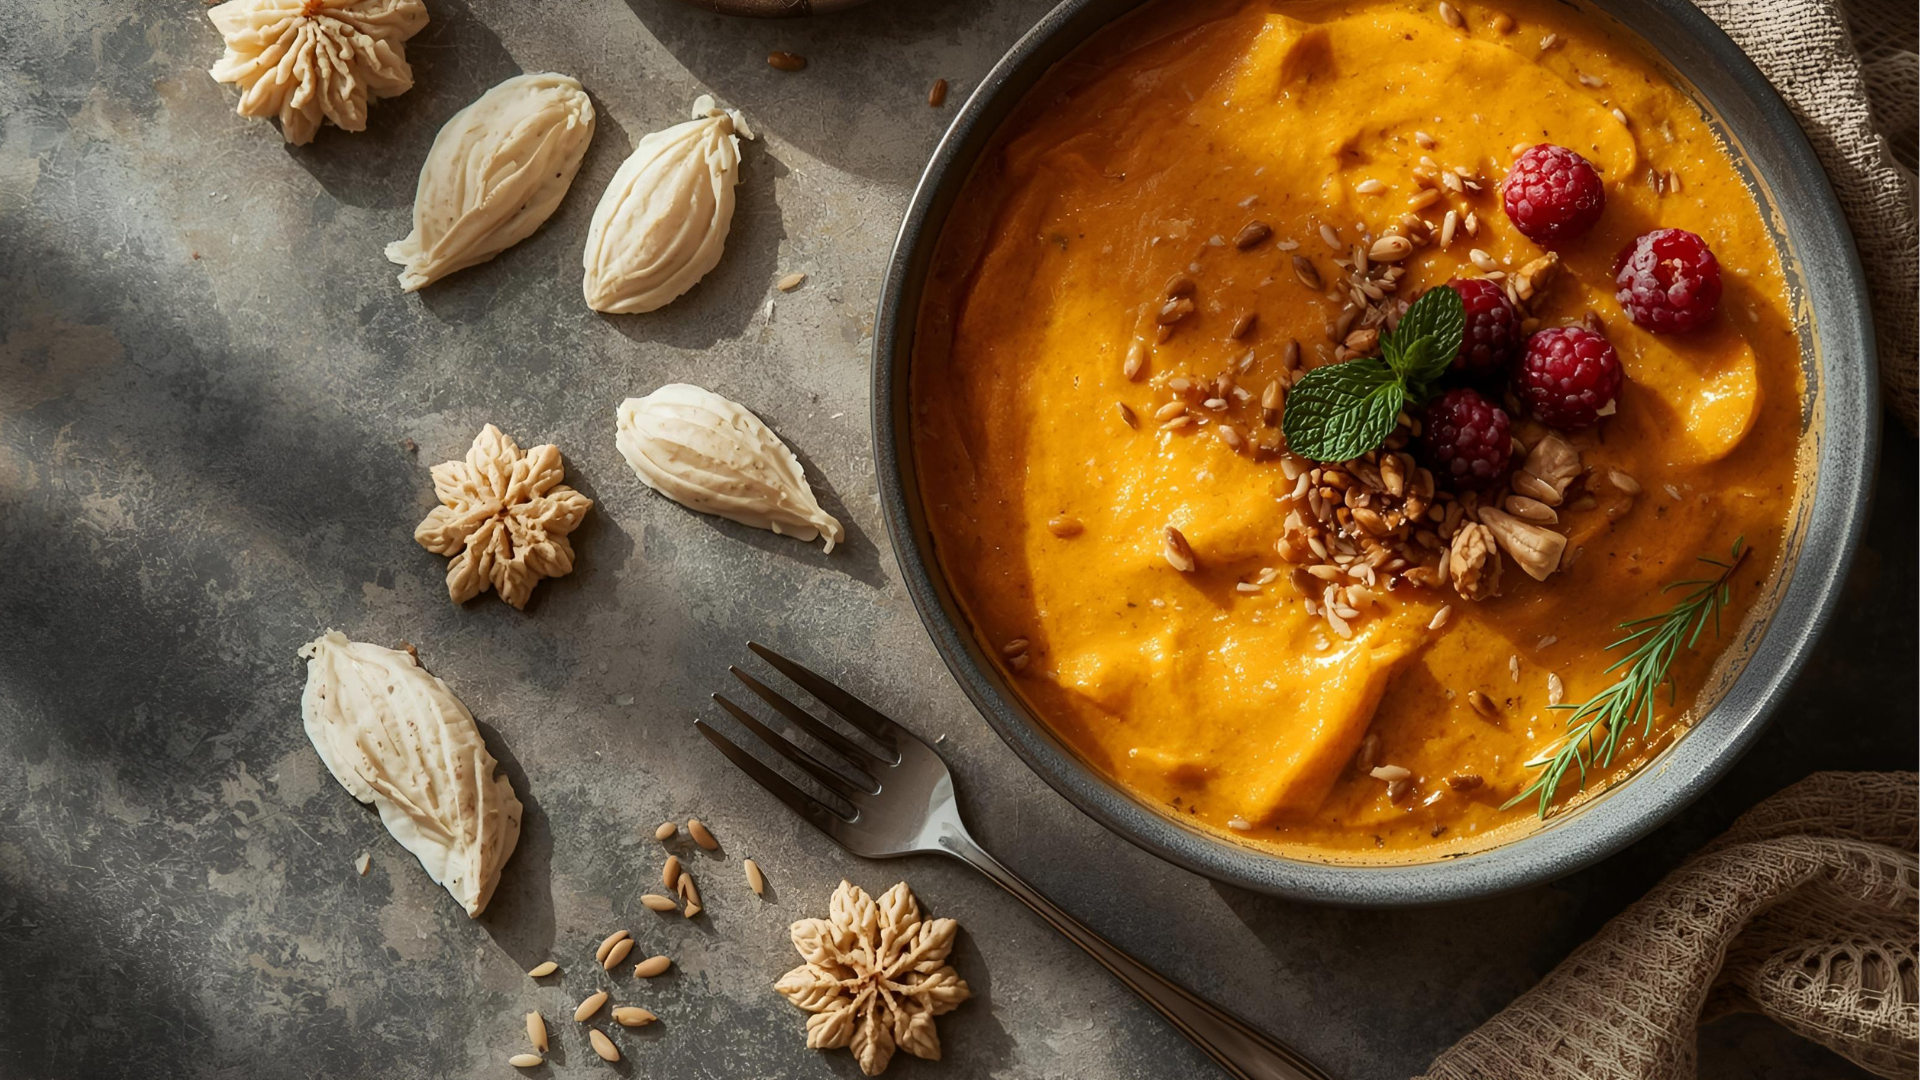
Texture adds depth and authenticity without overpowering the subject. Subtle textures—such as wood grain, brushed concrete, marble veins, metal patina, or linen weaves—provide visual interest, especially in close-up shots where details matter. Real textures, like hand-scraped wood or natural slate, photograph authentically, capturing light and shadow organically.
For wider shots (e.g., full tablescapes), printed textures on vinyl suffice, as minor imperfections are less noticeable. Overly busy patterns (e.g., loud florals) distract, so stick to understated designs. For instance, a faintly cracked concrete surface under a charcuterie board adds urban grit, while a linen texture softens a breakfast scene. Test textures in your lighting setup—real ones shine in macros, per a 2024 photography journal analysis.
3. Size
Size impacts compositional freedom. A minimum of 24×36 inches (61×91 cm) is recommended for versatility, accommodating both close-ups and wider scenes without crowding the frame. Larger sizes, like 30×40 inches or 72×120 cm, are ideal for full tablescapes or complex setups with multiple dishes, ensuring edges don’t creep into shots. Smaller boards (e.g., 24×24 inches) work for tight shots like a single dessert but limit flexibility and often require cropping or editing. For professional shoots, oversized boards (e.g., 4×8 feet) provide seamless coverage but demand storage space. Consider your shooting space—most home studios manage with 2×3-foot boards, while location photographers need compact options.
4. Material
Material affects durability, maintenance, and portability. Vinyl is lightweight (1-2 lbs), waterproof, and stain-resistant, making it ideal for messy shoots involving sauces or drinks. Wood offers authentic texture but requires sealing to prevent stains and weighs 5-10 lbs. Slate or stone (marble, granite) adds earthy elegance but is heavy (20-80 lbs) and prone to chipping. Fabric (linen, cotton) is washable but wrinkles easily. Foam boards are budget-friendly but dent quickly. Prioritize matte finishes to minimize glare, critical for food with glossy surfaces like soups or cocktails.
Vinyl and coated wood strike the best balance for frequent use, per user reviews on photography forums like Fstoppers.
5. Weight
Weight matters for portability, especially for on-location shoots (e.g., restaurant gigs). Lightweight options like vinyl or foam (1-2 lbs) are easy to transport in a backpack or car, ideal for nomad photographers. Heavier materials like real marble or thick wood (10-80 lbs) suit permanent studios but are impractical for travel. For example, a 24×36-inch vinyl board weighs under 2 lbs and rolls up, while a marble slab of the same size can hit 30 lbs, requiring team lifts. Aim for boards under 5 lbs unless you have a fixed setup.
These factors ensure backdrops are reusable, practical, and aligned with your creative vision. A starter kit might include a vinyl marble/wood combo, a sealed wooden board, and a slate slab, covering most aesthetic needs while keeping weight manageable. Pro tip: Test backdrops under your lighting setup before purchase—online swatches can mislead.
How to Set Up Your Food Photography Backdrops
A well-executed backdrop setup maximizes natural or artificial light, ensures stability, and streamlines your workflow. Whether shooting in a home studio or on location, the right equipment and techniques create professional results without frustration. Here’s a step-by-step guide to setting up backdrops and surfaces effectively, along with recommended gear and budget-friendly alternatives.
Basic Setup for Simple Shots
For quick shoots, especially in small spaces, a minimal setup works wonders. If you have a table near a wall, lean the backdrop against it at a slight angle (10-20 degrees) to avoid harsh shadows. Place the surface board directly on the table, ensuring it covers the full area visible in your frame. This setup is ideal for beginners or shoots with limited space, like a kitchen counter near a north-facing window. However, it may block natural light if the wall is opposite a window, dimming your scene. To counter this, use a white reflector ($10-20 on Amazon) to bounce light back onto the food, softening shadows and enhancing colors.
Advanced Setup for Flexibility
For professional shoots or complex compositions (e.g., overhead flat-lays or multi-dish scenes), invest in a portable, versatile setup. This allows you to position backdrops away from walls, preserving access to natural light and enabling creative angles. Essential equipment includes:
- Foldable Table: A 36×36-inch square table (e.g., Lifetime brand, $30-50 on Amazon) is sturdy, portable, and folds flat for storage. Opt for adjustable heights to match your camera tripod. For larger scenes, a 4×6-foot table ($80) accommodates oversized boards.
- Light Stands: Two adjustable stands (7-10 feet tall, $20-40 each on Amazon) hold the backdrop upright. Choose lightweight aluminum models supporting up to 10 lbs for easy transport. Neewer’s budget stands are popular among food photographers.
- Clamps: Use 2-4 heavy-duty A-clamps ($10-15/set on Amazon) to secure the backdrop to the stands. Ensure they grip tightly to prevent slipping, especially for heavier boards like wood or slate.
- Backdrop Holder (Optional): A crossbar ($15-25) connects the stands for larger backdrops, ensuring a seamless background. Manfrotto’s budget kits work well.
Steps:
- Set the foldable table near a light source (ideally a large window for soft, diffused light).
- Place the surface board on the table, ensuring it’s flat and covers the frame.
- Position light stands 2-3 feet behind the table, spaced to match the backdrop’s width.
- Attach the backdrop to the stands using clamps, adjusting height to align with the table’s edge for a smooth L-shape transition.
- Test lighting with a phone camera; adjust reflector placement to eliminate shadows.
This setup, costing $80-150 total, works for 90% of food shoots, from tight dessert shots to sprawling brunch spreads. For overhead shots, ensure the surface extends beyond the table edges to avoid visible seams—use a 30×40-inch board minimum. For location shoots, pack stands and clamps in a collapsible bag ($20) for portability.
Lighting Tips
- Natural Light: North-facing windows provide soft, even light; shoot in early morning or late afternoon to avoid harsh sun. Use sheer curtains ($10) as diffusers if needed.
- Artificial Light: A budget softbox kit (e.g., Neewer, $50-100) mimics window light for evening shoots. Set at 45-degree angles to the food.
- Glare Control: Matte backdrops reduce reflections; for glossy surfaces, angle lights to avoid hot spots.
Budget Alternatives
If equipment costs are a barrier, improvise:
- Use a dining table instead of a foldable one.
- Lean backdrops against stacked books or boxes instead of stands.
- Secure with heavy-duty tape ($5) instead of clamps for static setups.
- Borrow natural light from nearby windows or doors.
This setup ensures flexibility, allowing you to shoot in varied environments—home kitchens, restaurants, or outdoor markets—while maintaining professional quality. Real-world example: A Cape Town food blogger used a $50 table and two $20 stands to shoot a seafood platter against a weathered wood backdrop, achieving 10,000 Instagram likes with minimal editing.
Types of Food Photography Backdrops: Pros, Cons, and When to Use Them
Food photography backdrops come in a variety of materials, each with unique characteristics that cater to specific styles, budgets, and practical needs. Understanding their strengths and limitations helps you choose the right one for your shoot. Below, we explore the six main types, their pros and cons, and ideal use cases, ensuring you can match the backdrop to your creative vision.
1. Vinyl Backdrops
- Description: Printed vinyl sheets mimicking textures like wood, marble, concrete, or stone. Often double-sided, rolled for storage.
- Pros:
- Affordable: $35-100 for 24×36 inches, accessible for beginners.
- Lightweight: 1-2 lbs, ideal for travel or location shoots.
- Waterproof and Stain-Resistant: Easy to wipe clean after spills (e.g., sauces, wine).
- Portable: Rolls up tightly, fitting in backpacks or suitcases.
- Variety: Hundreds of designs (marble, wood, linen) from vendors like Capture by Lucy.
- Cons:
- Slight Sheen: Not fully matte, causing minor glare under direct light—angle lights carefully.
- Lower Resolution: Dot patterns visible in close-ups (macros); best for wider shots.
- Ridges: Rolling creates creases that need 24 hours to flatten.
- Best For: Overhead or 3/4 shots where textures appear realistic from a distance. Ideal for beginners, bloggers, or shoots with messy foods (e.g., pasta with sauce). Example: A white marble vinyl under a lemon tart creates a clean, elegant vibe.
- Use Case: Pair a faux concrete vinyl with industrial props for a burger shoot.
2. Wooden Backdrops
- Description: Real wood (plywood, pine) or faux wood replicas with natural grain, often sealed for durability. Double-sided options common.
- Pros:
- Authentic Texture: Grain and knots add warmth, perfect for rustic or cozy scenes.
- Durable: Sealed boards last years with proper care.
- Customizable: Sand, stain, or paint for unique finishes (e.g., whitewash for beachy vibes).
- Versatile: Swap sides for light/dark looks (e.g., oak vs. walnut).
- Cons:
- Heavier: 5-10 lbs for 24×36 inches, less portable than vinyl.
- Expensive: $100-400, especially for premium vendors like Woodville Workshop.
- Maintenance: Unsealed wood stains easily (oil, wine); requires resealing ($10).
- Best For: Close-ups where texture shines, like artisan breads, cheeses, or charcuterie. Use for farmhouse or nostalgic setups.
- Use Case: A weathered oak board under a homemade pie evokes a countryside bakery.
3. Slate or Stone Backdrops
- Description: Natural slate, marble, or granite (or replicas) in gray, black, green, or white tones. Often matte-finished.
- Pros:
- Earthy Aesthetic: Adds contrast and grounding, ideal for moody or organic shots.
- Wipeable: Easy to clean with damp cloth, though acids (lemon, vinegar) may etch.
- Matte Finish: Minimizes glare, perfect for glossy foods like soups or desserts.
- Cons:
- Fragile: Chips or cracks if dropped; not travel-friendly.
- Heavy: 20-80 lbs for 24×36 inches, suited for static studios.
- Stains: Acids leave marks unless sealed.
- Best For: High-contrast scenes, like a light cheesecake on dark slate or colorful veggies on white marble.
- Use Case: A black slate under sushi adds minimalist drama.
4. Fabric Backdrops (e.g., Linen, Cotton)
- Description: Textured cloths in neutrals (beige, gray) or subtle patterns, draped or stretched.
- Pros:
- Reusable and Washable: Machine-washable, eco-friendly.
- Inexpensive: $10-30 for large cuts at fabric stores.
- Soft Aesthetic: Adds homely warmth, ideal for breakfast or dessert scenes.
- Layering: Stack with surfaces for depth.
- Cons:
- Stains: Oil or sauce marks resist washing, requiring spares.
- Wrinkles: Needs ironing or steaming ($20 steamer) for smooth look.
- Best For: Homey, textured setups like pancakes or cookies. Use as backdrop or prop.
- Use Case: A beige linen backdrop behind a rustic wood surface for a brunch spread.
5. Foam or Paper Backdrops
- Description: Lightweight foam boards or rolled seamless paper in solid colors (white, black, gray).
- Pros:
- Cheap: $5-20 for foam; $10-30 for paper rolls.
- Versatile: Doubles as reflectors or diffusers.
- Customizable: Cut to size; paint for texture.
- Cons:
- Not Durable: Tears, dents, or stains easily; single-use for paper.
- Limited Aesthetic: Lacks depth compared to wood or stone.
- Best For: Budget flat-lays or minimalist shoots with simple foods (e.g., macarons).
- Use Case: A white foam board for a clean smoothie bowl shot.
6. Glass or Ceramic Tiles
- Description: Matte or textured tiles, often sourced in bulk for custom sizes.
- Pros:
- Affordable: $1-5/tile at hardware stores; glue to boards for larger surfaces.
- Variety: Endless patterns (subway, mosaic).
- Cleanable: Wipe with ease.
- Cons:
- Reflective: Glossy tiles cause glare; stick to matte.
- Heavy: Multiple tiles add weight (10-20 lbs).
- Best For: Modern, minimal scenes like sushi or cocktails.
- Use Case: Matte gray tiles for a sleek ceviche shoot.
Decision-Making Chart
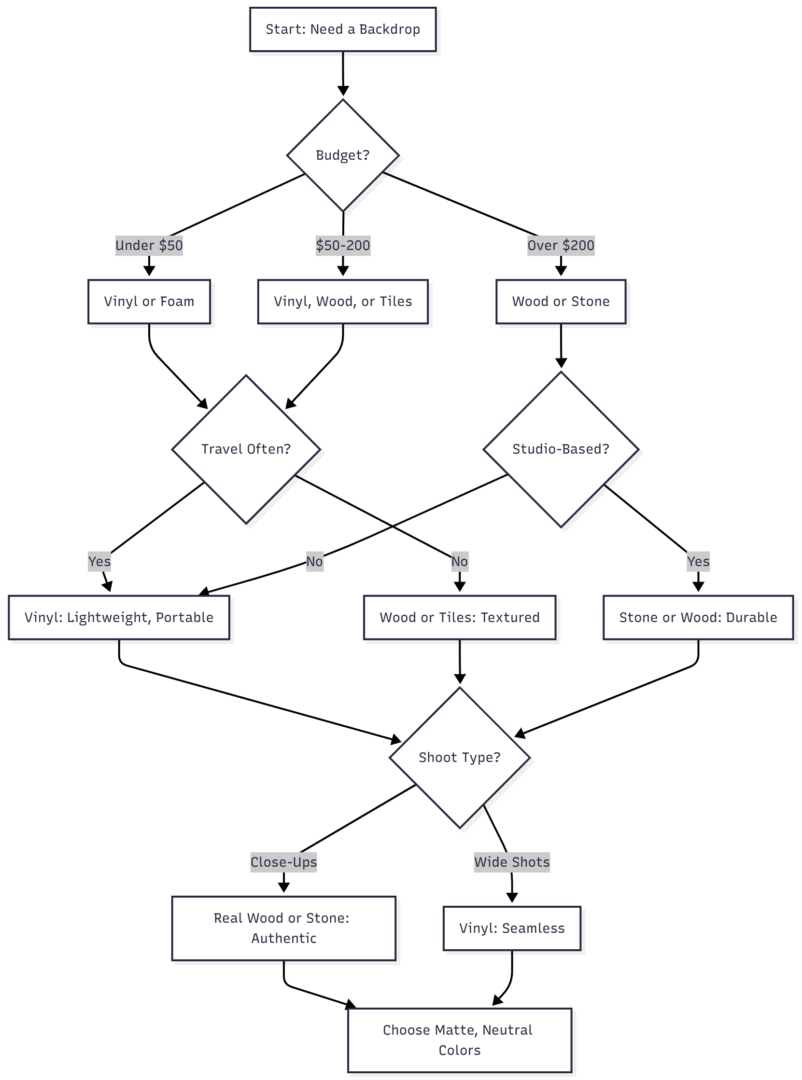
This flowchart helps you select based on budget, portability, and shoot style, ensuring efficiency.
Top Vendors and Recommendations: Comparison Table
The market for food photography backdrops is vibrant, with vendors offering diverse materials, sizes, and aesthetics. Below is a detailed comparison of leading suppliers as of October 2025, focusing on 24×36-inch (or similar) backdrops, with approximate prices, specifications, and notes. Prices fluctuate based on customizations; check vendor sites for exact costs.
| Vendor | Type/Material | Key Specs | Price Range (USD) | Notes |
|---|---|---|---|---|
| Best Ever Backdrops | Vinyl/Coated Boards | Lightweight (1 lb), matte, stain-resistant, sizes 24×24 to 46×36, double-sided, 100+ designs | $35-100 | USA-based, custom colors/textures. Use code REGANBARONI for 15% off. Free US shipping on $150+. |
| Capture by Lucy | Vinyl | Smooth, waterproof, high-res prints, sizes mini to XXL (24×36 standard), matte, 500+ designs | $36-50 for 2x3ft | UK-based, large collection, international shipping ($10-30 duties). Popular for marble, wood. |
| Poppy Bee Surfaces | Vinyl/Wood Replicas | Thick vinyl, handcrafted, matte, sizes 2x3ft to 3×4.5ft, bundles with 3-5 boards | $59 for 2x3ft; $345+ bundles | USA-made, free US shipping on 3+ items. Rustic and modern designs. |
| Woodville Workshop | Wooden Boards | Double-sided, sealed plywood, custom sizes 21×28 to 28×47, real textures, eco-friendly | $173-435 | Russia-based, premium wood (oak, pine). Free shipping over $500. |
| Bessie Bakes | Super-Thin Vinyl | 3mm thick, pliable, stain-resistant, 2x3ft standard, realistic textures | $40-60 | USA-made (Nashville), free US shipping. Ideal for travel. |
| Duo Boards (V-Flat World) | PVC Boards | Double-sided, lightweight (2.2 lbs), 30×40 standard, washable, includes legs for setup | $100-150 | USA-made, portable, durable. Popular for pros. |
| Texturit | Vinyl/Wood | Anti-curl, waterproof, sizes 2x3ft to 4x4ft, double-sided, shabby wood/stone | $66-293 | EU-based, unique distressed designs. Shipping $20-40. |
| Club Backdrops | Vinyl | Matte, durable, sizes 2x3ft to 3x4ft, custom colors, high-res prints | $36-45 for 2x3ft | UK-made, bulk discounts (10% for 3+). Worldwide shipping $15-25. |
| Fondos Para Fotógrafos | Vinyl | Photographed/hand-painted, bright textures, 2x3ft standard, vibrant patterns | $50-100 | Spain-based, colorful options for bold shoots. Shipping $10-30. |
| Errer | Vinyl | Smooth, matte, waterproof, 2x3ft standard, budget-friendly | ~$35 (EUR 30) | Netherlands-based, entry-level. Shipping $10-20. |
Recommendations:
- Beginners: Start with Best Ever Backdrops or Club Backdrops for affordable vinyl ($35-50). Their lightweight designs suit small spaces and travel.
- Professionals: Invest in Woodville Workshop ($173+) for authentic wood or Duo Boards ($100-150) for durable PVC with setup legs.
- Budget Travelers: Bessie Bakes’ thin vinyl ($40) or Errer ($35) for portability.
- Creative Bloggers: Capture by Lucy’s vast catalog (500+ designs) or Fondos Para Fotógrafos for vibrant, unique textures.
Pro tip: Order samples ($5-10) from vendors to test under your lighting. Check shipping costs (e.g., Texturit’s $20-40 EU fees) and customs duties for international orders.
DIY Food Photography Backdrops: Budget-Friendly Alternatives
For photographers on a tight budget or those craving custom aesthetics, DIY backdrops offer creative control at a fraction of the cost. These options leverage everyday materials, require minimal tools, and deliver professional results when executed well. Below are five DIY methods, including materials, steps, costs, and use cases, ensuring you can craft backdrops tailored to your style.
1. Painted Canvas or Plywood
- Materials: Canvas dropcloth ($10-15, Home Depot) or plywood sheet ($10-20, 24×36 inches), matte paint samples ($5 each, 2-3 colors), primer ($5), matte sealer ($10), sponge/brush ($5).
- Steps:
- Cut material to size (24×36 inches recommended).
- Apply primer to prevent warping; dry 4 hours.
- Layer paints with sponge for textured effect (e.g., gray base, white streaks for marble).
- Seal with matte varnish to protect against spills; dry 24 hours.
- Cost: $20-40.
- Best For: Rustic or modern looks (e.g., faux concrete for burgers, whitewash for seafood).
- Note: Lightweight canvas rolls up; plywood is durable but heavier (5-10 lbs).
2. Vinyl Contact Paper
- Materials: Vinyl contact paper ($10-15/roll, marble or wood effect), foam core board ($5, 24×36 inches), spray adhesive ($5).
- Steps:
- Cut foam core to size.
- Apply contact paper smoothly, avoiding bubbles.
- Trim edges; seal with clear matte spray ($5) for durability.
- Cost: $15-25.
- Best For: Clean, modern surfaces like marble for cakes or tiles for sushi.
- Note: Avoid glossy finishes; test for glare.
3. Baking Trays or Metal Sheets
- Materials: Used baking trays or metal sheets ($5-10, thrift stores), matte spray paint ($5, optional).
- Steps:
- Clean thoroughly to remove grease.
- Spray with matte paint for neutral tone (e.g., black or gray).
- Dry 24 hours; stack for larger surfaces.
- Cost: $5-15.
- Best For: Moody, industrial shots like steaks or cocktails.
- Note: Lightweight but small; combine for bigger setups.
4. Parchment or Grocery Bags
- Materials: Parchment paper or brown grocery bags (free-$5), tape ($2).
- Steps:
- Crumple paper for texture; flatten slightly.
- Tape to foam core or table for stability.
- Cost: $0-7.
- Best For: One-off flat-lays (e.g., cookies, coffee). Recyclable.
- Note: Single-use; tears easily.
5. Tiles or Cutting Boards
- Materials: Matte ceramic tiles ($1-5 each, hardware stores) or wooden cutting boards ($10-20), adhesive ($5).
- Steps:
- Arrange tiles/boards in desired pattern.
- Glue to plywood base for stability (optional).
- Clean and store flat.
- Cost: $10-30.
- Best For: Minimalist or rustic scenes (e.g., charcuterie, sushi).
- Note: Heavy if tiled; matte tiles reduce glare.
DIY Tips:
- Source materials from thrift stores or hardware shops (e.g., Home Depot, $10-20 for basics).
- Test textures under lighting to ensure realism.
- Store flat or rolled to avoid damage.
- Combine with props (napkins, cutlery) for cohesive storytelling.
DIY backdrops save 50-80% compared to purchased ones but may lack longevity. For a $50 budget, craft two canvas boards and one tile setup, covering rustic, modern, and minimalist aesthetics. Example: A DIY weathered plywood board ($20) helped a food blogger shoot a viral pizza post, saving $100 vs. a Woodville board.
Tips for Using Backdrops Effectively
To maximize your backdrops’ impact, integrate them thoughtfully into your workflow. These tips ensure professional results across shoots:
- Lighting: Use natural window light (north-facing ideal) for soft, diffused effects. Avoid direct sun to prevent harsh shadows—use sheer curtains ($10) as diffusers. Artificial softboxes ($50-100) replicate daylight for night shoots.
- Composition: Blur backdrops with a shallow depth of field (f/2.8-f/4) to keep food in focus. Use the rule of thirds to place dishes off-center for dynamic shots.
- Styling: Match backdrop to the food’s story—terracotta for Mediterranean dishes, slate for sushi, linen for breakfast. Add props (e.g., herbs, cutlery) sparingly to avoid clutter.
- Maintenance: Wipe spills immediately with a damp cloth; use mild soap for vinyl. Store vertically (wood, slate) or rolled (vinyl) to prevent warping.
- Angles: Overhead shots highlight surfaces (e.g., flat-lays for pizzas); eye-level shots emphasize backdrops (e.g., cocktails with black backdrop).
- Editing: Use Lightroom ($10/month) to adjust exposure or white balance, enhancing backdrop colors without heavy filters. Crop seams for seamless looks.
Experimentation is key: Test a dark wood backdrop with a bright salad to see if contrast pops, or pair a pastel vinyl with a chocolate dessert for softness. Rotate your collection to keep content fresh—social media algorithms favor varied aesthetics, boosting engagement by 15%, per 2024 Instagram analytics.
Conclusion
The best food photography backdrops are more than props—they’re storytelling tools that elevate your images from ordinary to extraordinary. By prioritizing matte, neutral, textured options in sizes like 24×36 inches, you ensure versatility across shoots, whether for blogs, restaurants, or social media. Vinyl offers affordability and portability ($35-100), ideal for beginners or travelers, while wood and slate deliver authentic depth for professionals ($100-400).
Vendors like Best Ever Backdrops, Capture by Lucy, and Woodville Workshop provide quality and variety, with options for every budget. DIY solutions—from painted plywood ($20) to tiled boards ($10-30)—empower creativity without breaking the bank. Invest in a foldable table ($30-50) and light stands ($40-80) for seamless setups, and follow lighting and styling tips to maximize impact. With the right backdrops, your food photography will captivate audiences, drive engagement, and tell compelling culinary stories.
Start small, experiment boldly, and watch your images transform into art that resonates globally.
Please share this The Best Food Photography Backdrops with your friends and do a comment below about your feedback.
We will meet you on next article.
Until you can read, Tethered Shooting Basics for Food Photography