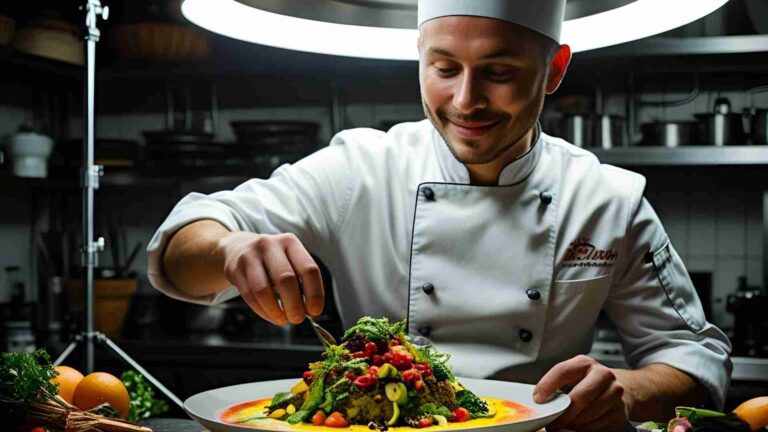
Food Photography Behind The Scenes
Food photography is an art form that transforms ordinary ingredients and dishes into visually captivating masterpieces. Behind every polished image lies a meticulous process involving creative vision, technical expertise, planning, styling, lighting, and editing. This comprehensive guide delves into the behind-the-scenes world of food photography, drawing from professional insights and practical strategies to help aspiring photographers master the craft. Whether you’re using professional gear or a smartphone, understanding the core elements can turn everyday food into extraordinary art. We’ll explore equipment essentials, pre-production planning, on-set execution, lighting techniques, styling tips, shooting methods, and post-production refinements, all while emphasizing efficiency and creativity to produce images optimized for digital platforms like websites, social media, and marketing materials.
The Essence of Food Photography: Balancing Creativity and Technique
At its core, food photography blends creativity with technical precision. The creative side drives the vision—deciding how to present a dish to evoke emotion, such as warmth, freshness, or indulgence. The technical side supports this through tools like cameras, lenses, and lighting. Professionals advise against over-focusing on gear initially; start with what you have, such as a basic camera or smartphone, and let practice refine your skills. As your vision evolves, you’ll naturally seek equipment to enhance it.
Food photography isn’t just “point and shoot.” It involves a structured process to make food look appetizing and realistic. For instance, editorial styles prioritize edible elements and natural settings, while commercial shoots might use tricks for perfection. The goal is to convey texture, color, and appeal, making viewers crave the dish. This requires understanding how light interacts with surfaces, how props enhance composition, and how editing polishes the final product.
To illustrate the workflow, consider this flowchart depicting a typical food photography process:
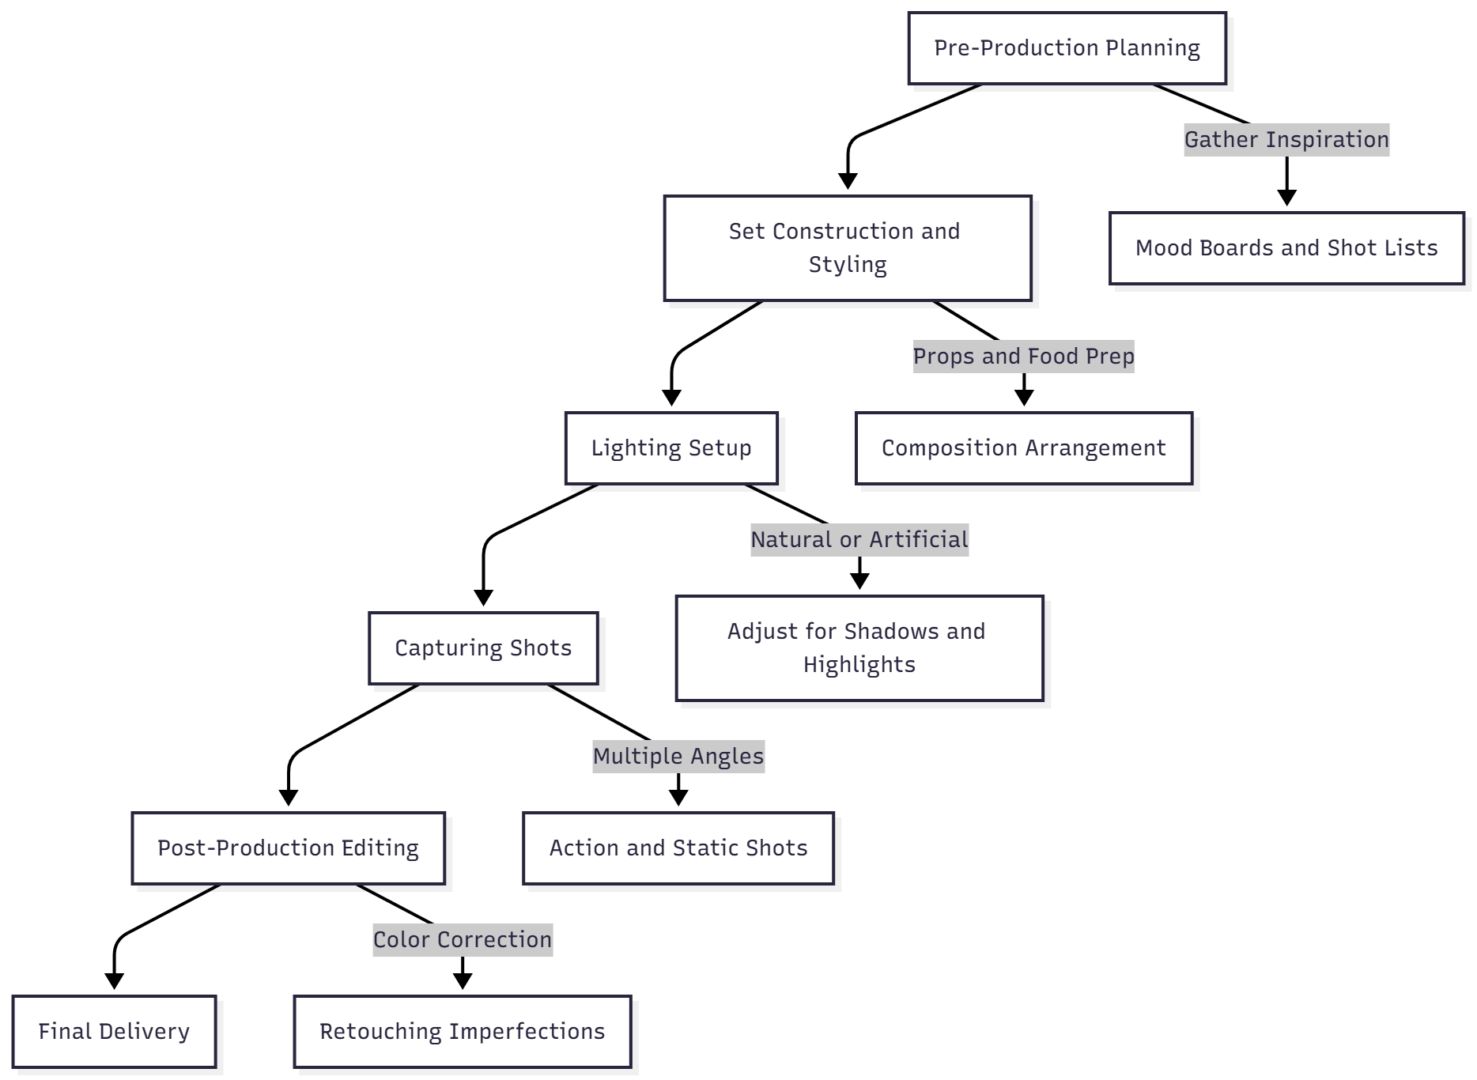
This chart outlines the sequential steps, highlighting how each phase builds on the previous one for a cohesive result.
Essential Equipment for Food Photography
Selecting the right equipment is crucial, but it doesn’t require breaking the bank. Professionals often use a mix of high-end and affordable tools. Below is a table summarizing common equipment, including specifications and approximate prices (based on current market averages in USD; prices may vary by retailer and region).
| Equipment | Specifications | Approximate Price | Key Uses in Food Photography |
|---|---|---|---|
| Camera | Nikon D750 (Full-frame DSLR, 24.3MP sensor, ISO 100-12800) | $1,200 | Captures high-resolution images with excellent dynamic range for detailed food textures. |
| Lens | Nikon 105mm f/2.8 Macro (VR stabilization, 1:1 reproduction ratio) | $900 | Ideal for close-up shots of ingredients, providing sharp focus on small details like garlic cloves. |
| Lens (Alternative) | Nikon 24-70mm f/2.8 (Wide-angle zoom, ED glass elements) | $1,800 | Versatile for overhead and wide compositions, such as soup setups. |
| Tripod | Manfrotto MT055XPRO3 (Aluminum, 66-inch max height, 19.8 lb load capacity) | $250 | Stabilizes camera for long exposures or tethered shooting in low light. |
| Lighting | Godox AD400 Pro Strobe (400Ws power, TTL mode, 2.4G wireless) | $500 | Provides consistent artificial light; use with softboxes for soft shadows. |
| Softbox | 47-inch Octagonal Softbox (Removable diffuser, bowens mount) | $80 | Diffuses light to reduce harshness, essential for even illumination on drinks. |
| Reflectors | 5-in-1 Collapsible Reflector (42-inch diameter, gold/silver/white/black/translucent) | $30 | Bounces light to fill shadows or add warmth/cool tones. |
| Tethering Cable | USB 3.0 Tether Cable (15 ft length, high-speed data transfer) | $20 | Connects camera to computer for real-time preview in Lightroom. |
| Editing Software | Adobe Lightroom Classic (Subscription-based, non-destructive editing) | $10/month | Adjusts exposure, color, and sharpness post-shoot. |
| Smartphone (Alt) | iPhone 14 (12MP wide camera, Night mode, ProRAW support) | $800 | Beginner-friendly for natural light shots; apps like VSCO for editing. |
Not all gear is mandatory. Many start with natural window light and a smartphone, gradually adding items like strobes for control. For artificial lighting, strobes with softboxes create soft, even light, while bare bulbs mimic direct sunlight for dramatic shadows. Accessories like foam boards (white for reflection, black for absorption) cost under $10 each and are invaluable for light manipulation.
In professional setups, tethering to software like Lightroom allows immediate review, saving time on reshoots. For outdoor shoots, lightweight tripods and remote triggers are essential for stability during golden hour.
Pre-Production Planning: The Foundation of Success
Behind-the-scenes success begins long before the shoot. Planning ensures efficiency, especially with perishable food. Start with client consultations to define goals: website banners, social media content, or print ads? Discuss mood (bright and fresh vs. dark and moody), branding colors, and usage formats (horizontal for websites, vertical for Instagram).
Create mood boards using platforms like Pinterest to visualize compositions, props, and lighting. Develop a shot list detailing angles (overhead, straight-on, 45-degree) and variations (with/without packaging). Scout locations—indoor studios for control, outdoors for natural vibes like autumnal fields mimicking vineyards.
Source props strategically: plain ceramic plates ($10-20 each) for versatility, linen napkins ($5-15) for color pops, and boards (wood or vinyl, $20-50) for backgrounds. Collect from thrift stores or online (e.g., Texturit boards with 10% discount codes). For food, prepare multiples—extra cherries or pears—to select the best.
In commercial shoots, collaborate with teams: food stylists for arrangement, prop stylists for environments. For solo work, sketch compositions starting with the hero ingredient, adding elements from largest to smallest. Budget time for challenges like melting ice cream or dripping sauces.
Outdoor planning adds layers: save locations in Google Maps, check for distractions, and time for golden hour (narrow window, often 30-60 minutes). Bring helpers for holding reflectors or assisting with setups.
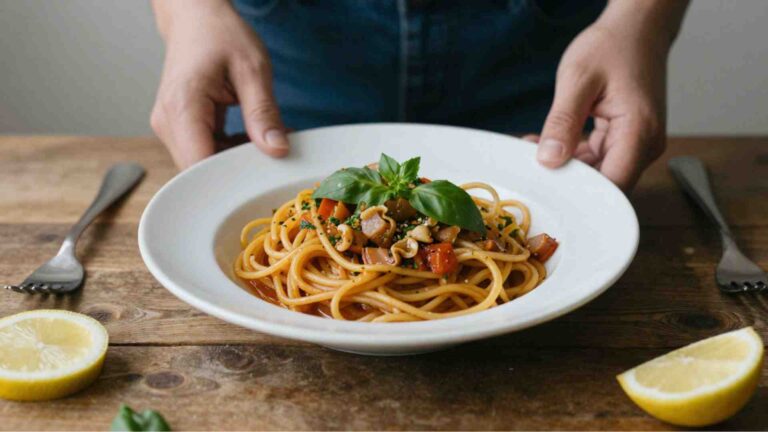
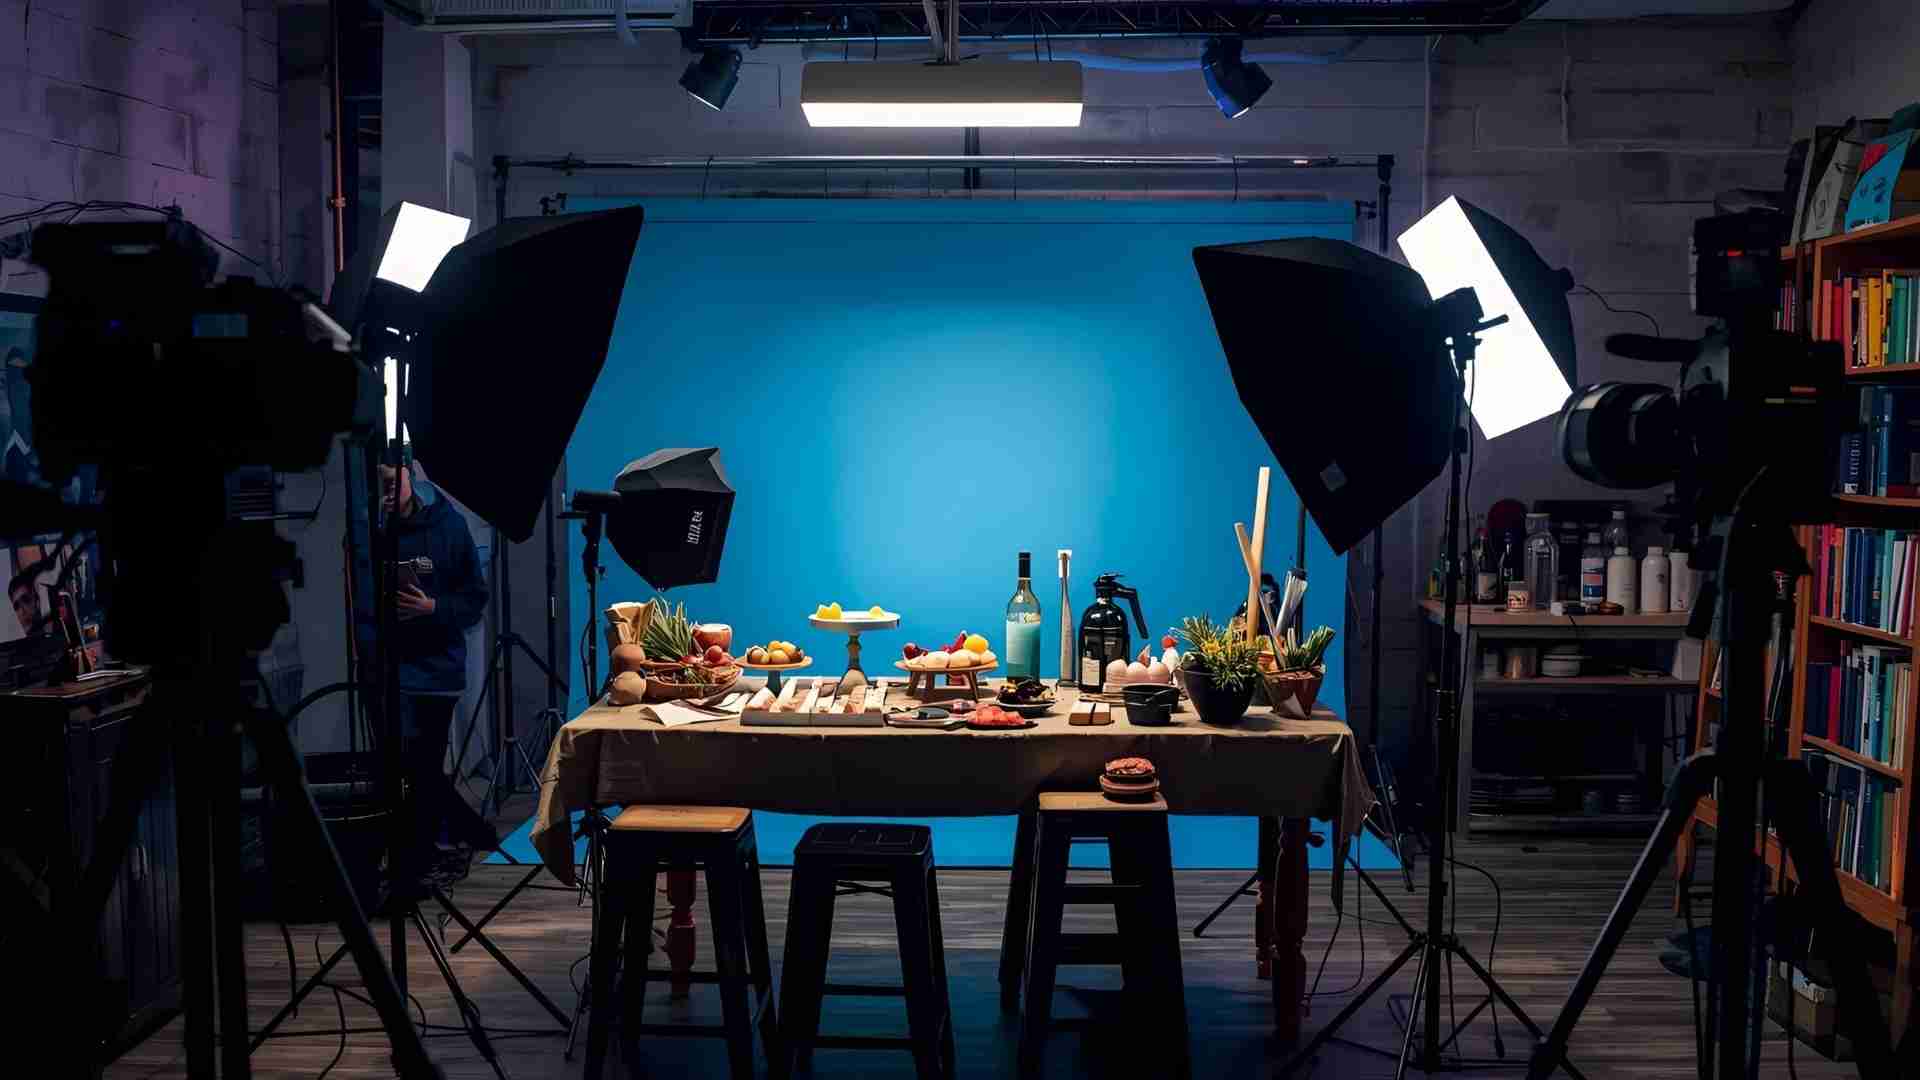
On-Set Execution: Styling and Composition
Once planned, execution focuses on building the set and styling food. Construct the environment with backdrops (vinyl for realism, hand-painted for texture) and props to match the aesthetic—dark wood for moody soups, neutral linens for popping cherries.
Food styling is detail-oriented: arrange to highlight textures and colors. Use tweezers for precision, fake ice ($10/pack) for drinks, or maple syrup-water mixes for bourbon looks. Add garnishes like fresh herbs or drips for realism. For dark moods, employ tarnished sheets and black bowls; for bright, white plates and foam boards.
Composition rules: focus on color stories (complementary hues like yellow boards with amber liquids) and storytelling (evoke coziness with warm tones). Include hands for lifestyle feel, but avoid overcrowding—keep scenes clean for product focus.
Experiment with depths: neutral props let colors pop, frayed linens add texture. For pears, minimalism works; let shapes shine on dark boards. Clean imperfections meticulously—cotton swabs for smudges, sprays for napkin shaping.
In team settings, photographers direct while stylists handle food. For solo, multitask: play food stylist (arrange), set stylist (props), and photographer (capture).
Mastering Lighting: Natural vs. Artificial
Lighting defines food’s appeal, creating dimension without flatness. Natural light from windows is favored for softness—north-facing for even diffusion, west-facing for warm afternoons. Use reflectors to bounce light, filling shadows.
Artificial options offer control: strobes for consistency, speedlights for drama. Position one light for direct sun effects (bare bulb for shadows), add V-flats opposite for balance. For monochrome garlic, two softboxed strobes ensure evenness.
Tips: Embrace shadows for depth—prevent artificial looks. Adjust camera settings (low ISO for clarity, wide apertures for bokeh). Outdoors, golden hour provides warm backlighting; indoors, combine with foam boards.
Common setups: One-light for drinks (strong shadows), multiple for even coverage. Tools like Pocket Wizards ($200) sync wirelessly.
Capturing the Shots: Techniques and Angles
Shooting involves experimentation. Use tethered setups for live previews, remote triggers for action shots (e.g., stirring beer for foam). Capture multiple formats: portrait/landscape, close-ups for texture, wide for context.
Angles matter: Overhead for flat lays (soups), 45-degree for height (stacks), straight-on for drinks. For action, set timers or use laptops. Include behind-the-scenes for authenticity.
Challenges: Tight timeframes with melting food—work fast, prepare backups. In cramped spaces like fridges, use grids/snoots to direct light, avoiding reflections.
Post-Production: Polishing to Perfection
Editing transforms raw shots. Select best images, then use Lightroom/Photoshop for color correction, contrast adjustments, sharpening. Remove imperfections (reflections, crumbs) without over-editing—keep edible realism.
Steps: Batch process for efficiency, fine-tune details (boost vibrance for fruits, deepen shadows for mood). For issues like unclean glass, clone/heal tools fix seamlessly.
Final touches: Optimize for use—high-res for print (300 DPI), web-optimized for speed.
Insights from Professional Food Photographers
Professionals like Fanette Rickert emphasize continuous learning: attend workshops, block time for personal shoots. Isabella Cassini highlights collaboration—stylists enhance creativity. Haniyeh Nikoo stresses daily practice and business savvy.
Common advice: Practice relentlessly, study art for inspiration, balance freelance business (70% admin). Personal projects maintain passion; pandemics taught adaptation, like learning animations.
For aspiring photographers: Build portfolios with restaurant practice, network via Instagram, invest in stylists for growth.
Challenges and Solutions in Food Photography
Perishables pose timing issues—shoot pizza while cheese melts. Outdoors: Weather variability—plan backups. Commercial vs. editorial: Balance tricks (lard for ice cream) with authenticity.
Solutions: Detailed planning, multiples of food, efficient teams. For budgets, thrift props, use natural light.
The Business Side: Commercial Applications
Food photography supports restaurants, brands, and markets. Create content for menus, websites, social—e.g., hero images for chocolate brands emphasizing abundance.
Understand client needs: Mood alignment, versatile formats. Freelancers: Questionnaires for clarity, mood boards for alignment.
FAQs
To begin food photography, you don’t need expensive gear. A basic camera like a Nikon D750 ($1,200) or even a smartphone such as an iPhone 14 ($800) works well. Add a macro lens like the Nikon 105mm f/2.8 ($900) for close-ups, a tripod like the Manfrotto MT055XPRO3 ($250) for stability, and simple lighting tools such as a Godox AD400 Pro strobe ($500) with a 47-inch octagonal softbox ($80). Reflectors ($30) and foam boards (under $10) help manipulate light. Use Adobe Lightroom ($10/month) for editing. Start with natural window light to keep costs low.
Pre-production is crucial as it sets the foundation for a successful shoot. It involves client consultations to define goals, mood, and formats; creating mood boards on platforms like Pinterest; and developing shot lists with angles and variations. Scout locations, source props like plates ($10-20) and boards ($20-50), and prepare food multiples to handle perishables. This phase prevents issues like melting ingredients and ensures efficiency, especially in tight timeframes like golden hour outdoors.
Natural lighting from windows provides soft, diffused illumination, ideal for fresh, realistic looks—north-facing for even light, west-facing for warmth. It’s free but dependent on time and weather. Artificial lighting, using strobes or speedlights, offers control and consistency, allowing dramatic shadows or even coverage with softboxes. For example, use one bare strobe for sunlight effects on drinks or two softboxed lights for monochrome setups. Combine with reflectors to fill shadows; artificial is better for indoor or moody shoots.
Food styling focuses on texture, color, and composition. Start with the hero ingredient, add elements from largest to smallest, and incorporate garnishes like herbs or drips for realism. Use tricks like fake ice ($10/pack) for drinks or tweezers for precision. Match props to mood—dark wood boards for moody soups, neutral linens for popping colors. Keep scenes clean to avoid busyness, and include hands for lifestyle feel. Dampen napkins with a spray bottle for shaping, and always prepare extras to select the best.
Challenges include perishable food timing (e.g., melting cheese on pizza), reflections in cramped spaces, or weather in outdoor shoots. Overcome by preparing multiples, using grids/snoots on lights to direct illumination and avoid glare, and planning backups like indoor alternatives. For editing issues like unclean glass, use cloning tools in Lightroom. Tight budgets? Thrift props and use natural light. Practice daily to build skills, and collaborate with stylists for complex setups.
Post-production polishes raw shots to highlight appeal. In software like Lightroom or Photoshop, select best images, then adjust color correction, contrast, sharpness, and vibrance. Remove imperfections (e.g., crumbs, reflections) with healing tools while maintaining edible realism. Batch process for efficiency, and optimize for use—high-res (300 DPI) for print, compressed for web. This step brings out details like fruit shine or sauce gleam, turning good shots into professional visuals.
Conclusion
Behind the scenes, food photography is a blend of preparation, creativity, and refinement. By mastering equipment, planning, styling, lighting, shooting, and editing, you can create compelling images that stand out. Start simple, practice consistently, and let your vision guide you. Whether for personal passion or commercial success, the process rewards those who embrace its intricacies, turning everyday food into timeless art.
Please share this Food Photography Behind The Scenes with your friends and do a comment below about your feedback.
We will meet you on next article.
Until you can read, The Best Lenses for Food Photography: DSLR, Mirrorless & iPhone