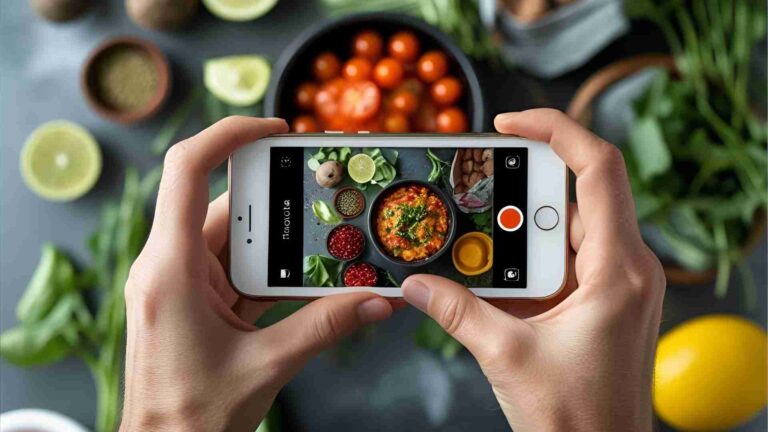
Food Styling Tips for Sandwiches (Without A Food Stylist)
Food styling is an art form that elevates culinary creations into visual masterpieces, and sandwiches, with their layers of bread, proteins, vegetables, and condiments, present a unique challenge for photographers and content creators. Whether you’re a food blogger, a social media influencer, or an aspiring photographer, capturing a sandwich that looks as good as it tastes requires meticulous planning, creative techniques, and an eye for detail. Sandwiches can easily appear flat, soggy, or uninspired if not styled properly, but with the right strategies, you can transform them into mouthwatering images that demand attention. This comprehensive guide expanded to dive deep into every aspect of sandwich styling offers practical, actionable tips to help you achieve professional-grade results without hiring a food stylist. From ingredient selection to lighting mastery, prop integration, and advanced hacks, we’ll cover everything you need to create scroll-stopping sandwich photos, complete with a delicious recipe to practice your skills.
Why Sandwich Styling Matters
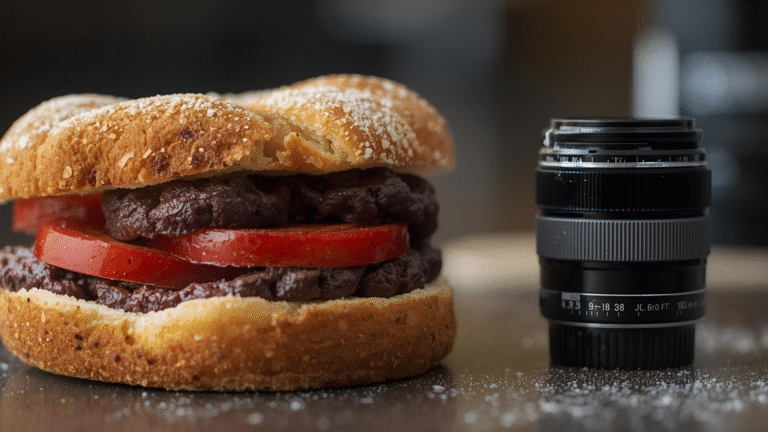
Sandwiches are a staple in cuisines worldwide, but their visual appeal in photography hinges on more than just slapping ingredients between two slices of bread. A poorly styled sandwich can look squished, lifeless, or unappetizing, undermining the effort put into its preparation. Food styling for sandwiches involves orchestrating ingredients to showcase texture, color, height, and freshness, all while maintaining a natural, edible appearance. Unlike other dishes, sandwiches rely heavily on structural integrity—bread must hold firm, fillings need to stay vibrant, and condiments should enhance without overwhelming. The goal is to evoke hunger and inspire viewers, whether for a blog post, Instagram feed, or a restaurant menu.
Styling sandwiches without a professional requires you to wear multiple hats: chef, stylist, and photographer. You’ll need to select ingredients that pop visually, build a structurally sound composition, and master lighting to highlight every layer. This guide draws from expert techniques to simplify the process, ensuring your sandwiches look irresistible even if you’re working solo in a home studio.
Selecting Ingredients for Maximum Visual Appeal
The foundation of any great sandwich photo is high-quality, photogenic ingredients. Every component plays a role in creating contrast, texture, and vibrancy. Here’s a detailed breakdown of how to choose and prepare ingredients for a garden greens sandwich with green goddess dressing, a perfect example of a visually stunning yet approachable dish.
- Bread: The bread sets the stage. Opt for artisan varieties like multi-grain, sourdough, or ciabatta for their rustic texture and ability to hold shape. Thicker slices (1-1.5 inches) provide height and prevent sogginess. Avoid thin, pre-sliced white bread, which compresses easily and lacks visual depth. For example, a multi-grain loaf with visible seeds adds a tactile quality that screams freshness.
- Proteins and Cheeses: Creamy spreads like herbed goat cheese or fresh mozzarella are ideal for sandwiches because they spread smoothly at room temperature, creating a visible, luscious layer. Position proteins like deli meats or cheeses toward the back of the sandwich to let fresh produce take center stage. This strategic placement ensures vibrancy while maintaining structural integrity.
- Vegetables and Greens: Choose vegetables with bold colors and varied textures. Curvy lettuce (like romaine or butter lettuce) adds dimension, while thick avocado slices provide creamy green contrast. Thinly sliced cucumbers (use a mandoline for delicate curls), vibrant tomato rounds, and green pepper slices contribute layers and color. Pickled red onions, with their bright pink hue, add a pop that draws the eye. Top with microgreens or broccoli sprouts for a fluffy, fresh finish.
- Condiments: A homemade green goddess dressing—made from dairy-free yogurt, lemon juice, rice vinegar, basil, garlic powder, salt, and pepper—adds creaminess and herbal notes. Apply it sparingly with an eyedropper or pipette to control placement and avoid messiness. Condiments should enhance, not overpower, the visual hierarchy.
Freshness is critical. Purchase ingredients the night before or morning of your shoot to ensure peak vibrancy. Wilted greens or browning avocados can ruin a shot, no matter how well-lit. If you’re shooting alone, prep components like pickled onions or sliced vegetables in advance to streamline the process.
Table: Essential Sandwich Ingredients and Their Styling Benefits
| Ingredient | Styling Benefit | Specifications | Approximate Price (USD per unit) |
|---|---|---|---|
| Multi-Grain Bread | Rustic texture, structural height | Thick slices, 1 lb loaf | $4-6 |
| Herbed Goat Cheese | Smooth, creamy layer, visible spread | 4 oz, soft at room temp | $5-7 |
| Avocado | Creamy green contrast, thickness | Medium, ripe but firm | $1-2 each |
| Tomato | Bright red color, juiciness | Medium, vine-ripened | $0.50-1 each |
| Cucumber | Thin, curvy layers for dimension | English, 1 lb | $1-2 |
| Green Pepper | Crisp texture, green accent | Medium, 1 lb | $0.75-1.50 |
| Pickled Red Onions | Vibrant pink, tangy contrast | Homemade, 1 red onion | $1-2 (ingredients) |
| Microgreens | Fluffy, fresh top layer | Broccoli/mixed, 4 oz | $3-5 |
| Green Goddess Dressing | Creamy drizzle, herbal vibrancy | Yogurt-based, 1 cup | $2-4 (ingredients) |
This table outlines cost-effective choices, ensuring you can source high-quality ingredients without breaking the bank. Prices are based on average U.S. retail costs, making this accessible for home stylists.
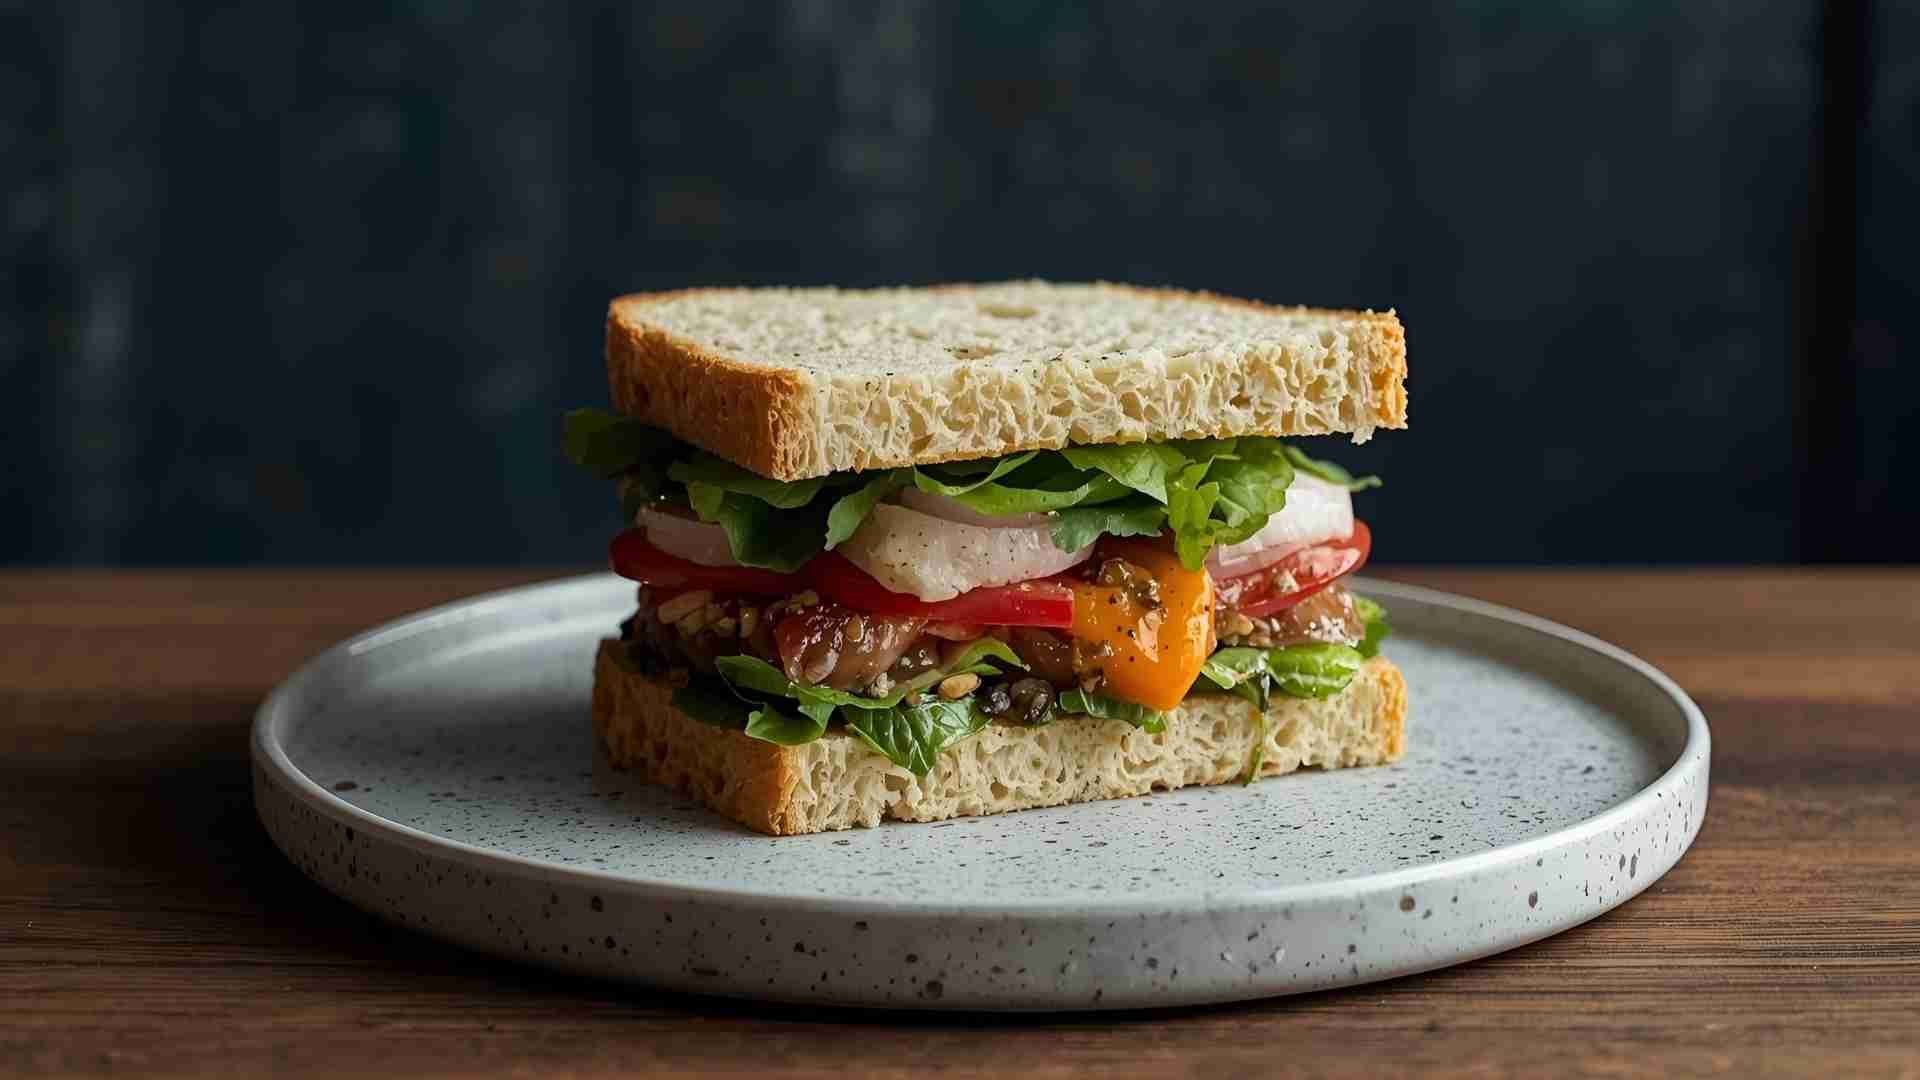
Building Height and Structure for Photogenic Sandwiches
Height is the secret to a captivating sandwich photo. A tall, layered sandwich showcases every ingredient, creating a sense of abundance and appeal. Without a professional stylist, you’ll rely on structural supports and careful assembly to achieve this.
Start with a thick slice of multi-grain bread as the base, placed on a small cutting board to elevate the composition slightly. Spread herbed goat cheese generously, ensuring extra is visible toward the front for a creamy, inviting look. Then, layer in this order for optimal visual impact:
- Curvy Lettuce: Adds volume and green vibrancy.
- Avocado Slices: Thick slices for creamy texture and color.
- Tomato Rounds: Bright red for contrast, placed centrally.
- Fresh Mozzarella: White, soft slices for a neutral yet luxurious layer.
- Cucumber Ribbons: Thin, curly slices for delicate texture.
- Green Pepper Slices: Crisp, green accents for crunch.
- Pickled Red Onions: Positioned toward the front for a pop of pink.
- More Greens: Another layer of lettuce for height.
- Microgreens: A fluffy topper for freshness.
To maintain height and prevent collapse:
- Cardboard or Foam Supports: Place small pieces between layers to add structure without squishing. For example, a 2×2-inch square of foam under the avocado keeps it elevated.
- Toothpicks or T-Pins: Insert discreetly to anchor layers. T-pins are easier to remove due to their T-shaped tops, but toothpicks work in a pinch. Ensure everyone on set knows the sandwich is inedible if pins are used.
- Skewers: For ultra-tall sandwiches, a central skewer holds everything securely, allowing you to build higher without toppling.
Position proteins and cheeses toward the back, leaving the front for fresh produce. This setup makes it easy to swap out wilting greens or tomatoes during a long shoot, preserving freshness without dismantling the entire sandwich.
Chart: Sandwich Layering Process
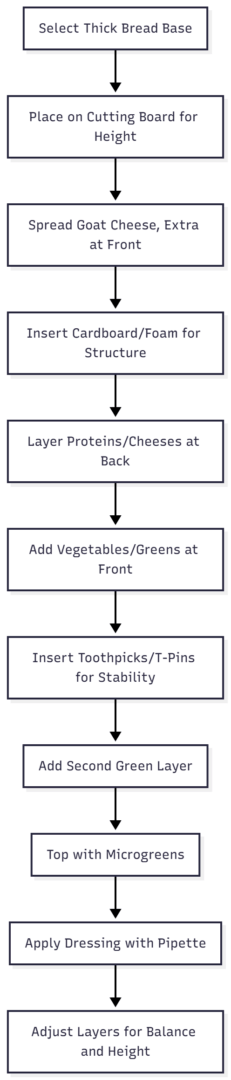
This flowchart ensures a systematic approach to building a photogenic sandwich, emphasizing height and stability.
Mastering Condiments and Moisture for Visual Perfection
Condiments like green goddess dressing or mayonnaise can make or break a sandwich’s appearance. Too much sauce creates a sloppy look, while too little fails to convey flavor. Precision is key.
- Application Tools: Use pipettes or syringes for controlled condiment placement. For green goddess dressing, an eyedropper allows you to place small, glossy drops exactly where needed—near the edges for a dripping effect or in the center for a creamy highlight.
- Drip Techniques: Apply condiments close to the sandwich’s edge with a small spoon, then use the back of the spoon to spread gently, creating an artful drip that spills slightly over the side. If the drip is insufficient, use a toothpick to add more sauce strategically.
- Moisture Control: To keep produce like lettuce or tomatoes looking fresh, apply tiny water droplets with a needle applicator or toothpick. Avoid spray bottles, which can drench the sandwich and make bread soggy. For longer shoots, a 1:1 glycerin-water mix in a spritzer creates lasting droplets that mimic freshness without evaporating.
For the green goddess dressing, combine 3 tablespoons dairy-free yogurt, 1 tablespoon lemon juice, 1 teaspoon rice vinegar, 1 tablespoon chopped basil, 1/4 teaspoon garlic powder, and salt/pepper to taste. This creamy, herbal sauce adds visual richness when applied sparingly.
Lighting Mastery for Highlighting Sandwich Details
Lighting is the backbone of food photography, bringing out the textures, colors, and layers of your sandwich. Natural light is often the best choice for its soft, flattering quality, but it requires careful control.
- Setup: Position your sandwich near a large window to capture side and front lighting. This highlights the curves of lettuce, the gloss of cheese, and the vibrancy of vegetables. Use a diffuser (a white sheet, sheer curtain, or foam board) to soften harsh sunlight, preventing overexposed highlights or deep shadows.
- Bounce Light: Place a white V-flat (two foam boards taped together) on the opposite side of the window to bounce light back, evening out shadows and illuminating the sandwich’s right side. This creates balanced, professional lighting.
- Camera Stability: Mount your camera on a tripod to avoid shake, especially with slower shutter speeds required in natural light. Adjust settings (e.g., ISO 100-200, f/4-5.6) for proper exposure, ensuring crisp details.
- Artificial Alternatives: If natural light isn’t available, use softbox lights to mimic its diffusion. Avoid harsh overhead lighting, which flattens the sandwich’s height and creates unflattering shadows.
Side lighting is particularly effective for sandwiches, as it emphasizes the texture of bread crusts and the drip of condiments, adding depth and realism.
Essential Food Styling Tools for Solo Sandwich Shoots
Without a professional stylist, a well-stocked tool kit is your lifeline. These tools enable precision, freshness, and structural control, making your sandwiches camera-ready.
Table: Must-Have Food Styling Tools for Sandwiches
| Tool | Use in Sandwich Styling | Specifications | Approximate Price (USD) |
|---|---|---|---|
| Styling Tweezers | Placing greens, onions, microgreens | Stainless steel, 6-12 inches | $10-15 (kit of 3-5) |
| Paint Brushes | Applying oil for gloss, dusting crumbs | Artist quality, sizes 2-8 | $5-10 (set of 6) |
| Pipettes/Syringes | Precise condiment drizzles | Plastic, 3-5 ml, 10-pack | $5-8 |
| Toothpicks/T-Pins | Anchoring layers, securing structure | Wooden/metal, 100-pack | $2-4 |
| Water Spritzer | Adding moisture to produce | 2 oz, fine mist | $1-3 |
| Glycerin | Long-lasting droplets on produce/drinks | 4 oz bottle | $3-5 |
| Heat Gun | Melting cheese for fresh, gooey look | 300-500W, adjustable temp | $20-30 |
| Museum Putty | Securing props, stabilizing boards | Reusable, 2 oz | $4-6 |
| Small Scissors | Trimming herbs, greens, small elements | 4-inch blade, stainless | $3-5 |
| Makeup Wedges | Propping up ingredients, leveling | Foam, 12-pack | $2-4 |
| Matte Spray | Reducing glare on glassware | 10 oz can | $5-8 |
| Ascorbic Acid | Preventing browning on produce | 8 oz powder | $6-10 |
Prices reflect average online retail costs (e.g., Amazon, Walmart). Invest in durable tools for long-term use, but affordable options work for beginners.
Composition and Prop Integration for Storytelling
A well-composed sandwich photo tells a story, inviting viewers to imagine biting into it. Use these composition techniques to enhance appeal:
- Rule of Thirds: Place the sandwich slightly off-center on an imaginary 3×3 grid to create movement and draw the eye. This avoids a static, centered look.
- Cross-Section Cut: Slice the sandwich in half to reveal layers, showcasing the interior textures and colors. Angle the cut slightly for a dynamic effect.
- Props for Context: Use neutral props like wooden cutting boards, linen napkins, or a glass of water to frame the sandwich without stealing focus. Scatter microgreens or crumbs around the base for a “lived-in” feel, embracing slight imperfections for realism.
- Background Choices: Opt for simple, neutral backgrounds (e.g., light wood, white marble) to keep attention on the sandwich. Avoid busy patterns, which distract from the food.
- Abundance and Texture: Add small bowls of extra ingredients (e.g., pickled onions, dressing) or side items like chips to suggest a complete meal. This creates a sense of abundance, making the scene inviting.
For a garden greens sandwich, a rustic board with a linen napkin in pale green or beige complements the vibrant ingredients, evoking a fresh, farm-to-table vibe.
Advanced Styling Hacks for Professional Results
To take your sandwich styling to the next level, incorporate these advanced techniques:
- Prevent Oxidation: Soak avocados, tomatoes, or cucumbers in a solution of 2 tablespoons ascorbic acid (or Fruit Fresh) in 1 cup water for 15-20 minutes to prevent browning. This is especially useful for long shoots.
- Fake Condensation: For drinks paired with sandwiches, mix 1:1 glycerin and water in a spritzer to create lasting condensation on glasses, mimicking a chilled look without actual cooling.
- Undercook for Vibrancy: Slightly undercook vegetables (e.g., blanch peppers briefly) to retain bright colors. Finish cooking post-shoot if you plan to eat the food.
- Color Theory: Use a color wheel to pair ingredients. Analogous colors (greens with yellows) create harmony, while complementary colors (red onions with greens) add drama. For example, the pink of pickled onions pops against green lettuce.
- Kitchen Bouquet: Brush diluted Kitchen Bouquet (a browning agent) on bread or cheese for a golden, freshly baked look, especially if the sandwich has sat for a while.
- Scotchgard for Bread: Spray bread lightly with Scotchgard to prevent sauces from soaking in, maintaining a crisp appearance during drizzles.
These hacks ensure your sandwich stays fresh-looking, even during extended shoots.
Recipe: Garden Greens Sandwich with Green Goddess Dressing
Practice your styling with this photogenic recipe, designed to highlight layers and colors. (Serves 2)
Ingredients:
Green Goddess Dressing:
- 3 tbsp dairy-free Greek yogurt
- 1 tbsp lemon juice
- 1 tsp rice vinegar
- 1 tbsp chopped fresh basil
- 1/4 tsp garlic powder
- Salt and fresh ground pepper to taste
Pickled Red Onions:
- 1/2 cup rice vinegar
- 1 tbsp sugar
- 1 tsp kosher salt
- 1 red onion, thinly sliced
Sandwich:
- 4 slices multi-grain bread
- 4 oz herbed goat cheese, room temperature
- 1/2 cucumber, thinly sliced (mandoline preferred)
- 1 medium green pepper, sliced
- 1 medium tomato, sliced
- 2 medium avocados, sliced
- 4 oz fresh mozzarella, sliced
- 1 cup microgreens (broccoli or mixed)
Instructions:
- Dressing: Mix yogurt, lemon juice, vinegar, basil, garlic powder, salt, and pepper in a bowl. Set aside.
- Pickled Onions: Whisk vinegar, sugar, salt, and 1 cup water until dissolved. Pour over sliced onions in a jar; let sit for 1 hour. Drain before use.
- Sandwich Assembly: Spread goat cheese on one slice of bread. Layer cucumber, green pepper, tomato, avocado, mozzarella, and pickled onions. Drizzle with dressing using a pipette. Top with microgreens and second bread slice.
- Styling: Build on a cutting board, using cardboard supports and toothpicks for height. Slice in half to reveal layers. Scatter extra microgreens around for abundance.
This recipe yields a visually stunning sandwich, perfect for practicing layering and condiment application.
Lighting and Composition Case Study: Garden Greens Sandwich
To illustrate, imagine styling the garden greens sandwich for a flat-lay shot:
- Lighting: Set up near a north-facing window for soft, diffused light. Place a diffuser to the left to soften shadows and a V-flat to the right to bounce light, ensuring even illumination.
- Composition: Position the sliced sandwich on a wooden board, slightly off-center (rule of thirds). Surround with scattered microgreens, a small bowl of dressing, and a linen napkin for texture. The cut reveals vibrant layers, drawing the eye.
- Props: A glass of iced tea with glycerin condensation adds a refreshing element, complementing the sandwich’s freshness.
This setup creates a balanced, inviting image that highlights the sandwich’s appeal.
Common Mistakes and How to Avoid Them
Even seasoned photographers make mistakes. Here’s how to sidestep common pitfalls:
- Flat Appearance: Use cardboard or skewers to build height. Ensure layers are visible.
- Wilting Ingredients: Refresh with water droplets or glycerin. Shoot quickly after assembly.
- Over-Styling: Avoid overly fussy arrangements. Embrace crumbs or slight drips for realism.
- Poor Color Contrast: Pair vibrant produce (red tomatoes, green lettuce) with neutral bread or props.
- Cluttered Frames: Limit props to 3-5 items (board, napkin, side dish) to keep focus on the sandwich.
- Lighting Issues: Check white balance to avoid blue/yellow casts. Use a gray card for accurate exposure.
Sustainable and Budget-Friendly Practices
To keep costs low and reduce waste:
- Source Locally: Buy produce from farmers’ markets for freshness and lower carbon footprint.
- Compost Scraps: Turn vegetable trimmings into compost to minimize waste.
- Thrift Props: Shop at thrift stores or garage sales for unique, affordable boards, napkins, and dishes.
- DIY Backdrops: Use foam boards, painted wood, or tiles for budget-friendly, customizable backgrounds.
These practices ensure your styling is eco-conscious and accessible.
Workflow Efficiency for Solo Shoots
Efficiency is critical when styling and shooting alone. Follow this workflow:
- Plan Ahead: Sketch a moodboard with desired angles (e.g., 45° for sandwiches) and prop choices.
- Prep Ingredients: Slice vegetables, make dressings, and pickle onions the day before.
- Set Up Lighting: Arrange diffusers, V-flats, and tripod before assembling the sandwich.
- Style and Shoot: Build the sandwich with supports, apply condiments, and shoot immediately to capture freshness.
- Edit Thoughtfully: Use Lightroom or Photoshop to enhance colors, remove pins, or adjust lighting subtly.
This streamlined process maximizes your time and ensures professional results.
Inspiration and Practice
Food styling is a skill honed through practice. Start with simple sandwiches, experimenting with layers and props. Study cookbooks, Instagram accounts (e.g., @kespinel), or magazines for inspiration, but avoid copying—adapt elements like napkin folds or color palettes to your style.
Try styling the garden greens sandwich multiple times, varying angles (flat-lay, eye-level, 45°) and props (rustic vs. modern). Each iteration will refine your technique, building confidence.
Conclusion
Creating stunning sandwich photos without a professional stylist is entirely achievable with the right tools, techniques, and mindset. Focus on fresh ingredients, structural height, precise condiment application, and balanced lighting to craft images that captivate and inspire. Practice with recipes like the garden greens sandwich to develop your skills, and embrace imperfections for a relatable, inviting aesthetic. Your photos will not only showcase delicious food but also tell a story that resonates with viewers, driving engagement on blogs, social media, or menus.
Please share this Food Styling Tips for Sandwiches (Without A Food Stylist) with your friends and do a comment below about your feedback.
We will meet you on next article.
Until you can read, The Best Overhead Setup For Food Photography