iPhone Photography Tips
The iPhone has revolutionized photography, making it accessible to everyone with a device that fits in your pocket. With cutting-edge camera systems in models, users can capture images that rival professional DSLRs. This comprehensive guide provides an in-depth exploration of iPhone photography tips, covering everything from basic camera settings to advanced techniques, composition strategies, lighting mastery, editing workflows, and essential accessories. We’ll include detailed specifications, prices for recommended tools, and practical advice to help you transform everyday moments into stunning visual stories. Whether you’re a beginner or an experienced photographer, these tips will elevate your iPhone photography to new heights.
The Evolution of iPhone Photography
Smartphone cameras have come a long way since the first iPhone debuted in 2007 with a 2MP sensor. Today, iPhone models like the 15 Pro Max ($1,199 for 256GB) boast a 48MP main camera with an f/1.78 aperture, 24mm focal length, and sensor-shift optical image stabilization. The iPhone feature advanced computational photography, including Night mode, Deep Fusion, and ProRAW, enabling professional-grade results. These advancements make the iPhone a powerful tool for capturing high-quality images without the need for bulky equipment.
The accessibility of iPhone photography lies in its convenience. Unlike DSLRs, which require lenses, tripods, and technical expertise, the iPhone is always with you, ready to capture spontaneous moments. This guide dives deep into techniques that maximize your iPhone’s potential, ensuring every shot is a masterpiece.
Getting Started: Mastering iPhone Camera Basics
1. Keep Your Lens Clean for Crystal-Clear Shots
A clean lens is the foundation of sharp, vibrant photos. iPhone lenses are prone to smudges, dust, and fingerprints, which can create a hazy effect. To ensure clarity, make lens cleaning a habit before every shoot.
- How to Clean: Use a microfiber cloth, such as the Zeiss Lens Cleaning Wipes ($5 for a pack of 10), designed for delicate surfaces like camera lenses and glasses. For stubborn smudges, lightly dampen the cloth with isopropyl alcohol or lens cleaning solution ($8 for 2 oz). Avoid abrasive materials like paper towels to prevent scratches.
- Pro Tip: Clean both the lens and phone case separately to avoid debris transfer. Check the lens under light to ensure no residue remains.
2. Enable the Grid for Better Composition
Activating the grid in your iPhone’s camera settings is a game-changer for composing balanced shots. Found in Settings > Camera > Grid, this feature overlays two horizontal and two vertical lines, dividing the screen into nine equal segments. It supports the Rule of Thirds, a fundamental photography principle where key elements are placed at line intersections for visual harmony.
- How to Enable: Go to Settings > Camera > Grid and toggle it on (green). The grid also activates a leveling tool—two crosshairs that align when the phone is parallel to the ground, perfect for straight horizons or flat-lay shots.
- Application: Position a portrait subject’s eyes at the top-left intersection or align a horizon along the lower third for a dramatic sky. The grid trains your eye to frame shots intentionally.
3. Master Focus and Exposure Control
Precise focus and exposure are critical for professional results. The iPhone’s camera app simplifies this with intuitive touch controls.
- Focus: Tap the screen to set the focus point. A yellow box indicates the focus area. For example, tap a flower to sharpen its petals while blurring the background.
- Exposure: Next to the focus box, a sun icon appears. Swipe up to brighten or down to darken the image. This is ideal for adjusting light in high-contrast scenes, like a subject against a bright sky.
- Locking Focus/Exposure: Tap and hold until “AE/AF Lock” appears. This locks focus and exposure, preventing the camera from readjusting when you move. Unlock by tapping again.
- Pro Tip: Use exposure adjustments to create moody effects (underexpose for darker tones) or vibrant shots (overexpose slightly for brightness).
4. Switch Between Lenses for Versatility
Modern iPhones, especially Pro models, feature multiple lenses: ultra-wide (0.5x, 13mm, f/2.2), wide (1x, 24mm, f/1.78), and telephoto (3x or 5x, up to 120mm, f/2.8 on iPhone 15 Pro Max). Each offers unique perspectives.
- Ultra-Wide: Captures expansive scenes like landscapes or tight interiors. Ideal for dramatic group shots or architecture.
- Wide: The default lens, versatile for everyday photography, from portraits to street scenes.
- Telephoto: Perfect for portraits or distant subjects, offering a compressed, flattering perspective.
- How to Switch: Tap the lens icons (0.5x, 1x, 3x/5x) at the bottom of the camera app. Pinch to zoom for finer control, but avoid digital zoom beyond optical limits to maintain quality.
Composition Techniques for Visually Striking Photos
Composition is the art of arranging elements within the frame to tell a compelling story. These techniques will help you create images that captivate viewers.
5. Rule of Thirds: Balance and Harmony
The Rule of Thirds is a cornerstone of photography. By aligning subjects at grid intersections or along lines, you create balanced, dynamic compositions.
- Example: In a portrait, place the subject’s eyes at the top-right intersection. For landscapes, position the horizon on the lower third to emphasize the sky or the upper third to highlight foreground details.
- Advanced Tip: Break the rule for creative effect. Centering a subject can evoke symmetry or intensity, especially in minimalist shots.
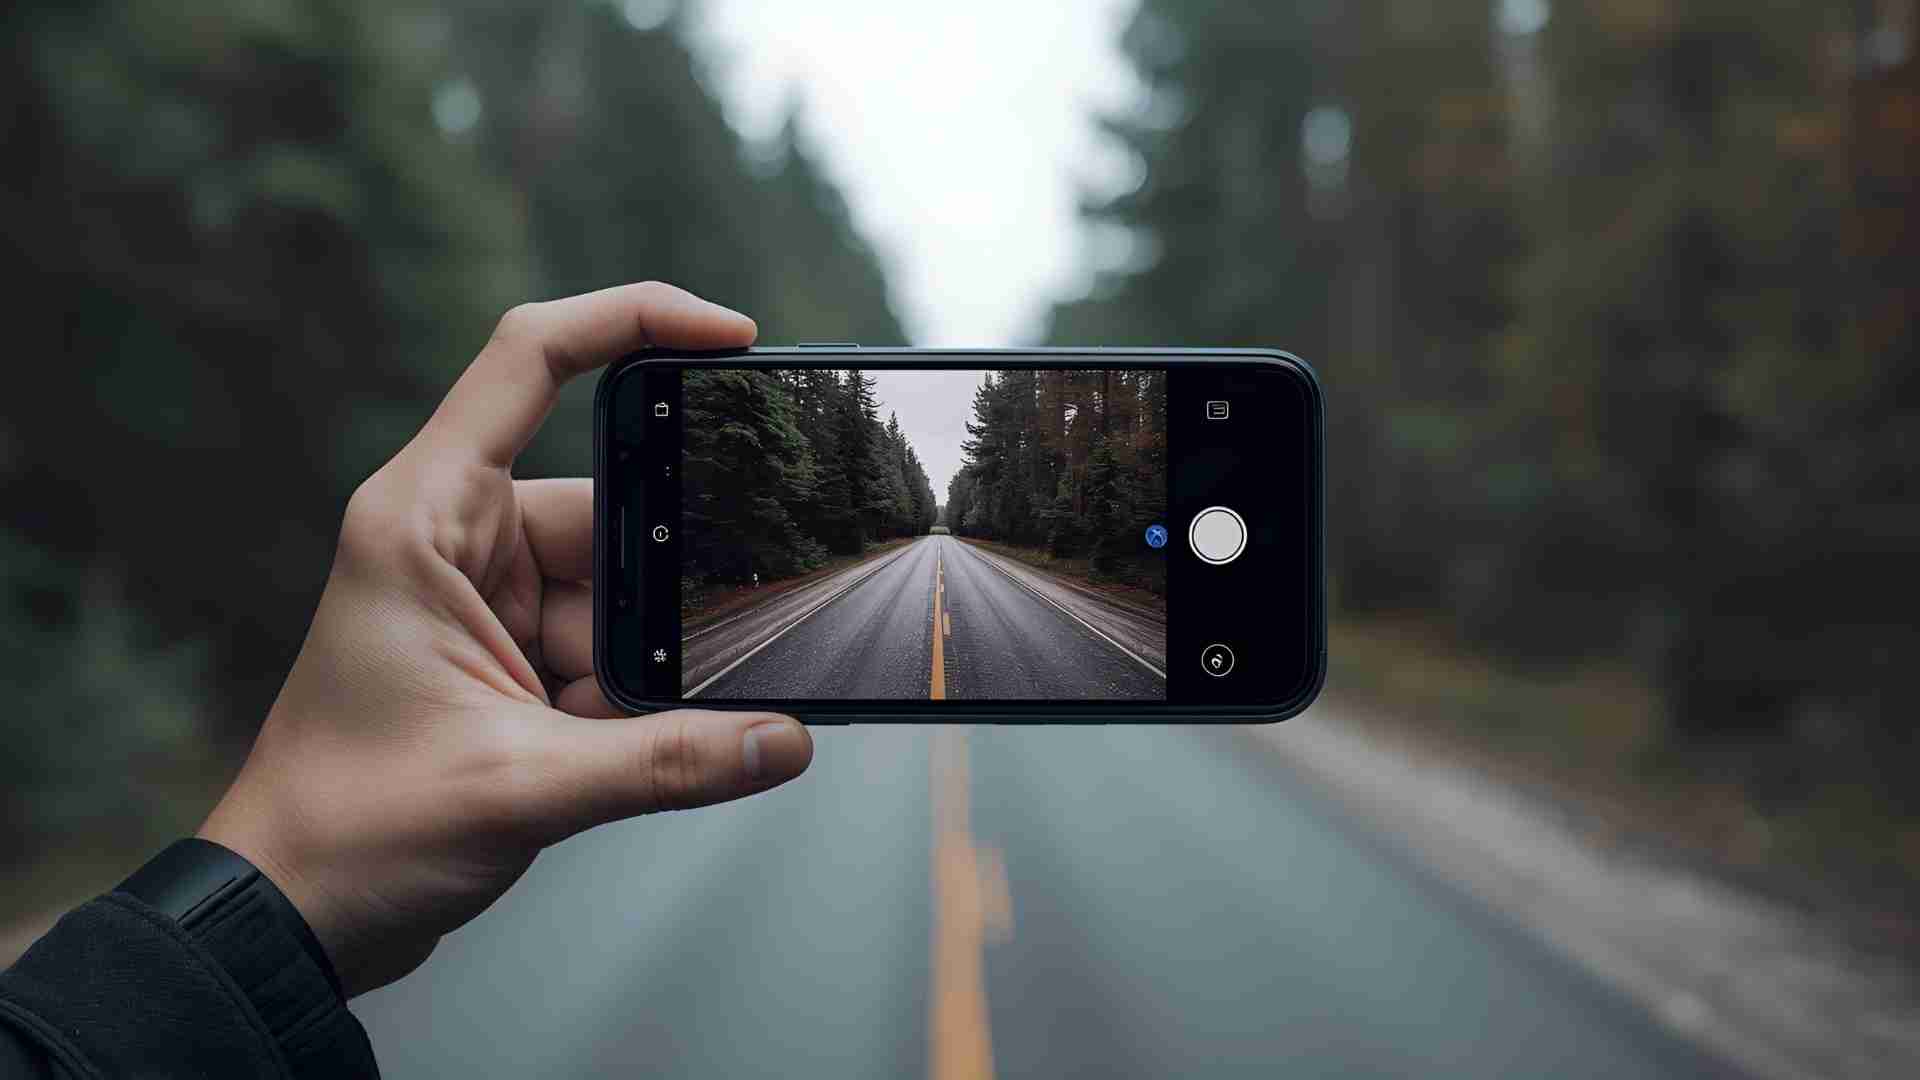
6. Leading Lines: Guide the Viewer’s Eye
Leading lines draw attention through the frame, adding depth and narrative.
- Examples: Roads, fences, rivers, or shadows. A path leading to a distant mountain pulls the viewer into the scene.
- How to Use: Position lines from the foreground to the background. Use the grid to ensure lines align naturally.
7. Create Depth with Layers
Layered compositions include elements in the foreground, middle ground, and background, creating a three-dimensional effect.
- Example: In a landscape, include rocks (foreground), a path (middle ground), and mountains (background). Shoot from a low angle to emphasize the foreground.
- Pro Tip: Use portrait mode to blur the background, enhancing depth in layered shots.
8. Symmetry for Visual Impact
Symmetrical compositions are visually striking, especially in architecture or reflections.
- Example: Center a building with mirrored windows or a reflection in a puddle. Use the grid’s centerlines to ensure perfect alignment.
- Application: Reflections in water or glass create natural symmetry. Experiment with abstract reflections for artistic flair.
9. Diagonal Alignment for Balance
When photographing multiple subjects, align them diagonally for a balanced, dynamic composition.
- Example: Position two people or objects from the bottom-left to top-right of the frame. This avoids cluttering one side.
- How to Apply: Move yourself or the subjects to achieve diagonal alignment. Use the grid to check balance.
10. Negative Space for Minimalist Appeal
Negative space—empty areas around the subject—emphasizes the focal point and evokes emotion, like solitude or simplicity.
- Example: A single tree in a vast field. Place the tree off-center with ample empty space to create a minimalist aesthetic.
- Pro Tip: Use negative space in social media posts, as it stands out on small screens.
11. Macro Photography for Intricate Details
Macro shots capture fine details, like textures of flowers or water droplets.
- How to Shoot: On Pro models, macro mode activates automatically when close (2-4 inches) to a subject. Alternatively, use a Moment Macro Lens ($100, 10x magnification, 25mm working distance).
- Application: Focus on patterns in nature, like leaf veins or food textures, for striking close-ups.
Table 1: Composition Techniques Overview
| Technique | Purpose | Best Scenarios | Tools Needed |
|---|---|---|---|
| Rule of Thirds | Balances composition | Portraits, landscapes | Grid enabled |
| Leading Lines | Guides viewer’s eye | Streets, nature | Grid for alignment |
| Depth Layers | Adds three-dimensionality | Landscapes, still life | Low-angle shooting |
| Symmetry | Creates visual harmony | Architecture, reflections | Grid for centering |
| Diagonals | Balances multiple subjects | Group shots | Grid for alignment |
| Negative Space | Emphasizes subject, minimalist look | Still life, portraits | Grid for placement |
| Macro | Captures fine details | Nature, food | Macro lens (optional) |
Lighting: The Heart of Photography
Lighting shapes the mood and quality of your photos. Mastering it is essential for professional results.
12. Harness Golden and Blue Hours
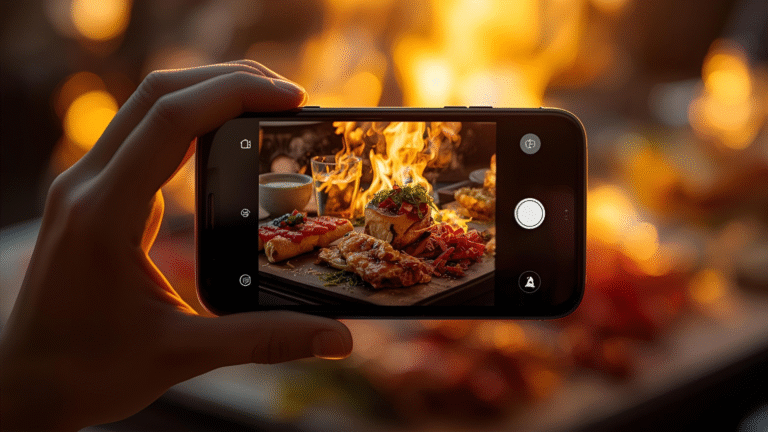
- Golden Hour: The hour after sunrise or before sunset offers warm, soft light with long shadows. Ideal for portraits, landscapes, and food photography. Colors are vibrant, and shadows add depth.
- Blue Hour: Pre-sunrise or post-sunset, this period provides cool, diffused light for serene, moody shots. Perfect for cityscapes or reflective surfaces.
- How to Plan: Use apps like PhotoPills ($10) to track sunrise/sunset times. Schedule shoots to capture these magical lighting conditions.
13. Diffuse Harsh Light
Harsh sunlight creates unflattering shadows. Diffuse it for softer, even lighting.
- Tools: Use a Neewer 32-inch Diffuser ($15, translucent fabric) between the light source and subject. A white bedsheet works as a budget alternative.
- Example: Place a diffuser over a window for food photography, softening sunlight for even illumination.
14. Bounce Light with Reflectors
Reflectors redirect light to fill shadows or add highlights.
- Tools: A 5-in-1 Reflector Kit ($20, 24-inch, includes white, silver, gold, black, translucent) or white foam boards ($10 for 20×30-inch). Black foam boards ($12) add contrast.
- Application: Use a white reflector opposite a window to brighten the dark side of a subject, like a plate of food.
15. Master HDR for Balanced Exposure
High Dynamic Range (HDR) combines multiple exposures for detail in highlights and shadows.
- How to Enable: Settings > Camera > Smart HDR. The iPhone auto-activates HDR in high-contrast scenes, like sunsets.
- Pro Tip: Turn off Smart HDR for manual control. Tap the HDR icon in the camera app to toggle on/off.
16. Night Mode for Low-Light Excellence
Night mode (iPhone 11+) extends exposure (1-30 seconds) for bright, detailed low-light shots.
- How to Use: Night mode activates automatically in dim conditions. A moon icon shows exposure time. Hold steady or use a tripod.
- Example: Capture city lights or starry skies with minimal noise.
17. Silhouettes for Dramatic Effect
Silhouettes create striking images by placing subjects against bright backgrounds.
- How to Shoot: Position the subject between the camera and a light source (e.g., sunset). Tap the bright area and swipe down to underexpose the subject.
- Example: A person against a colorful sunset for a bold, dark outline.
18. Shadows as Compositional Elements
Shadows add mystery and depth, especially during golden hour.
- How to Use: Shoot when the sun is low for long shadows. Use shadows as leading lines or abstract patterns.
- Example: Tree shadows on a path guiding the eye to a distant subject.
19. Reflections for Artistic Flair
Reflections in water, glass, or metal create symmetry or abstract effects.
- How to Shoot: Angle the camera to capture both the subject and its reflection. Create ripples in water for a painterly effect.
- Example: A building reflected in a puddle for a mirrored composition.
Table 2: Lighting Techniques Comparison
| Technique | Effect | Best Time/Scenario | Tools Needed |
|---|---|---|---|
| Golden Hour | Warm, soft light, long shadows | Sunrise/sunset | PhotoPills app |
| Blue Hour | Cool, serene light | Pre-sunrise/post-sunset | Tripod (optional) |
| Diffusion | Softens harsh light | Midday, bright conditions | Diffuser, bedsheet |
| Reflectors | Fills shadows, adds highlights | Indoor, outdoor | Reflector kit, foam |
| HDR | Balances highlights/shadows | High-contrast scenes | Smart HDR enabled |
| Night Mode | Brightens low-light shots | Night, dim interiors | Tripod for stability |
| Silhouettes | Bold, dark outlines | Backlit scenes | Exposure adjustment |
| Shadows | Adds depth, mystery | Golden hour | Grid for composition |
| Reflections | Symmetry, abstract effects | Water, glass surfaces | Creative angles |
Advanced iPhone Camera Modes and Techniques
The iPhone offers versatile modes to suit different scenarios, enhancing creative control.
20. Portrait Mode for Professional Portraits
Portrait mode (iPhone 7 Plus+) creates a shallow depth of field, blurring backgrounds for a DSLR-like bokeh effect.
- How to Use: Swipe to Portrait mode. Adjust f-stop (f/1.4-f/16) post-capture in Photos > Edit > Depth. Lighting effects (Natural, Studio, Contour) enhance mood.
- Example: A person with a blurred park background, f/2.8 for strong bokeh.
- Pro Tip: Keep subjects 2-8 feet away for optimal focus.
21. Burst Mode for Action Shots
Burst mode captures 10 frames per second, perfect for fast-moving subjects.
- How to Use: Hold the shutter button (iPhone 11+) or swipe left on the shutter (older models). Select best shots in Photos > Bursts.
- Example: A running dog or a sports event.
22. Panorama for Expansive Scenes
Panorama mode captures 240-degree views, ideal for landscapes or cityscapes.
- How to Use: Swipe to Pano, tap the shutter, and move the phone steadily in the direction of the arrow.
- Pro Tip: Keep the phone level using the grid’s leveling tool.
23. Time-Lapse for Dynamic Videos
Time-lapse speeds up slow processes, like clouds moving or a sunset.
- How to Use: Swipe to Time-Lapse, stabilize the phone (e.g., on a tripod), and record.
- Example: A bustling city street condensed into seconds.
24. Slo-Mo for Dramatic Effects
Slo-mo records 1080p at 240fps for smooth slow-motion videos.
- How to Use: Swipe to Slo-Mo, record, and edit speed in Photos.
- Example: Water splashing or a child jumping.
25. Long Exposure for Creative Motion
Use Live Photos for long-exposure effects, blurring motion like waterfalls or light trails.
- How to Use: Take a Live Photo, go to Photos > Effects > Long Exposure.
- Pro Tip: Stabilize the phone for best results.
26. Shoot in RAW for Editing Flexibility
ProRAW (iPhone 12 Pro+) captures 48-bit files for greater editing control.
- How to Enable: Settings > Camera > Formats > Apple ProRAW.
- Apps: Use Lightroom Mobile or ProCamera ($8) for RAW shooting on older models.
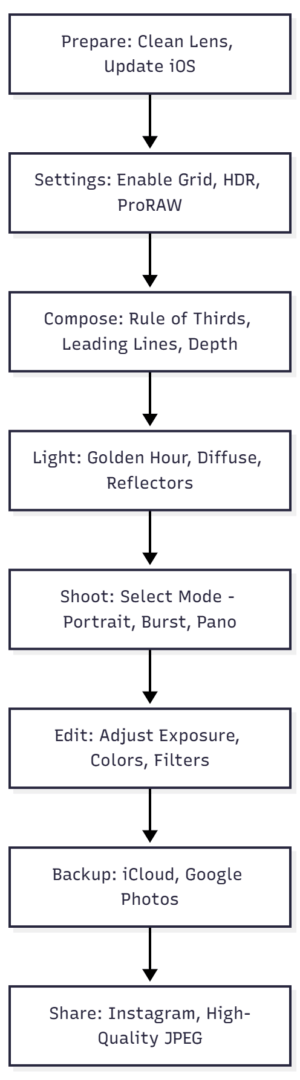
Chart: iPhone Photography Workflow
Essential Accessories for iPhone Photography
Accessories enhance your iPhone’s capabilities, offering professional-grade results.
27. Tripods for Stability
A tripod eliminates camera shake, crucial for long exposures, night shots, or time-lapses.
- Recommendation: Manfrotto 055 ($200, aluminum, 65-inch height, 19.8 lb load capacity). Pair with a metal iPhone mount ($15, universal fit).
- Use Case: Overhead food photography or low-light landscapes.
28. External Lenses for Versatility
Add-on lenses expand creative options.
- Moment Wide Lens: $120, 18mm, f/1.8, anti-reflection coating. Ideal for landscapes and interiors.
- Moment Macro Lens: $100, 10x magnification, 25mm working distance. Perfect for close-up details.
- Requirement: Moment case ($40) for secure lens attachment.
- Alternative: Olloclip 4-in-1 Lens Kit ($80, includes wide, macro, fisheye).
29. Remote Shutter for Shake-Free Shots
A Bluetooth remote prevents shake when pressing the shutter.
- Recommendation: CamKix Bluetooth Remote ($10, compatible with iOS/Android).
- Use Case: Group selfies or macro shots on a tripod.
30. Portable Charger for Extended Shoots
Battery life can limit long sessions.
- Recommendation: Anker PowerCore 10,000 ($30, 10,000mAh, 18W output).
- Use Case: Outdoor shoots or time-lapses.
31. Lighting Accessories for Control
External lights enhance indoor or low-light photography.
- Recommendation: Lume Cube 2.0 ($80, 1500 lux, 3200K-5600K adjustable color).
- Use Case: Food or portrait photography in dim settings.
Table 3: Essential Accessories with Specs and Prices
| Accessory | Specs | Price (USD) | Best Use |
|---|---|---|---|
| Manfrotto 055 | Aluminum, 65″ height, 19.8 lb load | 200 | Long exposures, time-lapse |
| Moment Wide | 18mm, f/1.8, anti-reflection coating | 120 | Landscapes, interiors |
| Moment Macro | 10x mag, 25mm working distance | 100 | Close-up details |
| CamKix Remote | Bluetooth, iOS/Android compatible | 10 | Shake-free shots |
| Anker Charger | 10,000mAh, 18W output | 30 | Extended shoots |
| Lume Cube 2.0 | 1500 lux, 3200K-5600K color temp | 80 | Indoor, low-light shots |
Editing: Transforming Good Shots into Great Ones
Editing refines your photos, enhancing colors, contrast, and mood.
32. Built-In Photos App
The Photos app offers basic but powerful editing tools.
- Adjust: Modify exposure, contrast, brightness, shadows, saturation, and white balance.
- Filters: Apply presets like Vivid, Dramatic, or Mono for instant moods.
- Crop/Straighten: Adjust framing or correct tilted horizons.
- How to Use: Open a photo, tap Edit, and select tools at the bottom.
33. Third-Party Editing Apps
For advanced editing, try these apps:
- Lightroom Mobile: Free, premium $5/month. Offers presets, RAW editing, and selective adjustments.
- Snapseed: Free. Features selective editing, healing tools, and curves.
- VSCO: Free, premium $20/year. Known for film-like filters and subtle effects.
- ProCamera: $8. Manual controls and RAW editing for precise adjustments.
34. Editing Workflow
- Step 1: Import photo to your chosen app.
- Step 2: Correct exposure and white balance for accurate lighting.
- Step 3: Enhance colors (saturation, vibrance) and contrast.
- Step 4: Sharpen details and reduce noise if needed.
- Step 5: Apply filters or presets for mood.
- Step 6: Crop or straighten for final composition.
35. Shoot RAW for Maximum Control
RAW files retain more data, allowing extensive edits without quality loss.
- How to Enable: Settings > Camera > Formats > Apple ProRAW (Pro models). Use ProCamera or Lightroom for older models.
- Benefit: Adjust white balance, recover highlights, or tweak shadows with precision.
Sharing and Preserving Your Work
36. Backup Your Photos
Protect your images with regular backups.
- iCloud: $0.99/month for 50GB. Enable in Settings > [Your Name] > iCloud > Photos.
- Google Photos: Free up to 15GB, $1.99/month for 100GB.
- Dropbox: $9.99/month for 2TB. Set up automatic uploads for convenience.
37. Optimize for Social Media
To maintain quality on platforms like Instagram:
- Export Settings: Save as JPEG at 80-100% quality. Use 1080x1080px for square posts.
- Sharpening: Slightly sharpen images to counter compression softening.
- Hashtags: Use #iPhonePhotography, #ShotOniPhone for visibility.
38. Practice and Community Engagement
- Daily Practice: Shoot regularly to refine skills. Experiment with new techniques.
- Join Communities: Platforms like Instagram or Reddit’s r/iPhonePhotography offer feedback and inspiration.
- Online Courses: Consider courses like “Mastering iPhone Food Photography” ($50-$100) for specialized skills.
Conclusion: Your iPhone, Your Creative Canvas
iPhone photography is more than point-and-shoot—it’s a craft that combines technical mastery with creative vision. By cleaning your lens, mastering composition, leveraging lighting, exploring camera modes, using accessories, and refining edits, you can create images that rival professional cameras. The iPhone with its 48MP sensor and advanced features, is a powerhouse, but even older models can produce stunning results with the right techniques.
Practice these tips, experiment with your unique style, and share your work confidently. Your iPhone is not just a phone—it’s a gateway to capturing the world’s beauty.
Please share this iPhone Photography Tips with your friends and do a comment below about your feedback.
We will meet you on next article.
Until you can read, The Structure of a Food Photography Estimate