How To Use Lightroom Mobile For iPhone Food Photography
Food photography with an iPhone has become a game-changer for amateurs and professionals alike, thanks to powerful apps like Adobe Lightroom Mobile. This free app, available on the App Store, combines a robust camera with advanced editing tools, allowing you to capture and enhance stunning food images right from your smartphone. Whether you’re a food blogger, a chef showcasing dishes, or simply someone who loves sharing mouthwatering photos, Lightroom Mobile unlocks the full potential of your iPhone’s camera. This comprehensive guide walks you through using Lightroom Mobile for iPhone food photography, covering camera settings, editing techniques, and practical tips to elevate your images. Expect actionable advice, equipment recommendations with prices, and visual aids to streamline your workflow.
Why Choose Lightroom Mobile for Food Photography?
Smartphone cameras, like the iPhone’s, have advanced significantly, rivaling traditional DSLR or mirrorless cameras for many purposes. However, the default iPhone Camera app limits control over key settings like shutter speed, ISO, and white balance. Lightroom Mobile bridges this gap by offering a Professional mode, giving you manual control akin to a DSLR. Plus, its editing suite allows you to refine colors, textures, and lighting for professional-grade results. The app’s seamless integration of capture and editing makes it ideal for food photography, where lighting and composition are critical.
iPhone vs. DSLR/Mirrorless Cameras
A common myth is that you need a “fancy” camera for great photos. In reality, photography is about mastering the camera you have. DSLRs and mirrorless cameras offer extensive manual controls, but keeping them in Auto mode is like using a bulkier smartphone camera. Similarly, the iPhone’s default app operates in Auto, limiting your creative control. Lightroom Mobile’s Professional mode unlocks settings like exposure, shutter speed, ISO, and white balance, letting you shoot like a pro without heavy gear. For food photography, where portability and natural light are key, the iPhone with Lightroom Mobile is a versatile, lightweight solution.
Setting Up Lightroom Mobile for Food Photography
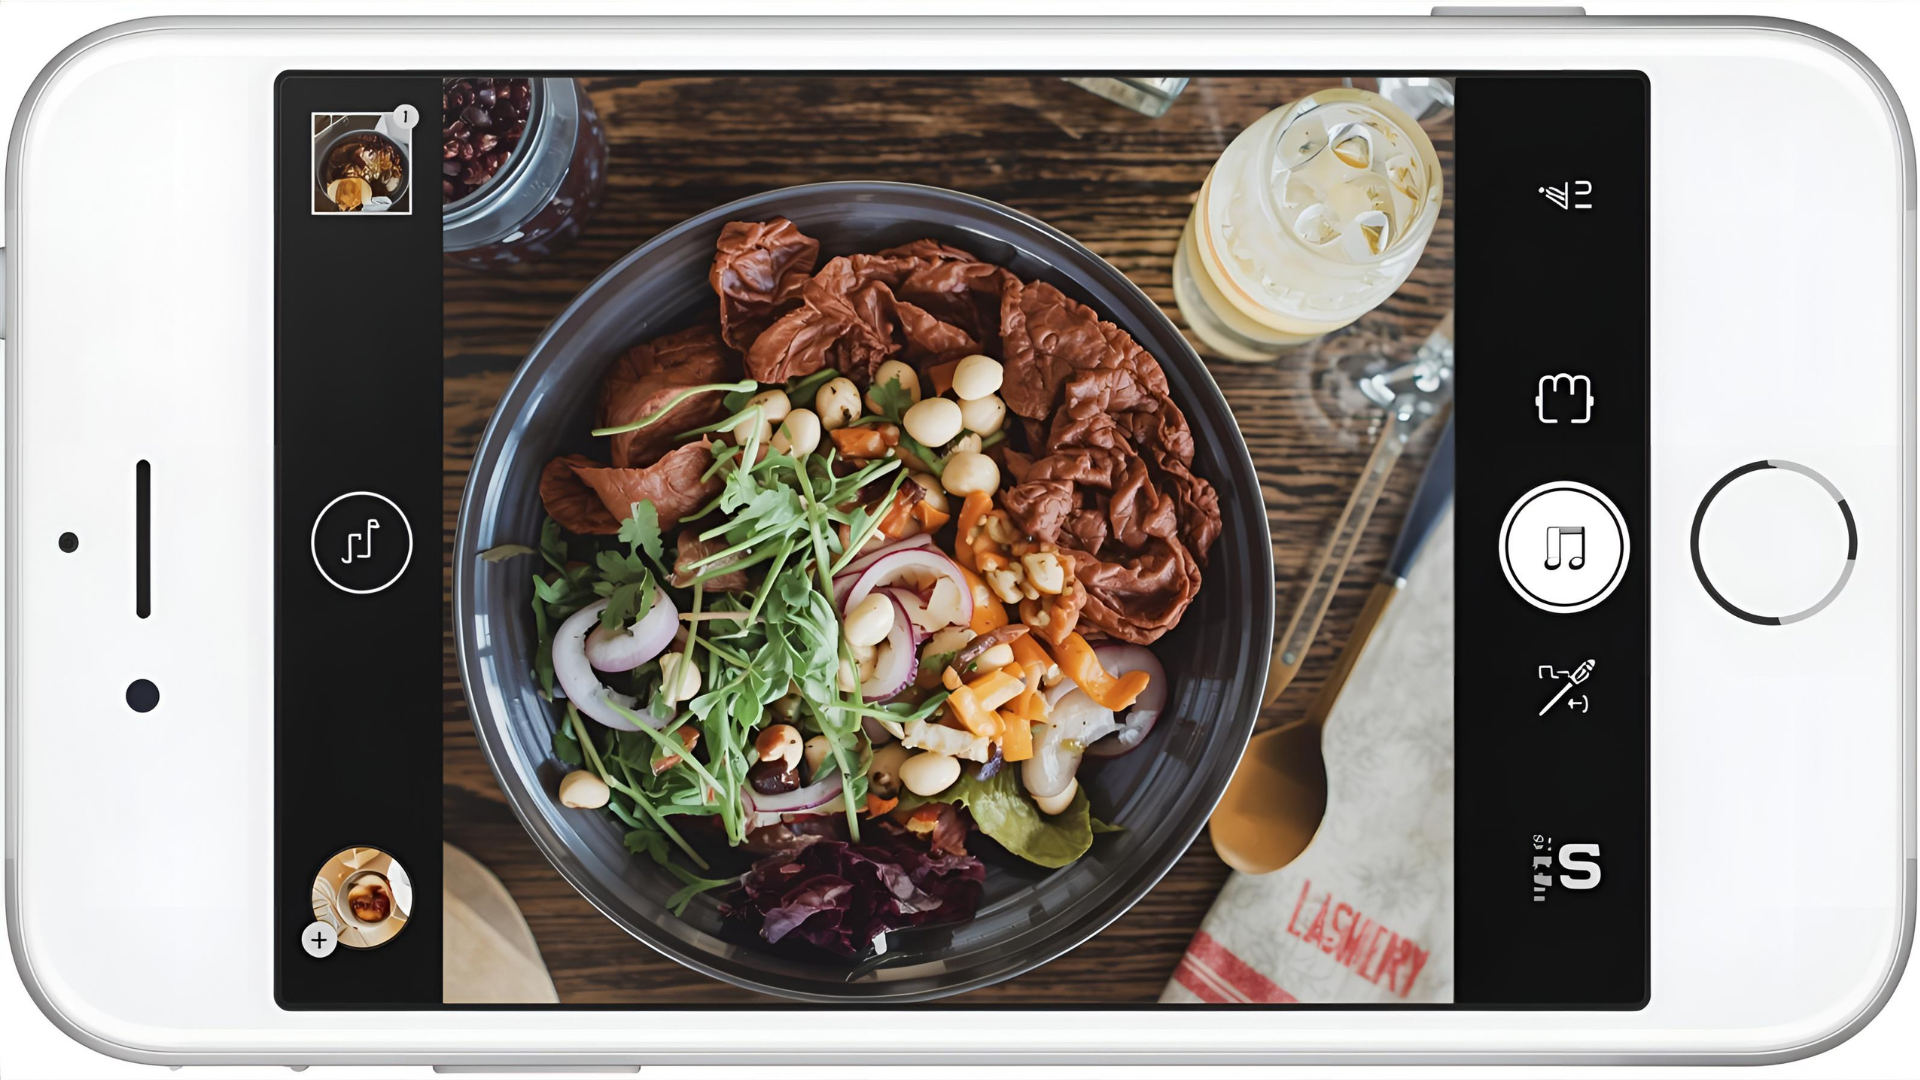
Download Lightroom Mobile from the App Store (free, with optional in-app purchases for premium features). Once installed, tap the camera icon to access the in-app camera. By default, it’s in Auto mode, similar to the iPhone Camera app. To unleash its full potential, switch to Professional mode:
- Open Lightroom Mobile and tap the camera icon.
- In the lower-left corner, tap “Auto” and select “Professional” from the menu.
- New settings appear at the bottom: Exposure (EXP), Shutter Speed (SEC), ISO, White Balance (WB), Focus, and Reset.
These controls mirror DSLR functionality, giving you precision over your food shots.
Recommended Equipment for iPhone Food Photography
To maximize results, consider these affordable tools (prices from Amazon unless noted):
| Equipment | Description | Price (USD) | Purpose |
|---|---|---|---|
| JOBY TelePod Mobile Tripod | Versatile tripod with selfie stick, monopod, and overhead capabilities. | ~$40 | Stabilizes iPhone for overhead and angled shots. |
| Metal iPhone Tripod Mount | Securely clamps iPhone to tripod, supports vertical/horizontal orientation. | ~$10 | Ensures stability without screen interference. |
| 5-in-1 Reflector/Diffuser (43-inch) | Includes diffuser and white reflector for softening and bouncing light. | ~$30 | Controls natural light for balanced exposure. |
| White Foam Boards (20×30 inches) | Lightweight boards to bounce light and reduce shadows. | ~$5 each | Fills in dark areas for even lighting. |
| Godox SLB60W Continuous Light | 60W LED with softbox for artificial lighting. | ~$150 | Bright, modifiable light for consistent results. |
These tools enhance your setup without breaking the bank, making professional-quality food photography accessible.
Mastering Lightroom Mobile Camera Settings
Professional mode unlocks five key settings for capturing food photos. Here’s how to use them effectively:
1. Exposure (EXP)
Exposure controls image brightness. Tap “EXP” and slide left (darker) or right (brighter). Adjusting EXP sets Shutter Speed and ISO to Auto, limiting control. For food photography, keep EXP at 0 and manually adjust SEC and ISO for precise results. Example: For a bright fruit salad, avoid overexposure by checking the image preview.
2. Shutter Speed (SEC)
Shutter speed determines how long the camera sensor is exposed to light. Tap “SEC” and adjust:
- Faster shutter (e.g., 1/1000s): Darkens the image, freezes motion (ideal for splashing liquids or falling crumbs).
- Slower shutter (e.g., 1/10s): Brightens the image, blurs motion (great for capturing moving hands in food prep).
Use a tripod for slow shutter speeds to avoid camera shake, especially in low light.
3. ISO
ISO adjusts the camera’s light sensitivity. Tap “ISO” and slide:
- Low ISO (e.g., 50): Less sensitive, reduces noise for crisp images. Preferred for food photography in good light.
- High ISO (e.g., 800): More sensitive, brightens images but adds grain. Use sparingly to avoid noise.
Keep ISO below 100 for clean food shots, adjusting shutter speed to compensate.
4. White Balance (WB)
White balance corrects color temperature for accurate food colors. Tap “WB” and choose:
- AWB (Auto): Camera adjusts automatically, reliable in mixed lighting.
- Tungsten: Warmer, for indoor lighting.
- Fluorescent: Cooler, for artificial lights.
- Daylight: Neutral, for sunny conditions.
- Cloudy: Warmer, for overcast days.
For a vibrant dish like pasta with red sauce, use Daylight or Cloudy to enhance reds without a yellow or blue tint.
5. Focus (Auto & Manual)
Auto focus is reliable, but manual focus offers precision. Tap the brackets with a plus sign, then slide left/right. Green highlights show the focused area, perfect for isolating details like a cake’s texture or a garnish. Manual focus is critical for close-ups where depth matters.
6. Reset
Tap “Reset” to clear all settings and start fresh for the next shot, ensuring consistency across multiple dishes.
Choosing the Right Image Format
Lightroom Mobile supports two formats: DNG and JPG. To set, tap “DNG” or “JPG” at the top center of the camera screen.
| Format | Pros | Cons | Best For |
|---|---|---|---|
| DNG (RAW) | Uncompressed, maximum editing flexibility, retains details. | Larger file size (~20-50MB). | Professional editing, high-quality prints. |
| JPG | Compressed, smaller file size (~2-5MB), quick sharing. | Limited editing range, some detail loss. | Social media, quick posts. |
For food photography, use DNG for its editing versatility, especially when adjusting colors and textures. Edited DNGs are automatically converted to JPG for export.
Extra Camera Tools in Lightroom Mobile
Tap the three dots in the upper-right corner to access additional tools:
- Aspect Ratio: Choose 16:9, 3:2, 4:3, or 1:1 based on your platform (e.g., 1:1 for Instagram). Check platform guidelines for optimal sizes.
- Timer: Avoid for food photography; it’s tricky to time. Use a remote shutter release (~$15 on Amazon) for hands-free shots.
- Grid & Level: Enable the “thirds” grid for Rule of Thirds composition. The level ensures straight overhead shots, preventing tilted props.
- Highlight Clipping: Zebra lines indicate overexposed areas. Adjust ISO or shutter speed to prevent loss of detail in bright spots like white plates.
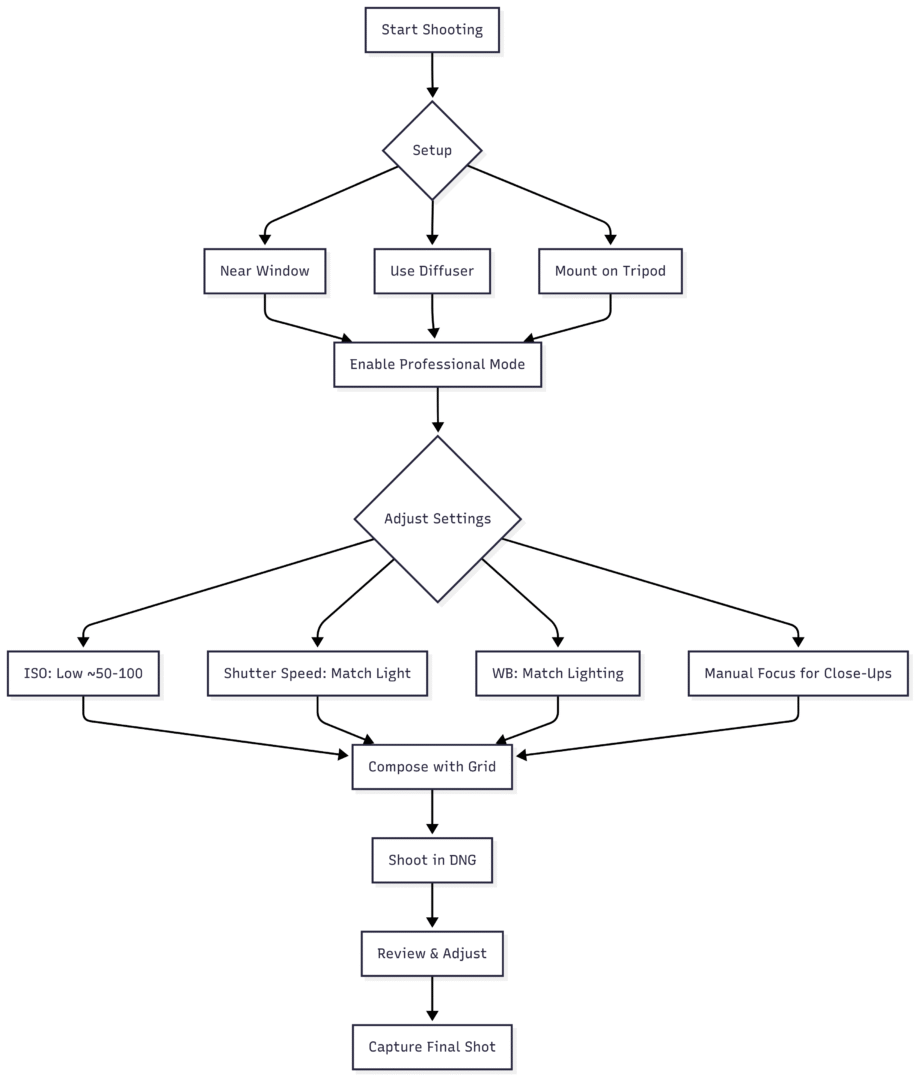
Shooting Food Photos with Lightroom Mobile
Follow these steps for capturing stunning food images:
- Set Up Near a Window: Position your food 1-2 meters from a large window for soft, natural light. Avoid direct sunlight to prevent harsh shadows.
- Use a Diffuser: Place a diffuser between the window and food to soften light. A white curtain or parchment paper works in a pinch.
- Stabilize with a Tripod: Secure your iPhone with a tripod and metal mount for steady shots, especially at slower shutter speeds.
- Enable Professional Mode: Switch to Professional mode and adjust ISO (low, ~50-100), shutter speed, and white balance for the lighting conditions.
- Compose with Grid: Use the thirds grid to balance food, props, and negative space. Ensure the level is aligned for flat-lays.
- Capture in DNG: Shoot in DNG for maximum editing control.
- Experiment with Angles: Try overhead for flat-lays (e.g., pizza), 3/4 for depth (e.g., burgers), or side angles for layered dishes (e.g., cakes).
Flowchart for Shooting Workflow:
Editing Food Photos in Lightroom Mobile
Editing transforms good shots into great ones. After capturing, import your photo into Lightroom Mobile’s library (it syncs automatically if shot in-app). Tap the photo to enter the editing interface. Here’s a step-by-step guide:
- Crop & Straighten: Adjust the frame to align props or focus on the subject. Use the grid for precision.
- White Balance: Fine-tune WB to correct color casts. For example, warm up a salad’s greens with a slight increase in Temperature (+5 to +10).
- Exposure & Contrast: Adjust Exposure for overall brightness, then tweak Highlights (-10 to -20) and Shadows (+20 to +50) for depth. Increase Contrast (+10 to +20) for pop.
- Clarity, Vibrance, Saturation: Boost Clarity (+10 to +20) for texture (e.g., pastry flakes). Increase Vibrance (+10 to +15) for subtle color enhancement, and adjust Saturation sparingly to avoid unnatural hues.
- Color Adjustments: Use the Color panel to tweak specific hues. For example, reduce Blue Saturation (-20) in cool lighting to warm up the scene.
- Masking & Healing: Use masking to enhance specific areas (e.g., brighten a strawberry). Healing removes blemishes like crumbs or smudges.
- Presets: Apply Lightroom Mobile presets for quick edits. Recommended: TLP Hazy Wood, Simple Winter Wood, Darkest Wood, Dark Green Wood ($10-20 for bundles, tlp.com). Adjust presets to avoid over-editing.
- Export: Tap the share icon and save to your camera roll as a JPG.
Example Editing Adjustments:
| Setting | Adjustment | Effect |
|---|---|---|
| White Balance | Temp: +5, Tint: -9 | Warms up cool lighting for natural food colors. |
| Shadows | +54 | Brightens dark areas for balanced exposure. |
| Whites | +50 | Enhances bright highlights without clipping. |
| Blue Saturation | -26 | Reduces cool tones for warmer food tones. |
| Blue Luminance | +24 | Brightens blue areas subtly. |
15 Tips for Stunning iPhone Food Photography
- Use Natural Light: Shoot near a window with diffused light (use a diffuser or curtain). Avoid flash to prevent reflections and unnatural colors.
- Manage Shadows: Place a white foam board opposite the light source to bounce light and soften shadows.
- Leverage iPhone Features: Enable gridlines (Settings > Camera > Grid) for composition. Use HDR mode for balanced exposure in tricky lighting.
- Choose Simple Backgrounds: Opt for neutral or pastel backdrops (e.g., wood, linen). Vendors like Best Ever Backdrops offer double-sided vinyl boards (24×36 inches, ~$35-100, besteverbackdrops.com, use code SKYBEST15 for 15% off).
- Experiment with Colors: Use complementary colors (e.g., red strawberries on green plates) for vibrancy or monochromatic tones for calm scenes.
- Style Like a Pro: Arrange food with the Rule of Thirds. Add herbs, toppings, or props like cutlery for visual interest.
- Pick the Right Angle: Overhead for flat-lays, 3/4 for depth, side for layers. Test multiple angles.
- Frame Thoughtfully: Leave negative space or zoom in for details, depending on the dish’s appeal.
- Tell a Story: Create context (e.g., a cozy hot chocolate with a blanket or a vibrant cocktail by the sea).
- Use Props: Add photogenic elements like fruit slices, spices, or seasonal items (e.g., autumn leaves). Keep props complementary.
- Capture Details: Focus on unique textures or patterns, like coffee foam hearts or cake layers.
- Edit for Impact: Use Lightroom Mobile for natural adjustments. Avoid over-editing for realistic results.
- Include Hands: Show hands holding food (e.g., ice cream) for relatability. Ensure they’re clean and groomed.
- Photo-in-Photo: Capture someone photographing the food with your iPhone for a creative behind-the-scenes effect.
- Add Action: Use Burst Mode (hold the shutter) for dynamic shots like syrup drizzles or cracking eggs.
Recommended Lightroom Mobile Presets
Presets streamline editing while maintaining a cohesive look. The TLP Food Photography Preset Bundle ($20, tlp.com) includes:
- TLP Simple Wood: Clean, neutral tones.
- TLP Darkest Wood: Moody, rich contrast.
- TLP Hazy Wood: Soft, dreamy effect.
- TLP Dark Green Wood: Earthy, vibrant greens.
These presets are designed for natural light and won’t work well with artificial lighting. They’re adjustable, letting you develop a signature style. The bundle includes e-guides on downloading and using presets, plus editing examples.
FAQs About Lightroom Mobile Presets
Pre-saved editing settings for consistent looks, applied in Lightroom Mobile (free app, App Store).
Designed for food but may suit other subjects.
No, presets enhance well-composed, properly exposed images.
Only work in Lightroom Mobile, not Photoshop or Lightroom Classic.
Conclusion
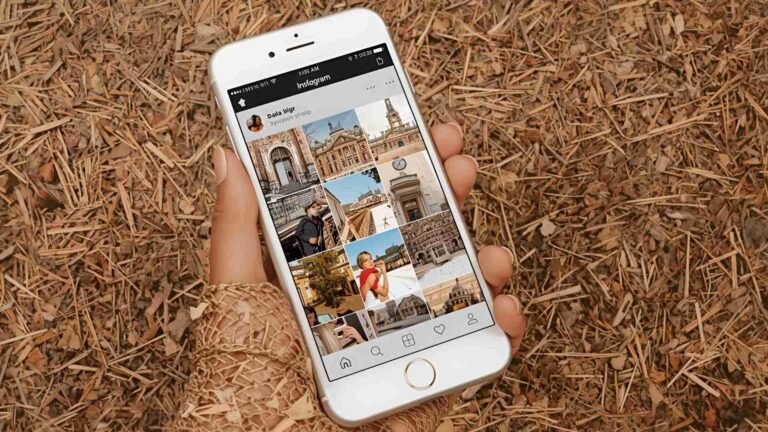
Lightroom Mobile transforms iPhone food photography by offering DSLR-like control and powerful editing tools. By mastering Professional mode, using natural light, and applying thoughtful edits, you can create stunning, professional-grade food photos without heavy gear. Invest in affordable tools like a tripod and diffuser, experiment with angles and props, and practice consistently to develop your style. Whether you’re sharing on Instagram or building a portfolio, Lightroom Mobile makes every dish look delicious. Check out the TLP Preset Bundle for a head start, and keep shooting to refine your craft!
Please share this How To Use Lightroom Mobile For iPhone Food Photography with your friends and do a comment below about your feedback.
We will meet you on next article.
Until you can read, The Best Food Photography Backdrops