Natural Light Product Photography
Natural light product photography harnesses the sun’s illumination to create vibrant, realistic images that highlight a product’s true colors, textures, and appeal. This approach offers a cost-effective alternative to studio setups, delivering professional results with minimal equipment. By leveraging diffused sunlight, photographers can achieve soft shadows and even lighting, making products appear relatable and high-quality. Ideal for e-commerce, branding, and social media, natural light emphasizes authenticity, helping businesses connect with customers through visually compelling shots. Whether you’re a beginner capturing wine bottles at home or an advanced user compositing reflective surfaces, mastering natural light elevates your imagery, boosts engagement, and increases conversions in competitive markets. With its versatility across indoor and outdoor settings, this technique empowers creators to produce stunning visuals that stand out without breaking the bank.
Introduction to Natural Light Product Photography
In today’s digital marketplace, where e-commerce reigns supreme, the quality of product images can make or break a sale. Customers can’t touch, feel, or try on items online, so they rely heavily on visuals to inform their decisions. Enter natural light product photography—a method that uses sunlight as the primary illumination source to create images that are not only beautiful but also true-to-life. This technique has gained immense popularity among small business owners, hobbyists, and professional photographers alike because it delivers high-end results with low barriers to entry.
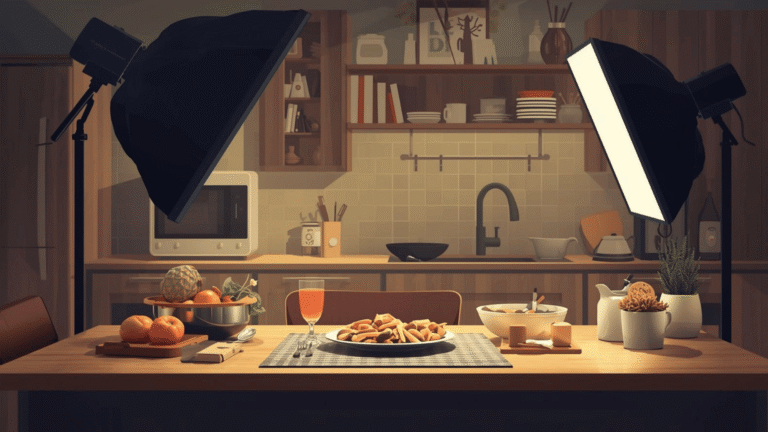
At its core, natural light photography involves positioning products in environments where sunlight—either direct or softened through diffusion—provides the lighting. This could mean shooting near a window in your living room, under the shade of a tree in your backyard, or during the golden hours of dawn or dusk. The sun’s rays offer a broad spectrum of light that artificial sources often struggle to replicate, resulting in colors that pop and textures that feel tangible. For example, imagine a handmade soap bar: under natural light, the subtle swirls of essential oils and the matte finish of the bar come alive, inviting potential buyers to envision it in their own bathroom.
But why choose natural light over studio lighting? For starters, it’s free and abundant, eliminating the need for costly equipment like strobes, softboxes, or continuous lights. It also imparts a sense of authenticity—products look as they would in everyday settings, fostering trust and emotional connections with viewers. However, mastering this approach requires knowledge of light’s behavior, from its intensity and direction to its color temperature. In this comprehensive guide, we’ll delve into the science, setups, tools, techniques, and real-world applications of natural light product photography. By the end, you’ll have the skills to transform ordinary snapshots into compelling visuals that drive sales and build your brand.
The Science and Benefits of Natural Light
To truly appreciate natural light, it’s essential to understand its scientific underpinnings. Sunlight is a form of electromagnetic radiation that travels from the sun to Earth, comprising visible light wavelengths that our eyes perceive as colors. This full-spectrum light, unlike the limited wavelengths of many artificial bulbs, ensures that products are rendered with unparalleled accuracy. Color temperature, measured in Kelvin (K), plays a key role: midday sunlight is around 5500K, offering a neutral white that doesn’t tint images yellow or blue.
Detailed Benefits of Natural Light
- Superior Color Fidelity and Accuracy: One of the standout advantages is how natural light preserves true colors. Artificial lights can introduce casts—think the orange hue from incandescent bulbs or the greenish tint from fluorescents. Natural light avoids this, making it perfect for color-critical products. For instance, in fashion photography, a red dress will appear as intended, not washed out or overly saturated.
- Enhanced Texture and Depth: The subtle play of light and shadow under natural conditions brings out intricate details. Fabrics show their weave, metals their sheen, and foods their freshness. This depth adds a three-dimensional quality, making flat images feel volumetric and more engaging.
- Soft, Flattering Shadows: Diffused natural light creates gentle transitions between highlights and shadows, avoiding the stark contrasts of direct artificial sources. This softness is forgiving, reducing imperfections and creating a polished look without extensive editing.
- Economic and Practical Advantages: With no need for power sources or bulky gear, natural light is ideal for on-the-go shoots. It’s especially beneficial for startups or solopreneurs, where budgets are tight. A basic setup might cost under $50, compared to hundreds for studio kits.
- Accessibility for All Skill Levels: Beginners can start immediately—no complex wiring or modifiers required. It’s a great learning tool, teaching observation of light’s natural behavior before advancing to controlled setups.
- Versatile Aesthetic Options: Natural light supports various moods: warm golden hour glows for cozy vibes, cool overcast skies for clean minimalism. This flexibility aligns with branding, from rustic handmade goods to sleek tech products.
- Environmental and Health Benefits: Shooting outdoors or near windows promotes sustainability by reducing energy use. Plus, exposure to natural light can boost mood and creativity during sessions.
Compared to studio lighting, natural light is less predictable but more organic. Studio setups provide consistency but at the cost of setup time and expense. Many pros hybridize, using natural light for lifestyle shots and studio for catalogs.
Key Guidelines for Natural Light Photography
Success with natural light hinges on strategic planning and observation. Here are expanded guidelines:
- Optimal Timing and Scheduling: The sun’s position dictates light quality. Golden hours (first hour after sunrise, last before sunset) yield warm, elongated shadows for dramatic effects. Mid-morning (8-10 AM) and late afternoon (3-5 PM) offer balanced brightness. Overcast days are goldmines for even diffusion, eliminating hot spots.
- Diffusion Strategies: Direct sun causes overexposure; combat with natural diffusers like clouds or man-made ones like sheers. Position products in open shade for uniform light.
- Light Direction Mastery: Side lighting: Builds texture through shadows; great for bottles or textured items. Front lighting: Minimizes shadows for flat, even looks; ideal for labels. Backlighting: Creates halos or glows; perfect for glass or translucent products, but watch for silhouettes.
- Maintaining Consistency Across Shoots: For series like product lines, note time, location, and weather. Use the same window or spot to match lighting.
- Product-Specific Considerations: Fragile items avoid direct heat; reflective surfaces need angle tweaks to minimize glare.
- Ethical and Practical Tips: Respect environments; use timers to avoid camera shake in low light.
Indoor Setups: Transforming Windows into Studios
Indoor photography offers control, shielding from weather while harnessing sunlight.
Selecting and Preparing the Ideal Window
Prioritize north-facing for steady, cool light—perfect for all-day shoots. South-facing deliver intensity; temper with diffusers. Measure window size; larger ones flood more light. Clean glass to avoid dust spots; remove distractions like blinds.
Position tables parallel or perpendicular based on desired direction. For multi-product shoots, use rolling carts for mobility.
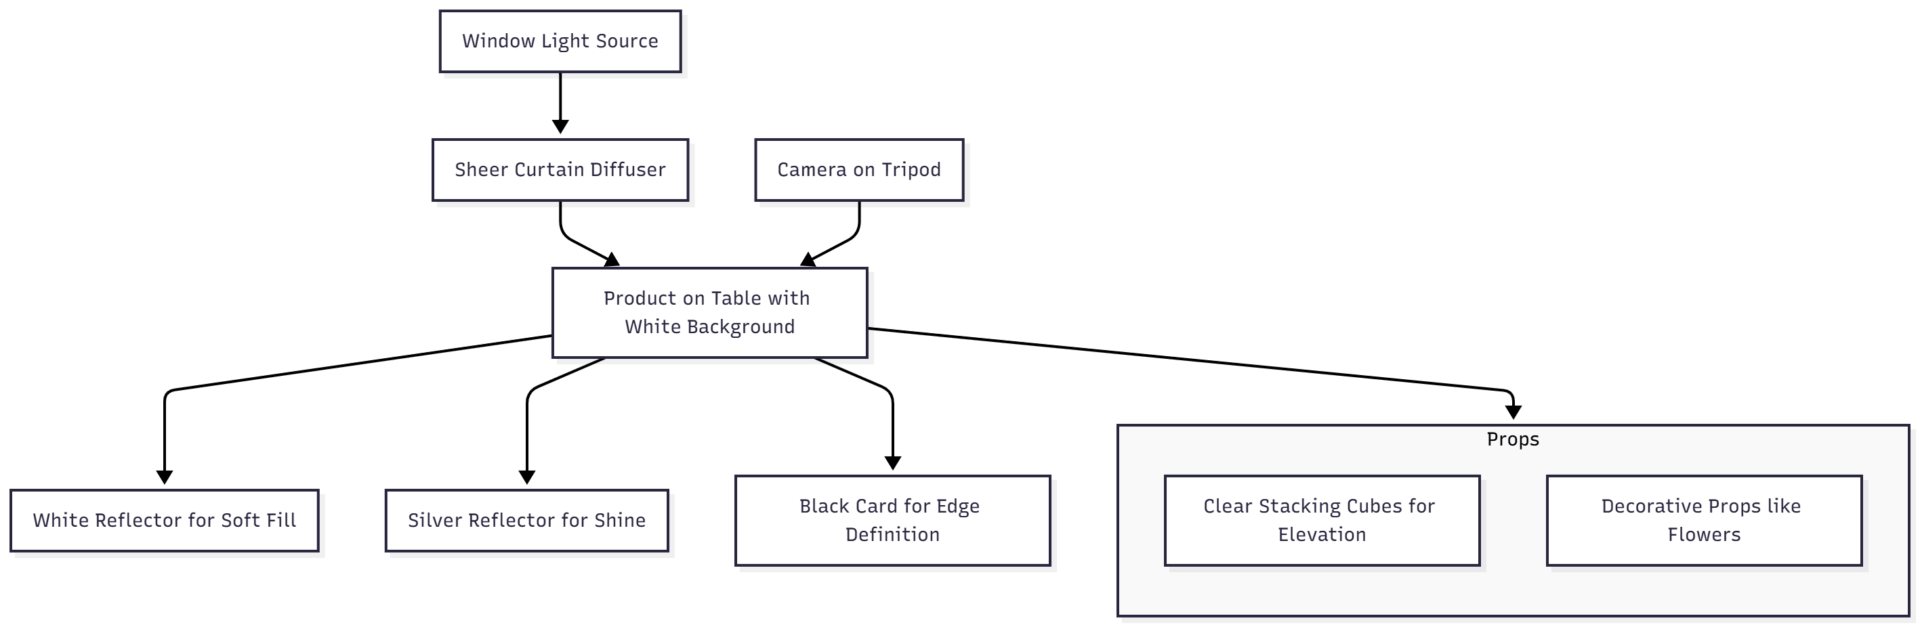
Step-by-Step Basic Indoor Setup
- Prepare the Surface: Stable table; cover with white seamless paper ($15 roll) taped for curve, creating infinity backgrounds.
- Product Arrangement: Place 2-6 feet from window; test rotations for best highlights.
- Implement Diffusion: If light’s harsh, affix translucent paper or curtains; adjust thickness for softness.
- Incorporate Reflection: Position white boards opposite; silver for stronger bounce, gold for warmth.
- Add Props if Needed: For lifestyle, include complementary items like books or plants, ensuring they don’t overshadow.
Advanced Indoor Techniques and Variations
- Focus Stacking for Depth: Essential for small objects; shoot 5-10 frames shifting focus, stack in Helicon Focus or Photoshop for razor-sharp results.
- Negative Fill Applications: Black foam absorbs excess light, sculpting shadows for moodier shots, like wine bottles.
- Tethered Shooting Workflow: USB cable to laptop ($15); use Lightroom for instant reviews, speeding iterations.
- Multi-Light Window Hacks: Combine adjacent windows for wraparound light; block one for directional control.
Indoor Settings Expanded Table:
| Scenario | ISO | Aperture | Shutter Speed | White Balance | Notes |
|---|---|---|---|---|---|
| Small Jewelry | 100 | f/2.8 | 1/125 | Daylight | Macro lens for close-ups |
| Wine Bottle | 200 | f/14 | 1/10 | Custom | Tripod essential |
| Apparel Flat Lay | 400 | f/8 | 1/60 | Auto | Overhead positioning |
| Food Close-Up | 320 | f/5.6 | 1/80 | Cloudy | Warm tones for appeal |
Outdoor Setups: Embracing Nature’s Vast Studio
Outdoor photography unlocks dynamic backgrounds but requires vigilance.
Comprehensive Planning for Outdoor Conditions
Forecast apps like Weather Underground predict cloud cover. Scout locations: Parks for greenery, urban alleys for texture. Time shoots for low sun angles; use SunCalc app for precise positioning.
Pack essentials: Portable diffusers, reflectors, ground cloths to protect products.
Core Outdoor Techniques
- Shaded Shooting Spots: Tree canopies or building shadows provide natural softboxes.
- Portable Diffusion Tools: Hold large panels overhead for group shots.
- Incorporating Natural Backdrops: Grass for organic feel, stone for industrial; ensure focus remains on product.
- Wind and Stability Measures: Use clamps or weights; shoot bursts to capture still moments.
For example, photographing high heels: Flat lay on white surface in shade; side light from low sun enhances leather texture.
Addressing Outdoor Challenges
- Weather Variability: Have indoor alternatives; shoot in bursts during stable moments.
- Glare on Screens: Hood viewers or edit later.
- Public Interruptions: Choose secluded spots; early mornings minimize crowds.
Essential Tools and Equipment for Natural Light Mastery
A well-curated kit amplifies natural light’s potential.
Core Must-Have Tools with Specifications
- Diffuser Panels: Neewer 5-in-1 ($40); 43-inch diameter, translucent for softening; portable zipper case.
- Reflectors: Promaster 5-in-1 ($35); 32-inch, includes white (soft fill), silver (strong bounce), gold (warmth), black (absorption), translucent.
- Tripods: Manfrotto Befree Advanced ($150); aluminum, 4-sections, 59-inch height, ball head for quick adjustments; load capacity 17.6 lbs.
- Lenses: Canon EF 100mm f/2.8 Macro ($600); or Nikon 105mm f/2.8 ($900); sharp for details, equivalent to 73mm in full-frame.
- Calibration Tools: X-Rite ColorChecker ($100); or basic gray card ($15) for white balance.
Budget-Friendly Kit Under $200:
| Item | Price | Specs/Details | Supplier Example |
|---|---|---|---|
| Foam Boards (Pack) | $20 | 20×30 inch, white/black | Amazon |
| Basic Tripod | $50 | Aluminum, 60-inch max | Walmart |
| Popup Diffuser | $20 | 24-inch collapsible | eBay |
| Gray Card | $10 | 4×6 inch plastic | B&H Photo |
| Total | $100 | Entry-level essentials |
Innovative DIY Solutions
- Reflector: Wrap cardboard in aluminum foil (shiny side out) for $5.
- Diffuser: Stretch tracing paper over embroidery hoop.
- Background: Large white bedsheet ironed flat.
- Stabilizer: Stack books as makeshift tripod.
These hacks prove ingenuity trumps expense.
Camera Settings: A Comprehensive Deep Dive
Settings bridge light and image quality.
The Exposure Triangle Explained
- ISO Sensitivity: Base at 100 for noise-free images; increase to 800 in dim conditions, but monitor grain.
- Aperture Control: f/1.8-f/4 for bokeh in close-ups; f/11-f/22 for full sharpness in packshots. Wider apertures let more light in but reduce depth.
- Shutter Speed Dynamics: 1/250+ handheld to freeze; 1/30 with tripod for more light. Slow speeds risk blur—use self-timer.
Mode Selection and Advanced Features
- Manual: Full control; ideal for consistency.
- Aperture Priority: Auto-adjusts shutter; great for varying light.
- Bracketing: Shoot +/- exposures; merge for HDR in post.
White Balance Nuances: Daylight preset for sun; cloudy for diffusion. Custom: Photograph gray card, set in-camera.
Histogram Mastery: Avoid left/right clipping; mid-tones for balance.
For Video: Similar settings; stabilize for smooth pans.
Real-World Case Studies and Practical Examples
Karl Taylor’s Wine Bottle Challenge
Task: Replicate studio flash image using window light. Setup: South-facing window, gray board background, diffusion sheets for soft left-side gradient, white reflector right, iPhone torches background. Lens: 100mm. Settings: f/14, ISO 200, 1/10 sec. Result: Near-identical to flash, demonstrating natural light’s prowess for home studios.
Before (Studio Flash) vs. After (Natural Light):
- Flash: Sharp, controlled edges.
- Natural: Warmer, organic feel.
Bottle Compositing Tutorial
For glass like Jack Daniel’s: Clean bottle, dark wood background near window. Shoot: Left/right sides, label, back glow with Neewer CN-160 ($25, dimmable LED). Composite: Photoshop layers, masks to blend. Settings: Nikon D750, 105mm f/2.8, f/14, ISO 200, 1/10 sec. Retouch: Spot healing fingerprints.
Jewelry Macro Example
Wristwatch on suitcase: 100mm macro at f/2.8, window right, mirror left for face highlight. Setup simple, results high-end.
Flat Lay for Fashion
High heels, hat, watch on white: Side golden light for warmth, composition with rule of thirds.
Outdoor Picnic Scenic
Harsh sun vs. diffused: Add panel for soft look on table setup.
Diverse Styles and Creative Applications
Natural light supports myriad styles.
- Packshot on White: Seamless background, even light for catalogs; f/16 for sharpness.
- Flat Lay Arrangements: Overhead, props themed (e.g., makeup with brushes); soft side light.
- Low Depth Close-Ups: Blur backgrounds, focus on details like watch dials.
- Outdoor Lifestyle Scenic: Props in real scenarios; plan for sun path.
Adapt to products:
- Jewelry: Soft, reflective control.
- Apparel: Movement in light for fabric flow.
- Food: Warm to enhance appetite.
- Electronics: Anti-glare angles.
- Candles: Airy outdoors for flame glow.
Overcoming Common Challenges in Depth
Natural light’s variability demands solutions.
- Inconsistent Intensity: Monitor with light meter apps; bracket shots, edit exposure uniformly in batch.
- Harsh Shadows Management: Diffuse, reflect; post: Lightroom shadows slider +20-50%.
- Reflections on Glossy Surfaces: Use gloves ($5), polarizing filters ($30); angle camera 45°.
- Color Inaccuracies: Gray cards for calibration; Photoshop tint adjustments.
- Over/Underexposure: Histograms guide; compensation -1/+1 EV.
- Weather Dependencies: Indoor fallbacks; reschedule for clouds.
Post-Processing Workflow: Import to Lightroom, adjust basics (exposure, contrast), local edits (brushes for shadows), export optimized for web.
Natural Light vs. Studio Lighting: An In-Depth Comparative Analysis
Pros of Natural Light
- Budget-Friendly: Zero energy costs.
- Authentic Rendering: Real-world appeal.
- Easy Entry: No technical barriers.
Cons
- Unpredictable: Cloud cover shifts light.
- Time-Limited: Daylight hours only.
- Less Drama: Harder for edgy looks.
Studio Lighting Pros
- Absolute Control: Adjust intensity, color.
- Weather-Independent: Anytime shooting.
- Professional Polish: High-end catalogs.
Cons
- High Costs: Kits $350-2000+.
- Space Needs: Dedicated area.
- Learning Curve: Modifiers, syncing.
Flash Example: Overhead softbox for even backgrounds; side for contrast.
Editing Comparison: Natural requires minimal; studio precise but time-intensive.
Recommendation: Start natural, transition to hybrid for growth.
DIY Tutorials: Building Skills from Scratch for Beginners
Empower home photographers.
Basic Home Setup Tutorial
- Locate Window: North/south for consistency.
- Assemble: Table, white paper background.
- Position Product: Near light, test angles.
- Add Tools: Diffuser if harsh, reflector for fill.
- Shoot: Manual settings, review on screen.
Composition Mastery
- Rule of Thirds: Off-center for interest.
- Angles: Low for dominance, high for overview.
- Props: Thematic, non-distracting; clear cubes ($20) for elevation.
Fill Card Techniques
White: Soft bounce.
Silver: Sharp highlights ($15 board).
Gold: Warm tones.
Black: Shadow definition.
Distances: Closer for stronger effect.
Hands-Free: Clamps ($10) or tape bends.
Final Setup Chart:
Advanced Editing, Retouching, and Compositing
Elevate raw shots.
Compositing Bottles Step-by-Step
- Capture: Separate exposures for sides, label, glow.
- Photoshop: Stack layers; mask to blend.
- Brush Tools: Black reveals, white erases.
- Final Tweaks: Zoom for dust; healing brush.
Tools: Spot healing, clone stamp.
Retouching Best Practices
Basic: Exposure, contrast.
Advanced: Frequency separation for skin/textures.
Outsource: Pros like Michelle Tucker for efficiency.
Software: Lightroom for batches, Photoshop for precision ($20/month Creative Cloud).
Product-Specific Strategies and Tips
Tailor approaches.
- Jewelry and Small Items: Soft side light; reflectors minimize glare; macro lenses.
- Apparel and Fashion: Layered lighting; flat lays with props; natural poses.
- Food and Beverages: Warm tones; side light for moisture; quick shoots for freshness.
- Electronics and Gadgets: Balanced angles; no screen glare; highlight features.
- Candles and Soaps: Airy outdoors; shaded for subtle glows.
Integrating CGI as a Complementary Modern Workflow
While natural light shines, CGI (computer-generated imagery) offers digital alternatives.
CGI Advantages Explored
- Efficiency Gains: Instant renders; no physical setups.
- Cost Savings Long-Term: No gear/shipping; scalable.
- Creative Unlimited: Impossible angles, animations.
- Consistency: Perfect matches across variants.
Tools: Blender (free), Adobe Substance ($20/month).
Hybrid: Natural for prototypes, CGI for catalogs.
E-commerce Optimization: Leveraging Natural Light Images
Visuals convert; natural light builds relatability.
- Platform Integration: Shopify apps for galleries; Etsy favors authentic shots.
- SEO Enhancements: Keyword-rich alt text, e.g., “natural light wine bottle photography”.
- Social Media Boost: Instagram grids with consistent light for cohesion.
A/B Test: Natural vs. studio images for engagement.
Future Trends in Natural Light Product Photography
- Mobile Advancements: AI cameras enhance low light.
- Sustainability Focus: Eco-friendly shoots gain traction.
- AR Integration: Natural light photos for virtual try-ons.
- AI Assistance: Tools like Shopify Magic for auto-edits.
Stay ahead: Experiment with drones for outdoor angles.
FAQ: Common Questions Answered
Use indoor alternatives like LED panels mimicking daylight ($50+), or reschedule for better weather. Overcast days are often ideal.
Angle the product away from direct light; use polarizing filters or black flags to block stray rays. Clean surfaces meticulously.
Mostly yes, but for highly reflective or dark items, supplement with reflectors. Avoid for heat-sensitive goods in direct sun.
Start with smartphones (iPhone 13+ or equivalents); upgrade to DSLRs like Nikon D750 ($1000) for more control.
Minimal for good shots—adjust exposure, crop. Use free tools like GIMP for basics.
Yes, for hybrids; match color temperatures to avoid casts.
Conclusion: Embracing Natural Light for Lasting Impact
Natural light product photography is more than a technique—it’s a gateway to authentic, engaging visuals that resonate with audiences. From indoor window setups to outdoor scenic shoots, its versatility, affordability, and beauty make it indispensable for e-commerce and branding. By understanding light’s science, mastering tools and settings, and overcoming challenges through practice, anyone can produce professional images that drive sales.
As markets evolve, natural light’s timeless appeal endures, blending creativity with practicality. Start small, experiment often, and watch your products come alive under the sun’s glow. Whether capturing a simple bottle or intricate jewelry, the results will speak for themselves, fostering connections and boosting your business in an image-driven world.
Please share this Natural Light Product Photography with your friends and do a comment below about your feedback.
We will meet you on next article.
Until you can read, Artificial Light Photography: How To Shoot A Bottle

![How To Create a Weight Loss Blog [9 Steps to Success!]](https://yumtonight.com/wp-content/uploads/2025/07/Untitled-design-2-4-768x432.jpg)