A digital recipe book stores your favorite dishes as organized, searchable files on your phone, computer, or website instead of scattered paper cards or stained printed pages. Each entry typically includes ingredients with exact measurements, numbered steps, prep and cook times, servings, notes, and photos. You can group recipes by meal type, cuisine, dietary needs, or tags, then find any dish instantly with search.
Printed cookbooks wear out. Grease stains, water spots, and missing pages turn trusted family collections into fragile keepsakes. Digital versions solve this permanently. They stay accessible on any device, support OCR search for handwritten notes, allow easy updates, and make sharing simple via PDF, cloud links, or a live website. Food bloggers gain an extra advantage: a digital cookbook on WordPress becomes both a personal library and a traffic-driving content asset with proper recipe schema.
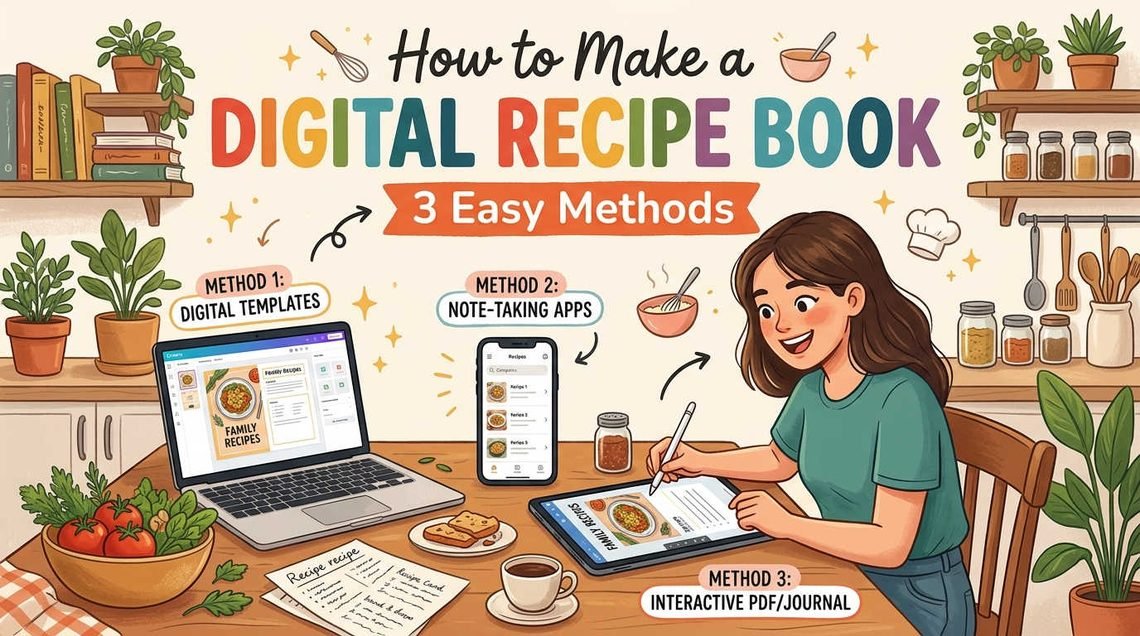
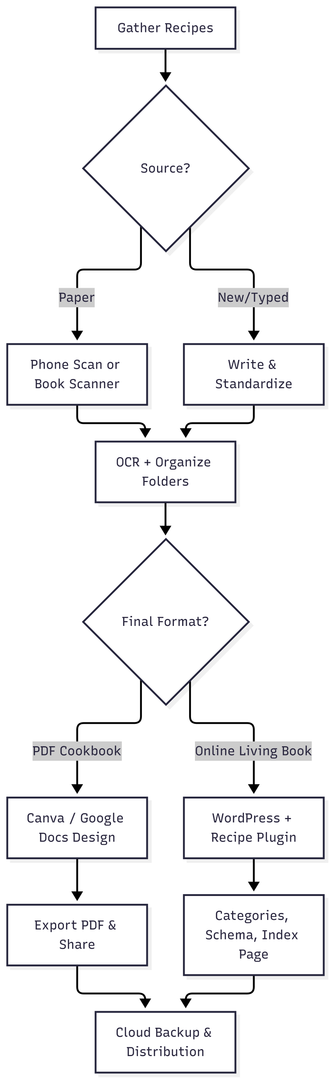
This guide covers three practical methods anyone can follow. Method 1 uses free or low-cost design tools for a polished PDF. Method 2 digitizes existing paper recipes with a phone or scanner. Method 3 builds a living, searchable cookbook directly on a WordPress site using dedicated recipe plugins. Mix the methods as needed—scan old cards, design a clean layout, then publish the best ones online.
Method 1: Design a Digital Recipe Book with Canva or Document Tools
The simplest way to create a complete digital cookbook from scratch is a visual design platform. Canva offers ready-made cookbook templates optimized for screens and print. Google Docs or Notion work for text-heavy collections with minimal design needs.
Step-by-Step Process
- Collect and standardize every recipe. List ingredients with precise measurements (1 cup, 2 tsp, 180°C). Write clear numbered instructions. Note prep time, cook time, servings, and any substitutions (gluten-free flour swap, dairy-free cream alternative). Test the recipe once if possible so details stay accurate.
- Organize by category. Create sections such as Breakfast, Weeknight Mains, Baking, Desserts, and Seasonal. Add a table of contents with clickable links for PDF navigation.
- Choose a tool and template. In Canva, search “cookbook” or “recipe book.” Select a clean single-column or two-column layout that works on phones and tablets. Free Canva accounts include basic templates and export. Canva Pro (approximately $15–18 per month or $120–180 per year) unlocks premium templates, background remover, Brand Kit for consistent fonts and colors, and higher-resolution exports.
- Build the pages. Start with a cover featuring a strong food photo and title. Add a short introduction or dedication. For each recipe page include:
- Title and short description
- High-quality photo
- Ingredient list in bullet points
- Numbered steps
- Tips, variations, or nutrition notes
- Optional QR code linking to a video
- Export as PDF. Choose PDF Standard for smaller file size suitable for email and downloads. Keep the file under 20–30 MB for easy sharing. Upload to Google Drive, Dropbox, or your website. Share the link via email, Linktree, or social media.
Google Docs offers a free alternative: use Heading styles for hierarchy, insert images, and export to PDF. Notion works well for a living database with filters and tags, then export selected pages.
This method produces a professional-looking digital recipe book in a few hours once recipes are collected. It requires no coding and works for personal gifts or small paid downloads.
Method 2: Digitize Paper Recipes with Phone Scanning or a Home Scanner
Many collections start as handwritten cards, magazine clippings, or bound cookbooks. Scanning turns them into searchable digital files without retyping everything.
Phone Scanning (Best for Small Collections)
Most modern phones already have excellent scanning capability through built-in apps or free downloads.
Recommended apps:
- Adobe Scan – clean PDFs plus OCR for searchable text
- Microsoft Lens – simple capture and cloud save
- Google Drive Scan (Android) – free and fast
- CamScanner – multi-page batches
Process:
- Open the app and start a new scan.
- Hold the phone parallel to the page to avoid distortion.
- Capture, then crop edges carefully so notes remain visible.
- Apply document or contrast filters for faded ink or stained paper.
- Enable OCR so ingredients and steps become searchable.
- Name files clearly (Chocolate_Cake_Grandma.pdf).
- Save to a dedicated folder in Google Drive or iCloud and back up immediately.
Phone scanning costs nothing beyond storage and handles mixed sources—typed pages, handwritten cards, and photos of notes—quickly.
Home or Book Scanner (Best for Large Volumes)
When you have full cookbooks or stacks of pages, dedicated hardware saves time and improves quality. Flatbed scanners work for loose sheets. Sheet-fed models handle multi-page stacks. Overhead book scanners capture open pages without forcing the spine flat.
CZUR models are popular for recipe books. Entry portable units such as the Aura Pro typically sell in the $260–$289 range. Higher-resolution professional models (ET series) range from approximately $500–$800 depending on megapixels and features. Key specifications often include:
- Curve-flattening technology that corrects page curvature near the spine
- Auto page split for two-page spreads
- OCR supporting 180+ languages
- Capture sizes up to A3
- Output as searchable PDF or JPEG
Steps for a book scanner:
- Position the open book under the camera using guides.
- Use a glass plate or finger-removal tool if needed.
- Trigger the scan (foot pedal keeps hands free).
- Apply curve correction and split pages.
- Run OCR and save to organized folders.
A dedicated scanner makes sense only when volume is high. For a few dozen cards a phone remains faster and free.
Quick Comparison of Capture Methods
| Method | Best For | Setup Effort | Speed | Typical Cost | OCR Quality |
|---|---|---|---|---|---|
| Phone camera + app | Mixed cards & pages | Very low | Fast per page | Free | Good |
| Flatbed/sheet-fed | Loose printed stacks | Medium | Medium | $50–200 | Excellent |
| Overhead book scanner | Bound cookbooks | Medium-high | Fast for volumes | $260–800 | Excellent |
After scanning, move files into a recipe app such as OrganizEat for structured storage. OrganizEat supports import from photos, websites, and social media. The free tier limits recipes; Premium runs about $40 per year and unlocks unlimited storage, meal planning, and family sharing.
Method 3: Build a Living Digital Cookbook on WordPress
For food bloggers or anyone who wants an online, updateable collection, WordPress plus a recipe plugin turns individual posts into a full digital cookbook. Readers get jump-to-recipe buttons, printable cards, star ratings, and scalable servings. Search engines receive proper recipe schema for rich results.
Recommended Plugins and Pricing
Tasty Recipes (by WP Tasty) and WP Recipe Maker are the two leading options.
- Tasty Recipes Lite – free starter version with basic cards and schema
- Tasty Recipes paid plans start at $49 for the first year (normally $99) for one site; higher tiers support multiple sites
- All Access bundle (Recipes + Links + Pins + Roundups) often priced around $149 first year
- Features include multiple card designs, adjustable servings, nutrition fields, Cook Mode, Instacart integration, and strong Google schema
WP Recipe Maker offers a robust free version. Premium starts at $49 per year; Pro and Elite plans reach $99–$149 and add automatic nutrition calculation, unit conversion, collections, and shopping lists.
Both plugins let you create beautiful recipe cards inside regular posts. Group posts with categories (Breakfast, Desserts) and tags (quick, vegetarian, one-pan). Add a recipe index page that lists everything by category for easy browsing.
How to Set It Up
- Install and activate the plugin from your WordPress dashboard (upload the zip for paid versions and enter the license key).
- Create a new post. Insert the recipe block.
- Fill title, description, ingredients, instructions, times, servings, and image.
- Publish. The plugin generates the structured card and schema automatically.
- Organize with categories and tags. Create a dedicated “Cookbook” or “Recipe Index” page that displays all recipes.
- Optional: enable comments for reader feedback and substitutions, add social sharing buttons (especially Pinterest), and ensure the site is mobile-responsive and fast-loading.
This method produces a digital recipe book that grows with every new post. It supports monetization through ads, affiliates, or paid digital downloads of curated collections. Because the content lives on your site, you control updates and can repurpose posts into seasonal PDF cookbooks later.
Organizing and Enhancing Your Digital Collection
Regardless of method, consistent structure keeps the book usable:
- Use clear, searchable titles
- Apply a limited set of tags rather than deep nested folders
- Store everything in cloud storage with automatic sync
- Include process photos and the finished dish
- Add personal notes or variations after testing
For photos, natural light and the food as the clear subject produce the best results. Multiple angles help readers visualize the dish.
Final Tips for Success
Start small. Digitize ten favorite family recipes first, then expand. Keep measurements and steps consistent so the book feels professional. Back up every file. If you plan to share or sell, check that photos and recipes are yours or properly credited.
A digital recipe book protects memories, simplifies cooking, and—when published on WordPress—can become a valuable content asset. Choose the method that matches your volume and goals, follow the clear steps above, and you will have a searchable, shareable collection ready in far less time than traditional printing ever required.
Please share this How to Make a Digital Recipe Book: 3 Easy Methods with your friends and do a comment below about your feedback.
We will meet you on next article.
Until you can read, How To Write a Food Blog Post That Sizzles [10 Simple Steps]