How to Take Good Food Photos with My Phone
Great food photography no longer requires a professional camera. Modern smartphones pack enough optical power to produce scroll-stopping images — if you know how to use them. The difference between a forgettable food snap and a mouthwatering shot comes down to light, angles, composition, and a few smart settings. This guide covers everything you need to know.
Why Smartphone Food Photography Works
The best camera is the one you have with you, and for most people, that’s a phone. Today’s flagship smartphones feature multi-lens systems, computational photography, and RAW file support that rival entry-level DSLRs in many conditions. What they lack in sensor size, they compensate for with software intelligence — and for food photography specifically, that trade-off is largely in your favor.
That said, technique matters more than hardware. A $200 phone used correctly will outperform a $1,200 phone used carelessly.
1. Light Is Everything — Use It Correctly
Natural light is the single most important element in food photography. It renders colors accurately, produces soft shadows, and makes food look fresh and appetizing. Artificial lighting — especially the built-in flash — does the opposite.
Rules for lighting:
- Shoot near a window with indirect daylight
- Turn your flash off permanently for food shots
- If direct sunlight is too harsh, hang a sheer curtain or white sheet to diffuse it
- Use a white foam board on the opposite side of the light source as a reflector to fill in dark shadows
The best times to shoot are morning before 10 a.m. and late afternoon from around 3 p.m. onward. During these windows, light is directional but soft — it creates dimension and makes food look three-dimensional rather than flat.
Avoid shooting at midday when overhead sunlight is flat and unflattering. Shooting indoors in a restaurant? Position yourself near the window, and never use flash. If the light is too dim, activate Night Mode (available on most modern smartphones) rather than turning on flash. Night Mode stacks multiple exposures to produce brighter, cleaner images without the harsh artificial look.
2. Master the Two Key Angles
Angle choice defines the personality of a food photo. Two angles dominate professional food photography:
Top-Down (Flat Lay)
- Hold your phone directly parallel to the surface
- Ideal for: pizza, charcuterie boards, salads, table spreads, breakfast plates
- Shows arrangement, color, and composition across the dish
- Leave breathing room around the plate — don’t crop too tight
Straight-On (Eye Level)
- Camera at the same height as the food
- Ideal for: burgers, pancakes, layered cakes, tall drinks
- Shows height, layers, and texture dramatically
- Prevents the distortion that comes from shooting slightly above eye level
A 45-degree angle (halfway between overhead and eye level) also works well for soups, bowls, and pasta dishes where you want both the top and the side visible.
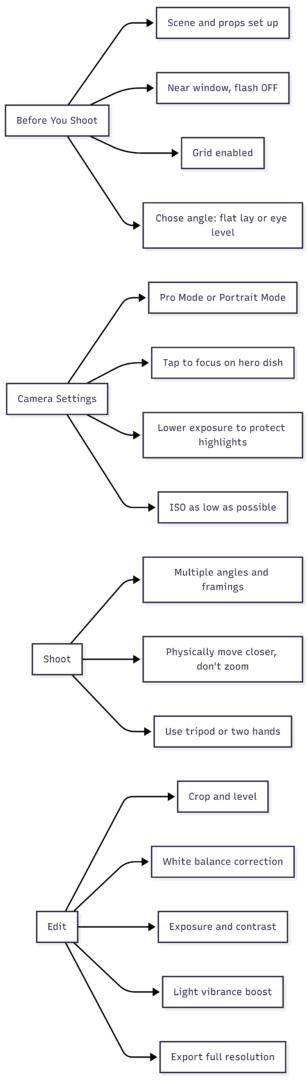
Avoid zooming in digitally. Digital zoom degrades image quality and increases camera shake. Instead, physically move closer to your subject for tight shots.
3. Composition: Rule of Thirds
The Rule of Thirds is the most reliable composition framework for food photography. Enable your camera’s grid overlay (Settings → Camera → Grid) and use it on every shoot.
The grid divides your frame into nine equal sections using two horizontal and two vertical lines. The four intersection points are where the eye naturally travels. Place your hero dish — or its most photogenic element — on one of these intersections rather than dead center.
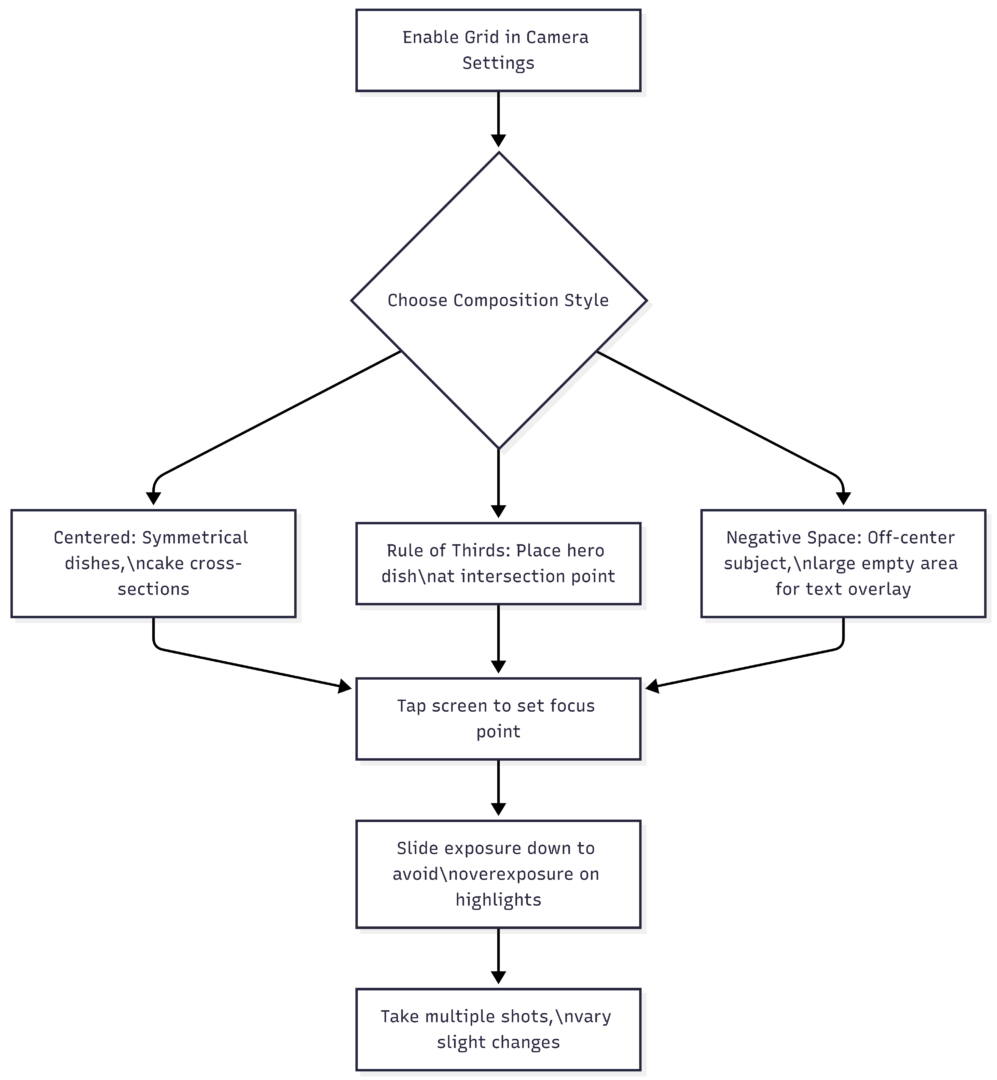
Beyond the grid, consider these composition principles:
- Negative space creates a clean, editorial feel — especially useful if text or a logo will overlay the image
- Leading lines (the edge of a wooden board, a row of ingredients) draw the eye toward the main subject
- Odd numbers of props and elements feel more natural than even groupings
4. Camera Settings That Make a Real Difference
Use Pro / Manual Mode
Every major smartphone camera app has a Pro or Manual mode. Use it. Auto mode makes conservative decisions; manual mode lets you optimize for the exact look you want.
| Setting | Auto Mode Behavior | Manual Mode Best Practice |
|---|---|---|
| Flash | May activate in low light | Always OFF |
| ISO | Raised in dim conditions, adds grain | Keep as low as possible (100–200) |
| Shutter Speed | Slowed in low light | Increase if shooting action (pouring, sprinkling) |
| White Balance | Compensates for light temperature | Set manually for consistent color |
| Focus | Detects face/subject automatically | Tap to set focus on the hero dish |
| Exposure | Averaged across the frame | Tap hero, slide down to protect highlights |
Third-party apps that offer superior manual control include Lightroom Mobile (free), VSCO, ProCamera, and Halide (paid). Lightroom Mobile is particularly powerful because it doubles as an editing tool.
Portrait Mode for Blurred Backgrounds
Portrait Mode simulates the shallow depth of field (background blur / bokeh) that longer camera lenses create naturally. For food, this pulls the dish sharply into focus while the background softens.
One limitation: Portrait Mode struggles with subjects that don’t have clear edges — glassware, garnishes, and irregular textures can get partially blurred. In these cases, use manual focus with Pro mode for better control.
Focus Peaking
If your camera app supports Focus Peaking, enable it. It highlights the areas of the frame that are in sharp focus (usually shown in a bright color overlay), making it easy to confirm exactly what’s sharp before shooting.
5. Styling and Props: Less Is More
The food is the hero. Props exist to support it, not compete with it.
Effective prop choices:
- Textured backgrounds: wooden boards, linen napkins, marble surfaces, slate
- Complementary items: fresh herbs, whole spices, stacked napkins, vintage cutlery
- Contrast elements: a glass of water, a sauce bowl, scattered crumbs or seeds
Background color strategy:
| Food Color | Recommended Background |
|---|---|
| Dark (chocolate, coffee, red meat) | Light: white, cream, pale linen |
| Light (pasta, rice, bread) | Dark or earthy: slate, dark wood, charcoal |
| Colorful (salads, bowls, fruit) | Neutral: wood, stone, medium gray |
| Multi-colored | Monochrome: single-color neutral surface |
Keep backgrounds free of logos, patterns, or distractions. Busy backgrounds reduce the visual weight of the food. If a surface has a strong wood grain or tile pattern, that texture should enhance the story — not overpower it.
Set the scene before the food arrives. Props, background, and lighting should all be arranged and tested with a stand-in object. When the real dish arrives, you have seconds before heat causes steam to dissipate, ice melts, or sauces set — set everything up before the food hits the table.
6. Stability: Prevent Blur Before It Happens
A slightly blurred image is impossible to fix in editing. Stability is non-negotiable.
- Hold the phone with both hands, elbows tucked against your body
- Use the volume button instead of the on-screen shutter — it causes less shake
- Use your phone’s self-timer (2–3 seconds) when the phone is propped or on a tripod
- A small tabletop tripod with a phone adapter costs very little and eliminates shake completely, freeing both hands for interaction shots (pouring, sprinkling, holding cutlery)
Tripods are especially useful for overhead flat lays, where holding a phone directly above the dish while keeping it perfectly level is difficult without one.
7. Editing: The Final 20% That Separates Good from Great
Editing does not fix a bad photo — it elevates a good one. Shoot with editing in mind: expose slightly under rather than over, since recovering shadow detail is easier than recovering blown highlights.
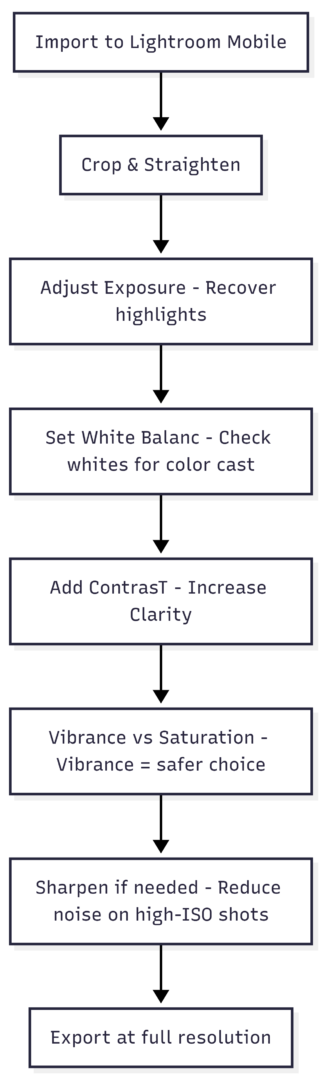
Core editing adjustments in order:
- Crop and straighten — Horizontal surfaces should be perfectly level
- Exposure — Brighten if underexposed, pull back highlights if overexposed
- White Balance — Look at what should be white (a plate, a napkin). Adjust until it reads as neutral white
- Contrast — A moderate increase adds depth and richness
- Vibrance — Boosts muted colors without oversaturating already-vivid ones (safer than Saturation)
- Clarity — A small increase adds texture and makes food look more detailed
- Noise Reduction — Apply if you shot at high ISO in low light
Avoid heavy-handed filters. An over-filtered food photo signals inauthenticity and reduces appetite appeal. The goal is a version of the dish that looks better than real life — not a version that looks processed.
Recommended editing apps:
| App | Cost | Best For |
|---|---|---|
| Lightroom Mobile | Free (core features) | Full professional editing, RAW support |
| VSCO | Free + paid filters | Consistent film-style presets |
| Snapseed | Free | Quick targeted adjustments, healing tool |
| A Color Story | Free + paid | Bright, airy food blogger aesthetic |
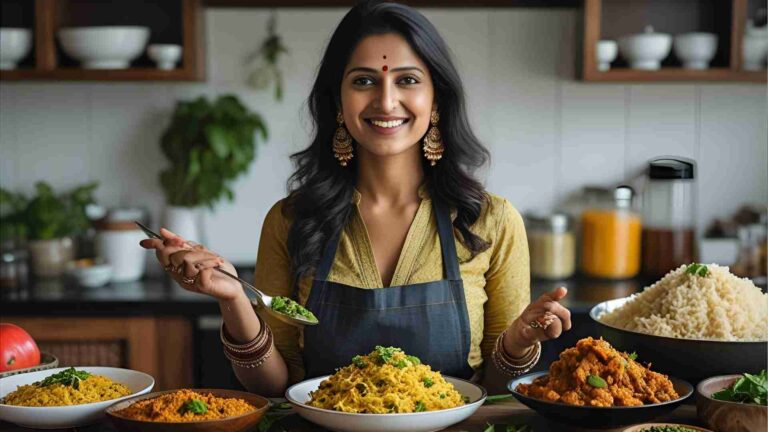
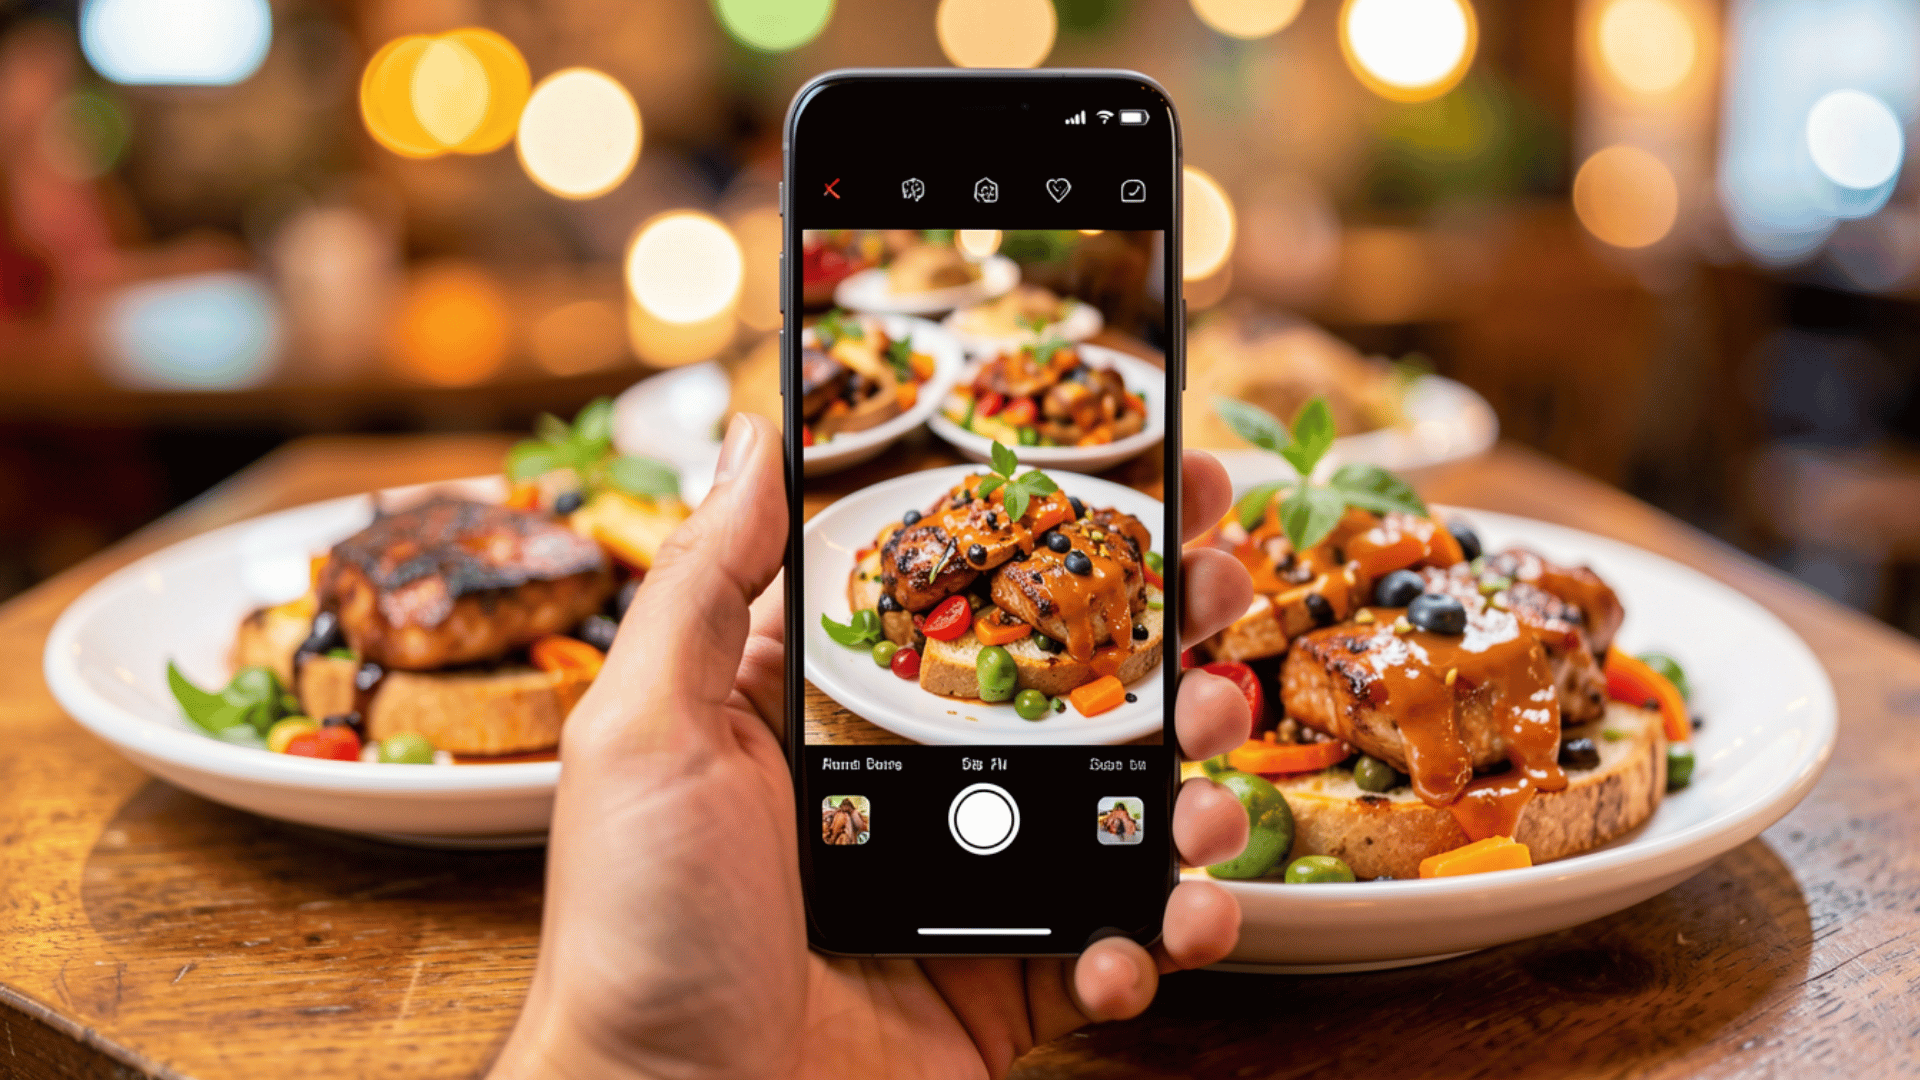
8. Including People in Food Photos
Photos of people with food consistently outperform food-only images on social media in terms of engagement. A hand reaching into the frame, someone pouring a drink, or a diner mid-bite creates context and story.
Keep these shots candid rather than posed. The food should remain the primary subject — the person provides scale, interaction, and life. Ensure lighting still falls on the food first, with the person secondarily lit.
Quick Reference: Phone Food Photography Checklist
Summary
Taking professional-quality food photos with a smartphone is genuinely achievable. The fundamentals — natural light, correct angles, intentional composition, and clean editing — apply whether you’re shooting with a flagship phone or a mid-range device. The most common mistakes are avoidable: using flash, shooting at unflattering angles, digital zooming, and over-filtering in post.
Invest time in setting up your scene before the food arrives, shoot multiple framings of each dish, and develop a consistent editing workflow. With practice, your phone becomes a serious food photography tool — one that’s always in your pocket when the light is perfect and the dish looks its best.
Practice consistently with what you have. Technique always outperforms hardware.
Please share this How to Take Good Food Photos with My Phone with your friends and do a comment below about your feedback.
We will meet you on next article.
Until you can read, The Essential RAW File Backup & Storage System